5
SAFETY INFORMATION
ATTENTION: Please verify that all components of the
skimmer are undamaged before putting it into function.
ALWAYS disconnect electrical supply of the skimmer
and any other appliance placed in the water before
performing any maintenance. Be sure that the voltage
of the power supply corresponds to the voltage shown
on the unit’s label.
• The pump is intended for INDOOR USE only in water
with a maximum temperature of 35° C (95° F).
• DO NOT RUN DRY - Do not connect to electrical
supply if pump is not completely immersed in water.
• Do not connect to electrical supply if pump is missing
parts.
• The cord of this pump cannot be replaced or repaired;
in case of damage the entire unit must be discarded.
• Do not cut or pull on the electrical cord.
• Always disconnect from main power supply gently
and make sure hands are dry.
• To avoid any danger of electric shock remember to
always keep all connections dry.
• Verify that the main power supply is clean, and is not
humid or encrusted with salt deposits.
• Please keep these instructions in a safe and dry place
for future reference.
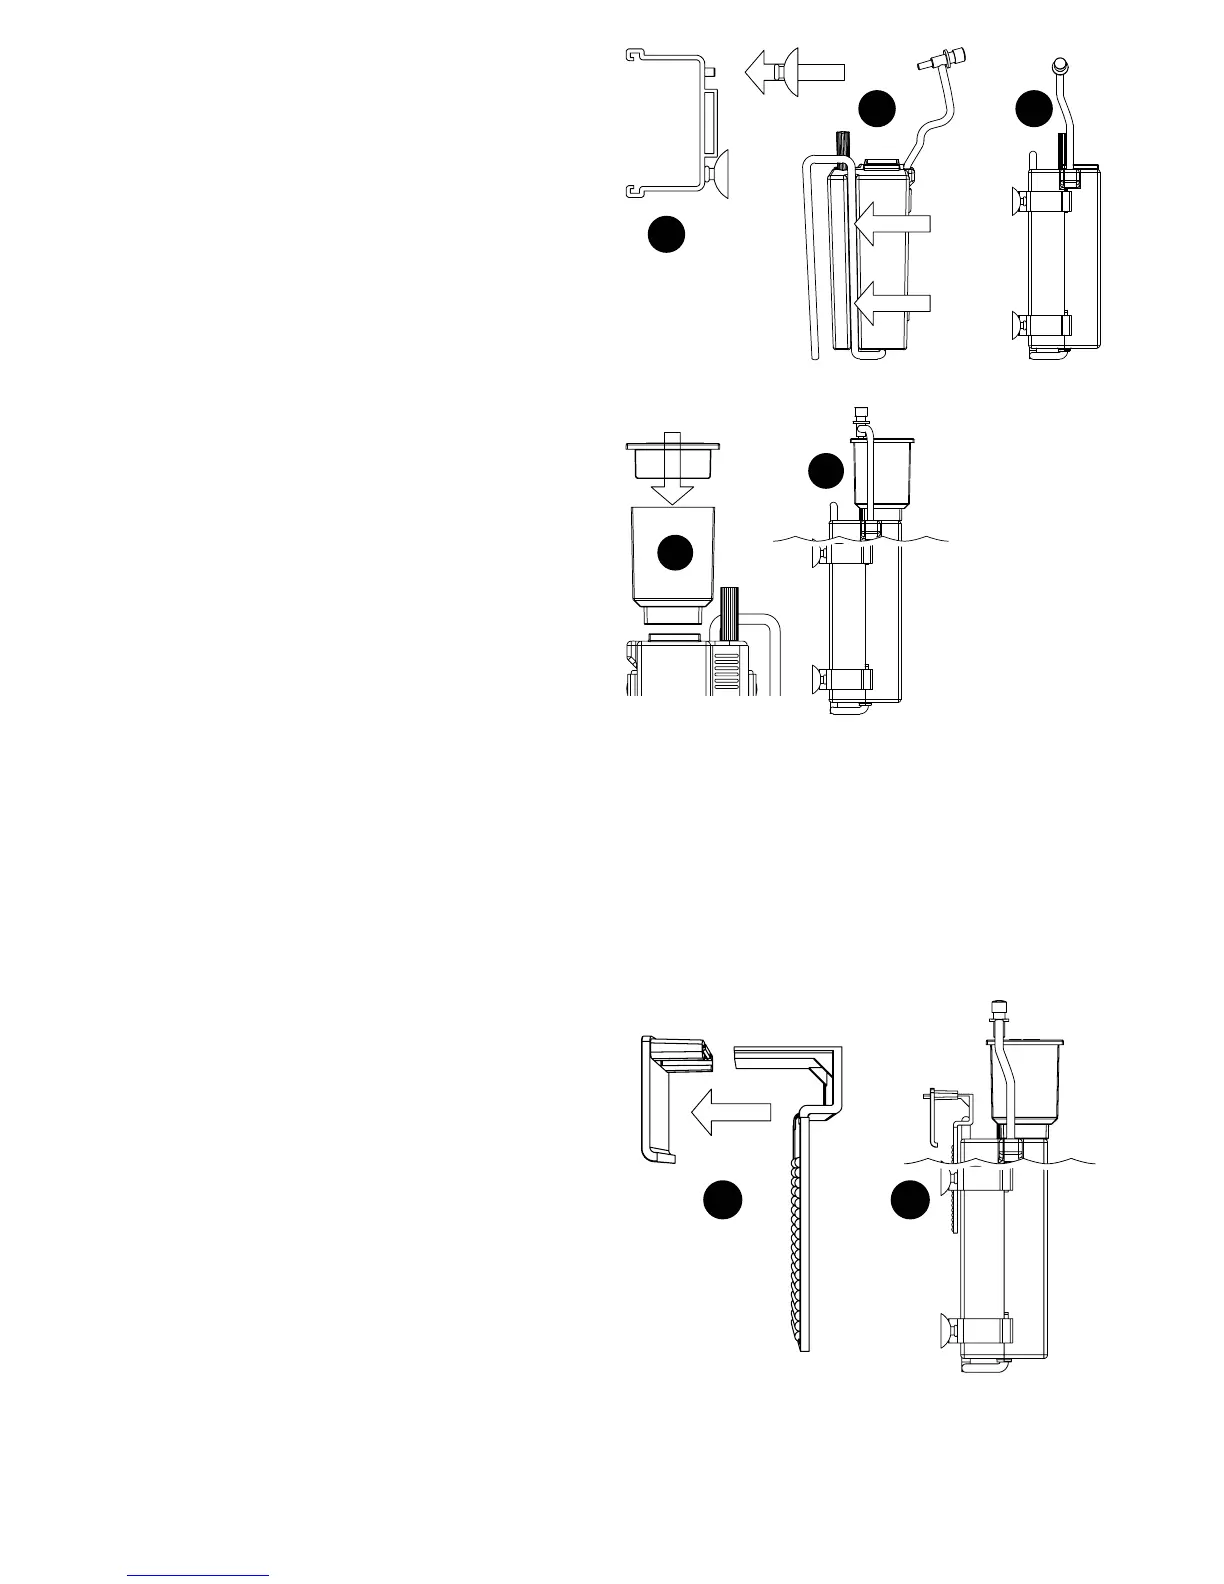
INSTALLATION INSTRUCTIONS
The Fluval Sea Mini Skimmer is designed to be
positioned inside the aquarium by the use of the suction
cup housing clips and the hanging bracket.
Option # 1: Housing Clips for Mounting Options
A) Attach suction cups to the housing clips.
B) Ensure the power cord is routed through the
integrated channel on the rear housing.
C) Slide the housing clips over the rear housing and
lock the clips to the front housing.
D) Install collection cup on top of the skimmer and
cover the collection cup with the lid. Ensure the air
intake tube (with air intake valve) is correctly installed
on the top of the lid.
E) Install the skimmer in the aquarium so that the
water level is just below the top of the housing.
After placing the skimmer in the aquarium, plug
in the power cord to the electrical outlet. Ensure
the creation of a “drip loop” in the power cord for
safe operation. Allow the skimmer to operate for
a few minutes before any adjustments are made.
The 32-needle wheel impeller will mix the air and water
to create bubbles (foam). After a few minutes, turn the
water level control valve to increase or decrease the
foam level in the collection cup.
D
E
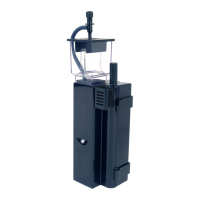
Option # 2: Hanging Bracket and Lock
Follow installation instructions as per Option # 1, but
with these additional steps.
A) Slide the bracket lock onto the hanging bracket. The
bracket lock position should be adjusted to fit to the
width of the aquarium top frame.
B) Slide the hanging bracket through the housing clip.
Adjust the height of the hanging bracket for the correct
skimmer position within the aquarium.
A B