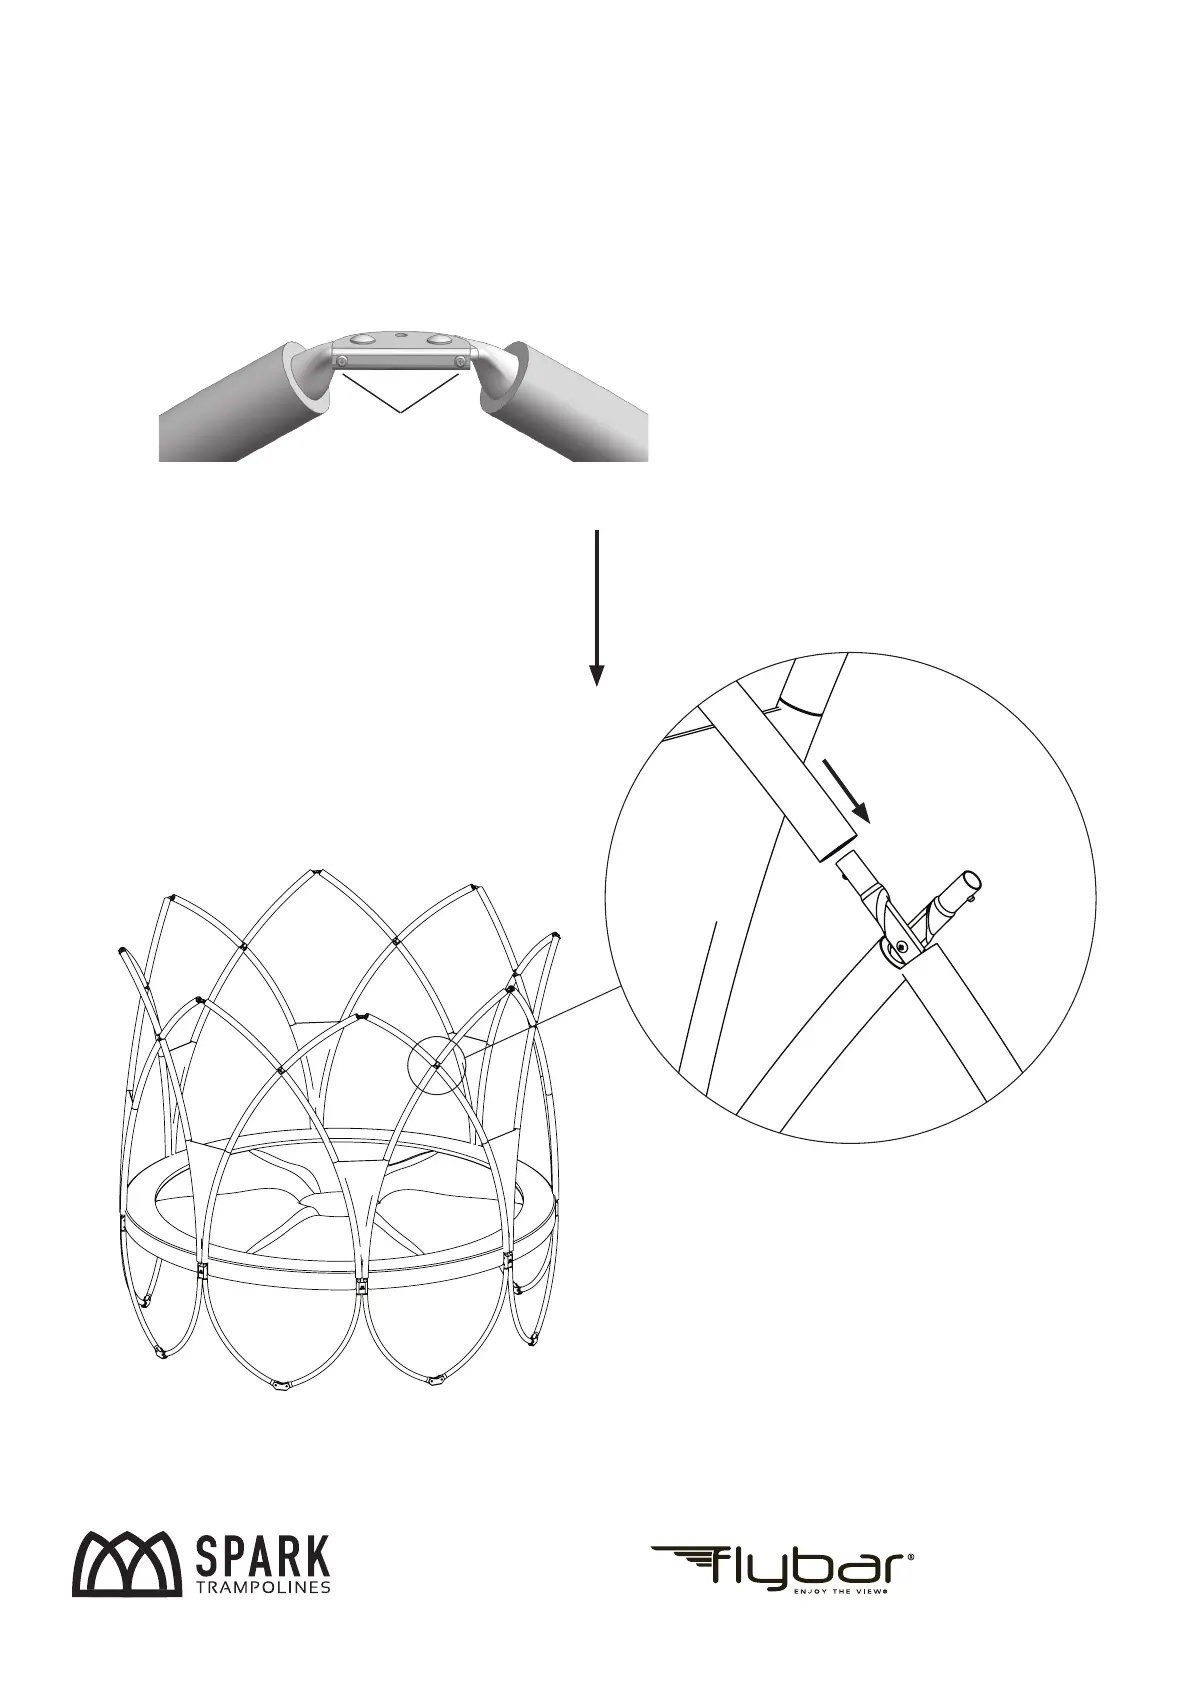
STEP 13: Install Cross Upper Poles
A A
B B
C C
D D
E E
F F
G G
H H
12
12
11
11
10
10
9
9
8
8
7
7
6
6
5
5
4
4
3
3
2
2
1
1
DRAWN
CHK'D
APPV'D
MFG
Q.A
UNLESS OTHERWISE SPECIFIED:
DIMENSIONS ARE IN MILLIMETERS
SURFACE FINISH:
TOLERANCES:
LINEAR:
ANGULAR:
FINISH:
DEBURR AND
BREAK SHARP
EDGES
NAME
SIGNATURE
DATE
MATERIAL:
DO NOT SCALE DRAWING
REVISION
TITLE:
DWG NO.
SCALE:1:50
SHEET 1 OF 1
A2
WEIGHT:
N-ASSM_A3 - 10FT
Cross
Middle Pole
Cross Upper Pole
*If you have any problems by this stage, please do not try to install the trampoline and call 1300 782 661
STEP 10: Install the CROSS MIDDLE POLEs
After installing the LOWER POLEs, now you can plug the CROSS MIDDLE POLEs
into the LOWER POLEs upper hole and it should look like the image below when
you finish:
Cross Middle Pole
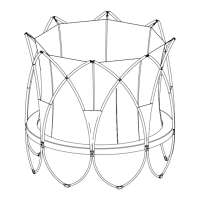
STEP 11: Install the CROSS UPPER POLEs
After installing the CROSS MIDDLE POLEs, now pick up one CROSS UPPER POLE
and loosen the screws on the top (image below). Do not take the screws out.
You can now adjust the CROSS UPPER POLE angle and plug it into the CROSS
MIDDLE POLE. The Screw heads should face outward. It should look like the
image on next page. Finally ghten the screws. Congratulaons, you are just one
step away from finish building your personal SPARK.
Screws
1. Loosen the screws
2. Adjust the Angle
3. Plug it into the CROSS MIDDLE POLE
4. Make sure the screw heads are facing
outward
5. Tighten the screws
12
Ellenville, NY 12428
Ph: 845-647-8400
Email: spark@flybar.com
Web: www.flybar.com
Distributed by:
After installing the cross middle poles, now pick up one cross upper pole and loosen the screws on
the top (image below). Do not take the screws out. You can now adjust the cross upper pole angle and
plug it into the cross Middle pole. The screw heads should face outward. It should look like the image
below. Finally tighten the screws. Congratulations, you are just one step away from finish building your
personal spark.
Version 1.0