This document provides disassembly and assembly instructions for the Flygt SX 5-15 series submersible pumps, manufactured by ITT Industries. The manual, identified as Doc. :ST-SX-SM, was first published in March 1999.
Function Description
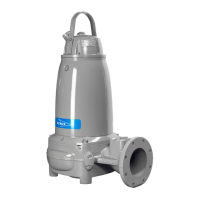
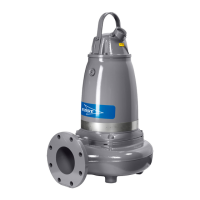
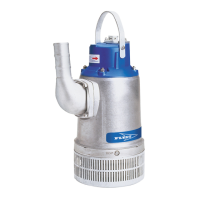
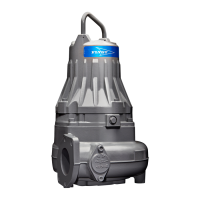
The Flygt SX 5-15 series pumps are submersible pumps designed for various applications, likely involving the transfer or removal of liquids. While the specific function isn't detailed, the presence of components like an impeller, suction filter, and diffusers suggests they are centrifugal pumps used for moving fluids. The electrical connection diagrams indicate both single-phase and three-phase versions, with options for operation with or without a float, implying their use in applications requiring automatic level control, such as dewatering, drainage, or wastewater handling. The robust construction, featuring a stainless steel outer shell, suggests suitability for demanding environments.
Important Technical Specifications
The manual does not explicitly list detailed technical specifications such as flow rates, head, power, or material grades beyond the stainless steel shell. However, it does provide crucial information regarding electrical connections and assembly torques:
- Electrical Connections: The pumps are available in both 50 and 60 Hz versions, supporting three-phase and single-phase configurations. Single-phase versions can operate with or without a float. The diagrams illustrate wiring for motor, capacitor (where applicable), supply cable, and float switch connections.
- Capacitor: For SX 05-07 single-phase versions, the capacitor (18) is installed inside the head. For the SX 11 single-phase version, the capacitor (28) is mounted inside the control panel.
- Torque Specifications:
- Diffuser screws (15): 5 Nm (cross sequence).
- Screw with gasket (23): 5-6 Nm.
- Impeller screw: 5.5-6 Nm.
- Suction filter fastening screws (12): 5-6 Nm (cross sequence).
- Oil Quantity: During assembly, 0.107 Kg of "ESSO MARCOL 82" oil is to be placed in the pump body.
Usage Features
The manual primarily focuses on maintenance procedures rather than operational usage. However, some usage-related features can be inferred:
- Automatic Operation: The availability of single-phase versions with a float indicates the capability for automatic start/stop based on liquid levels, making them suitable for unattended operation in sumps or tanks.
- Versatility: The different electrical configurations (single-phase, three-phase, with/without float) suggest a versatile pump series adaptable to various power supplies and control requirements.
- Submersible Design: As a submersible pump, it is designed to operate fully immersed in the fluid, which typically allows for quiet operation and efficient cooling of the motor.
Maintenance Features
The manual provides comprehensive instructions for the disassembly and assembly of the pump, highlighting several key maintenance features:
- Modular Design: The pump appears to have a modular construction, allowing for individual components like the suction filter, impeller, motor casing, and head to be removed and replaced. This simplifies repair and reduces downtime.
- Clear Disassembly Steps: The instructions are detailed and accompanied by clear photographic illustrations, making the process accessible to qualified personnel. Key steps include:
- Removing the suction filter (12) and suction flange (5).
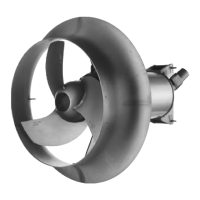
- Loosening the impeller fastening screw and removing the impeller (2).
- Unscrewing the head and carefully removing it using a plastic hammer and chisel to avoid damage.
- Removing the outer shell (33) and upper cover (7).
- Disconnecting wires and removing the capacitor (if internal).
- Removing the diffuser fastening screws (15) and the diffuser (15).
- Separating the motor casing (3) from the pump body (1) and extracting the oil conveyor (10).
- Removing the mechanical seal (9) and tapping out the shaft (4) to slide out the rotor shaft and lower support.
- Removing the bearing ring (20), seal ring (21), and compensation ring (11).
- Detailed Assembly Steps: The assembly instructions mirror the disassembly, ensuring correct re-installation of components. Important steps include:
- Inserting the compensation ring (11) and rotor shaft with pre-assembled bearings (4).
- Installing the lower bearing ring (20) and seal ring (21) with proper orientation.
- Positioning and installing the mechanical seal's washer (9) and the rotating part of the seal using a seal guide and plastic tap.
- Installing the oil conveyor (10) and the fixed part of the seal (9) into the pump body (1).
- Carefully positioning the pump body (1) on the motor casing (3) and installing the diffuser (15), tightening screws in a cross sequence.
- Installing the gasket (32) between the pump body (1) and the diffuser (15).
- Adding "ESSO MARCOL 82" oil (0.107 Kg) to the pump body.
- Fastening the screw with gasket (23).
- Inserting the impeller lock tab and positioning the sandscreen V-ring (24).
- Installing the impeller (2) and tightening the impeller screw.
- Positioning the suction flange (5) and installing the suction filter (12), tightening its screws.
- Installing the electrical connection box (16) and threading wires.
- Installing gaskets (19, 32) and the shell (33).
- Connecting wires to the pre-assembled head and installing the upper cover (7).
- Installing the gasket for the cover with handle (8), spreading grease for a better seal.
- Fitting the cover with handle (8) and tightening it with an Allen wrench.
- Special Tools/Techniques: The manual specifies the use of a plastic hammer and chisel for head removal, a screwdriver for prying the mechanical seal, and a plastic tap for seal installation, indicating that some specialized tools or careful techniques are required to prevent damage.
- Resin Bonding: The "Head Components" section mentions that "Resin bonding is a procedure that requires experience and special materials." This implies that certain head components are permanently bonded and may not be field-serviceable, requiring the purchase of a fully assembled head for replacement. This is a critical maintenance consideration.
- Spare Parts: An "Exploded View" diagram with a comprehensive list of numbered components (1-33) and their descriptions is provided, facilitating easy identification and ordering of spare parts. This is essential for effective maintenance and repair.
- Qualified Personnel: The "NOTES" section explicitly states that "The pump should be serviced by qualified personnel only and after having been disconnected from the power mains." This emphasizes the importance of safety and expertise during maintenance.
- Service Center Recommendation: For damage to the head, it is recommended to "contact our Service Center," reinforcing the complexity of certain repairs and the need for specialized assistance.
In summary, the Flygt SX 5-15 series pumps are robust submersible units with a modular design that facilitates maintenance. While specific performance data is not provided, the manual offers detailed, illustrated instructions for disassembly and assembly, including critical torque values and oil specifications. The emphasis on qualified personnel and the recommendation to contact a service center for complex head repairs highlight the need for expertise in handling these pumps.