EasyManua.ls Logo

Flymo 1200 R - User Manual

Flymo 1200 R
4 pages
Print Icon
To Next Page IconTo Next Page
Loading...
Easier by Design
www.ymo.co.uk
QUICK GUIDE
Robotic
Lawnmower
120 0 R
MINIMUM
150cm
SUITABLE
FOR LAWNS
UP TO
400m
2
1157876-26,QG,Flymo1200R,2016,GB.indd 25 2015-12-07 08.52

Other manuals for Flymo 1200 R

Questions and Answers

  • D
    Darrell HarveySep 6, 2025
    Why does my Flymo 1200 R Lawn Mower have difficulty docking?
    • M
      Michael CareySep 7, 2025
      If your Flymo Lawn Mower struggles to dock, ensure the boundary wire is laid in a long, straight line far enough from the charging station. Make sure the guide wire is perfectly straight and correctly positioned under the charging station in its slot. Also, confirm the charging station is on a level surface.
  • A
    Albert DavisAug 22, 2025
    Why does my Flymo 1200 R Lawn Mower say 'No loop signal'?
    • J
      johnsoncindyAug 22, 2025
      If your Flymo Lawn Mower displays a 'No loop signal' error, several factors could be at play. First, ensure the transformer is properly connected to a functioning wall socket and that the low voltage cable is securely attached to the charging station. Also, verify that the boundary wire is correctly connected to the charging station. A break in the boundary wire can also cause this issue; inspect the wire and replace any damaged sections using an original coupler. Ensure the boundary wire isn't laid incorrectly around any islands. If disturbances from metal objects or buried cables are suspected, try repositioning the boundary wire. Finally, try generating a new loop signal via Security -> New loop signal.
  • A
    Alyssa HughesSep 4, 2025
    What happens if I enter the wrong PIN on my Flymo Lawn Mower?
    • K
      Kelly WallSep 4, 2025
      If you've entered the wrong PIN on your Flymo Lawn Mower, remember that after five incorrect attempts, the keypad will be blocked for five minutes. Enter the correct PIN code. If you forget the PIN code, contact Flymo Central Service.
  • L
    Lisa WagnerSep 2, 2025
    Why does my Flymo Lawn Mower have uneven mowing results?
    • L
      lawsoncrystalSep 2, 2025
      Uneven mowing with your Flymo Lawn Mower can stem from several causes. The mower might not be running enough hours daily, so increase the mowing time. The proportion setting might be wrong for your yard's layout, so check that the correct proportion value is selected. If the working area is too large, try limiting it or extending the working time. Dull blades can also cause this, so replace all blades and screws to balance the rotating parts. If the grass is too long for the set cutting height, increase the cutting height and then lower it gradually. Finally, check for grass accumulation around the blade disc or motor shaft, ensuring the blade disc rotates freely; if not, remove the blade disc to clean out any grass or foreign objects.
  • L
    Lauren FlemingSep 1, 2025
    Why does my Flymo 1200 R have no drive?
    • M
      millerandrewSep 1, 2025
      If your Flymo Lawn Mower has no drive, it could be caught on something. Free it and address the cause. If wet grass is the problem, wait for the lawn to dry. Also, if the working area has steep slopes, isolate them, as the maximum guaranteed slope is 25%. If a guide wire is on a slope, ensure it's angled across it.
  • W
    William CobbAug 30, 2025
    How to unblock right wheel motor on Flymo 1200 R Lawn Mower?
    • W
      wpierceAug 30, 2025
      If the right wheel motor of your Flymo Lawn Mower is blocked, it's likely because grass or another object has wrapped around the drive wheel. To resolve this, check the drive wheel and remove any grass or obstructions.
  • J
    James BarrettAug 29, 2025
    How to unblock left wheel motor on Flymo 1200 R Lawn Mower?
    • J
      Jacob GordonAug 29, 2025
      If the left wheel motor of your Flymo Lawn Mower is blocked, it's likely due to grass or another object wrapped around the drive wheel. Check the drive wheel and remove any obstructions.
  • A
    Ashley SalazarAug 27, 2025
    What to do if my Flymo Lawn Mower is trapped?
    • M
      Monique TorresAug 27, 2025
      If your Flymo Lawn Mower is trapped, it means it has likely gotten caught on something. Free the robotic lawnmower and rectify the reason for it becoming trapped. Also, check if there are any obstacles that make it hard for the robotic lawnmower to move on from this place.
  • S
    Scott SpearsAug 27, 2025
    Why does my Flymo 1200 R have a low battery?
    • S
      Sarah SmithAug 27, 2025
      If your Flymo Lawn Mower is showing a low battery, it might be unable to locate the charging station. Check that the charging station and guide wire are installed correctly. If the guide wire is broken or not connected, look for a yellow flashing indicator lamp on the charging station. If the battery is old, consider replacing it. Also, a defective charging station antenna, indicated by a red flashing light, could be the problem.
  • A
    alan91Aug 25, 2025
    How to fix Flymo 1200 R cutting system blocked?
    • H
      hernandezchristopherAug 26, 2025
      If the cutting system of your Flymo Lawn Mower is blocked, it's likely due to grass or another object wrapped around the blade disc. In this case, check the blade disc and remove any obstructions. Another potential cause is the blade disc lying in a pool of water. Move the robotic lawnmower and, if possible, prevent water from collecting in the working area.

Summary

Getting Started with the Flymo

Placement and Connection of the Charging Station

Place charging station centrally, connect power supply cable, and plug into wall socket.

Charging the Battery and Boundary Wire Placement

Charge mower in station, lay boundary wire in a loop around the work area.

1200 R Robotic Lawnmower Operations

Connecting the Boundary Wire

Connect boundary wire ends to connectors, press together, and attach to charging station pins.

Placement and Connection of the Guide Wire

Run guide wire, attach connector, fasten to station, lay out, and connect to boundary wire.

Starting and Stopping Procedures

Starting the Lawnmower

Open cover, set main switch to 1, press START, and close cover.

Stopping the Lawnmower

Press the STOP button to halt the lawnmower operation.

Adjusting the Lawnmower for Your Garden

Adjusting Mowing Time for Lawn Size

Use the Timer function to set mowing time based on garden size for optimal results.

Testing Narrow Passage Navigation

Use the Calibrate guide function to test mower's ability to navigate narrow passages.

Overview

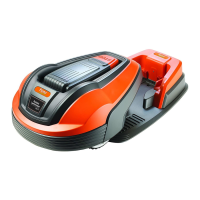
The Flymo Robotic Lawnmower 1200 R is an automated lawn care device designed for ease of use and efficient grass cutting. This quick guide provides essential information for setting up, operating, and maintaining the robotic lawnmower.

Function Description:

The Flymo Robotic Lawnmower 1200 R is designed to autonomously cut grass within a defined boundary. It operates by navigating a lawn area, returning to a charging station when its battery is low, and resuming operation once charged. The device is suitable for lawns up to 400 m² and requires a minimum boundary wire distance of 150 cm from obstacles. Its primary function is to maintain a consistently mown lawn without manual intervention, offering an "Easier by Design" approach to garden care.

Important Technical Specifications:

  • Model: Robotic Lawnmower 1200 R
  • Maximum Lawn Area: Up to 400 m²
  • Minimum Boundary Wire Distance: 150 cm
  • Power Supply: 100-240 V wall socket
  • Charging Station Placement: Central position in the work area, with open space in front and on a relatively horizontal surface.
  • Boundary Wire Placement: Forms a loop around the work area, with specific distances from edges (e.g., 10 cm / 4" from obstacles, 20 cm / 8" from hard surfaces, 5 cm / 2" from soft edges).
  • Guide Wire Placement: Runs from the charging station to a point on the boundary loop, laid at least 2 meters straight out from the front edge of the charging station.
  • Mowing Capacity: Approximately 33 m² per hour per day.
  • User Interface: Display and keypad for settings and control.
  • Safety Features: STOP button, PIN code for initial setup.

Usage Features:

  • Placement and Connection:
    • Charging Station: Place centrally with clear space. Connect the low voltage cable to the charging station and power supply, then plug into a 100-240 V wall socket.
    • Boundary Wire: Lay the boundary wire to define the mowing area, ensuring it forms a complete loop. Specific distances from obstacles and edges must be maintained for optimal performance. Connect the wire ends to the charging station's contact pins (A) using connectors and pliers, ensuring correct polarity (right-hand wire to right-hand pin, left-hand wire to left-hand pin). Use cable markers for easy reconnection.
    • Guide Wire: Run the guide wire through the slot at the bottom of the charging station, connect it to the "Guide" contact pin, and lay it to a point on the boundary loop. Connect the guide wire to the boundary wire using couplers.
  • Charging: Place the robotic lawnmower in the charging station and set the main switch to position 1 to charge the battery.
  • Starting: Open the cover, set the main switch to position 1 (a four-digit PIN code must be selected during the first start-up), press the START button, and close the cover.
  • Stopping: Press the STOP button.
  • Adjusting to Garden Size (Timer Function): The mowing results depend on the mowing time. Adjust the mowing time using the Timer function in the menu to suit the garden size. If the mower cuts too often, the lawn may appear trampled; if too seldom, the lawn may not be properly mown. For example, a 360 m² lawn would require approximately 11 hours of operation per day.
  • Narrow Passage Test (Calibrate Guide Function): To ensure the mower can navigate narrow passages, use the "Calibrate guide" function. Place the mower in the charging station, select "Calibrate guide" from the menu, press OK, then START, and close the cover. Observe if the mower successfully follows the guide wire through the passage. If not, check the guide wire installation according to instructions in chapter 3.6 of the Installation Manual.
  • User Interface Components:
    • Main switch (1)
    • STOP button (2)
    • LED for function check of boundary and guide wires (3)
    • Cutting height indication (4)
    • Display (5)
    • Keypad (6) These components allow users to control and monitor the lawnmower's operation and settings.

Maintenance Features:

  • Installation Manual Reference: The quick guide frequently refers to the full Installation Manual for detailed instructions on placement, connection, and advanced settings, suggesting that comprehensive maintenance information is available there.
  • Cable Markers: Provided to mark boundary and guide wires, simplifying reconnection and troubleshooting.
  • Connectors and Couplers: Used for secure and durable connections of boundary and guide wires, ensuring long-term reliability.
  • Troubleshooting: The LED indicator (3) helps check the function of boundary and guide wires, aiding in diagnosing connection issues. The "Calibrate guide" function also serves as a diagnostic tool for navigation in narrow passages.

The Flymo Robotic Lawnmower 1200 R aims to simplify lawn care through automation, offering a user-friendly experience from setup to daily operation.

Flymo 1200 R Specifications

General IconGeneral
BrandFlymo
Model1200 R
CategoryLawn Mower
LanguageEnglish

Related product manuals