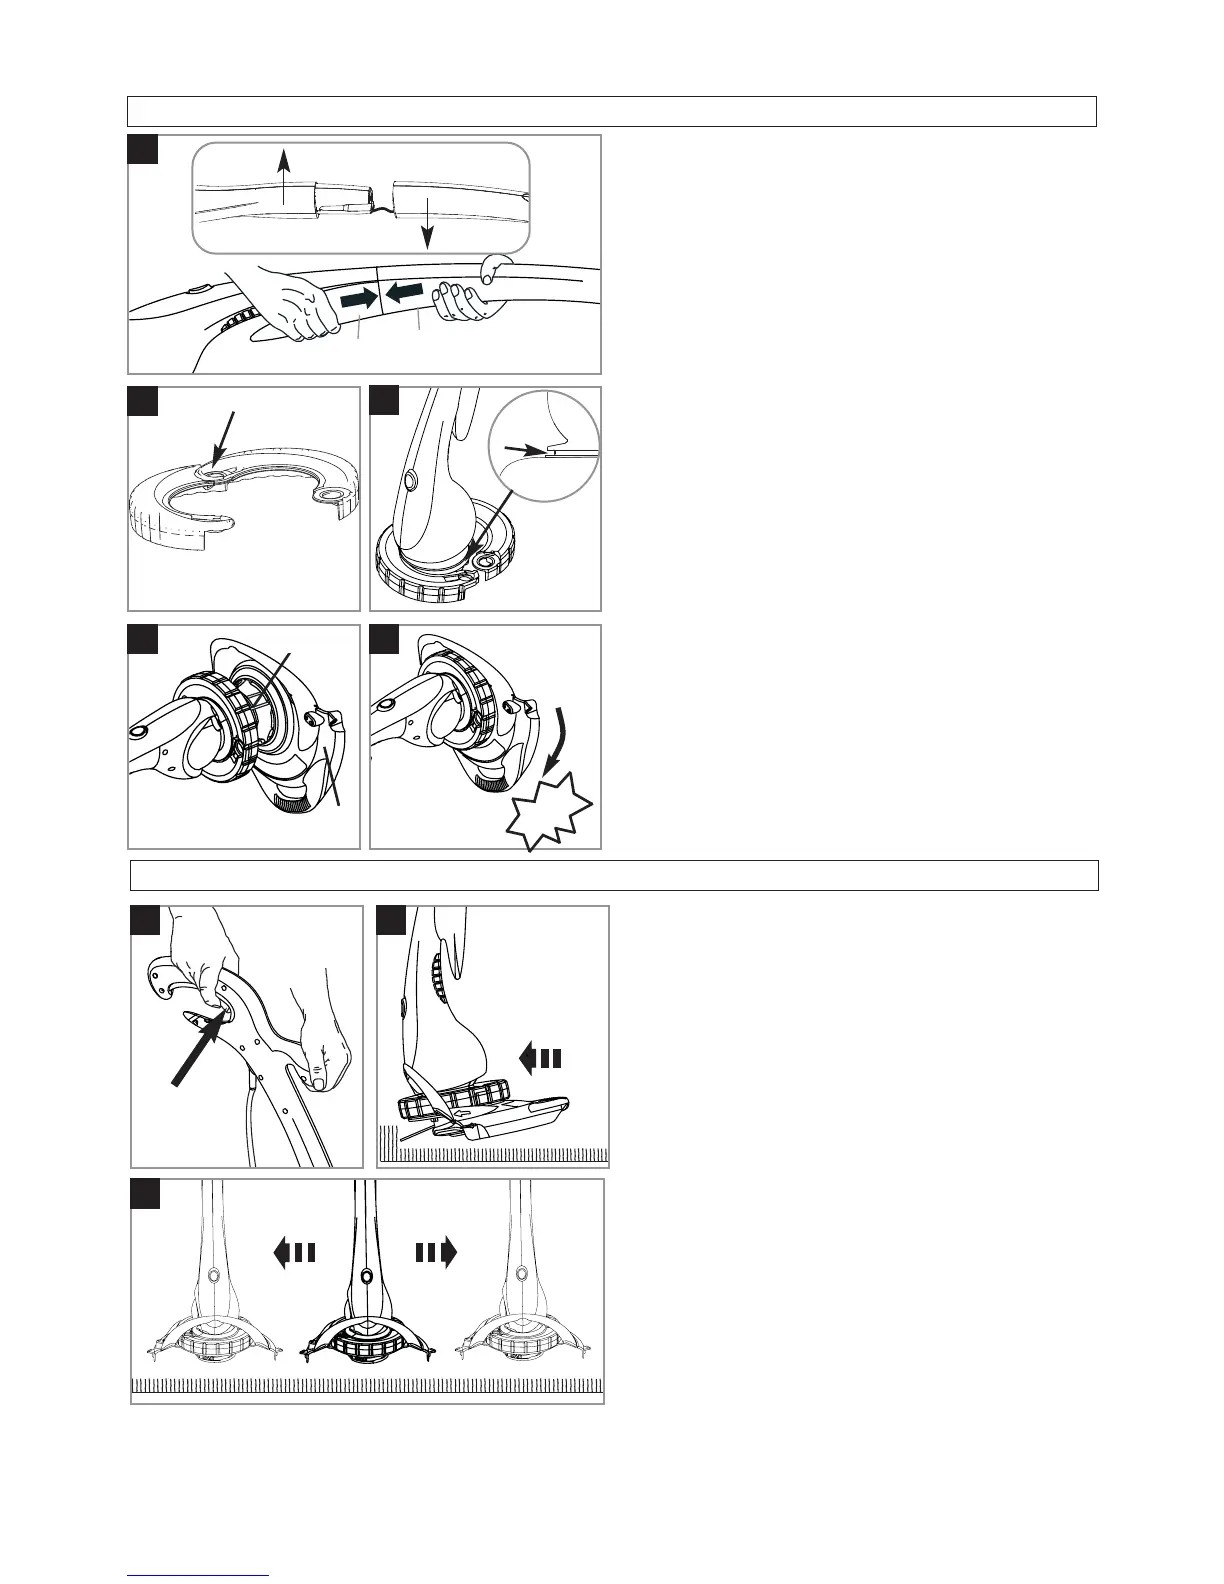
Shaft Assembly (A)
1. Locate the lower shaft (A1) into the upper shaft (A2).
2. Grasp firmly and hold steady the lower shaft. Locate
the upper shaft and snap together firmly.
• The unit is correctly assembled when the gap between
the upper and lower shaft has been closed.
Wheel Assembly (B) & (C)
1. Fix the 2 halves of the wheel together as illustrated in
fig B.
2. Attach the wheel to the trimmer making sure that it is
located into the groove on the trimmer head (C1).
3. Clip the wheel together on the other side, making sure
it is secure.
4. The wheel should turn freely.
Safety Guard Assembly (D) & (E)
1. Locate the safety guard (D1) over the cutting head
(D2). Ensure the nylon line is fed through the hole in
the safety guard as illustrated in fig D.
2. Push into location and turn safety guard in the direc-
tion illustrated in Fig E, until a click is heard and the
safety guard is securely locked in position.
• ENSURE THE S
AFETY GUARD IS SECURELY IN
PLACE BY AT
TEMPTING TO TWIST GUARD.
Assembly Instructions
C
D
A
1
2
B
E
1
2
1
2
1
CLICK!
• WARNING
• The use of eye protection is recommended.
Do not lean over the trimmer whilst trimming or edging,
objects may be thrown by the cutting line.
Do not allow cutting head to rest on the ground.
Do not overload your trimmer.
Overloading can be avoided by making sure the motor
speed does not drop unduly.
DISCONNECT FROM THE MAINS ELECTRICITY
SUPPLY BEFORE AT TEMPTING ANY MAINTE-
NANCE OR ADJUSTMENT.
•B
EFORE USE
Make sure that both lines are fed out.
• Make sure motor is up to full speed before trimming or
edging.
How to trim
1. Hold as illustrated in Fig F.
2. To start, squeeze the safety lock-off/switch lever (F1).
3. Cut with nylon line at an angle using the tip. See Fig G.
4. Swing trimmer in and out of the cutting area taking
small cuts (H)
5. Line is fed out automatically every time the trimmer
head stops rotating and returns to operating speed.
• Extra line can be fed out manually as described in
Manual line feed
6. To stop your trimmer release the switch lever.
G
H
How to trim and edge
F
1