Assembly Instructions
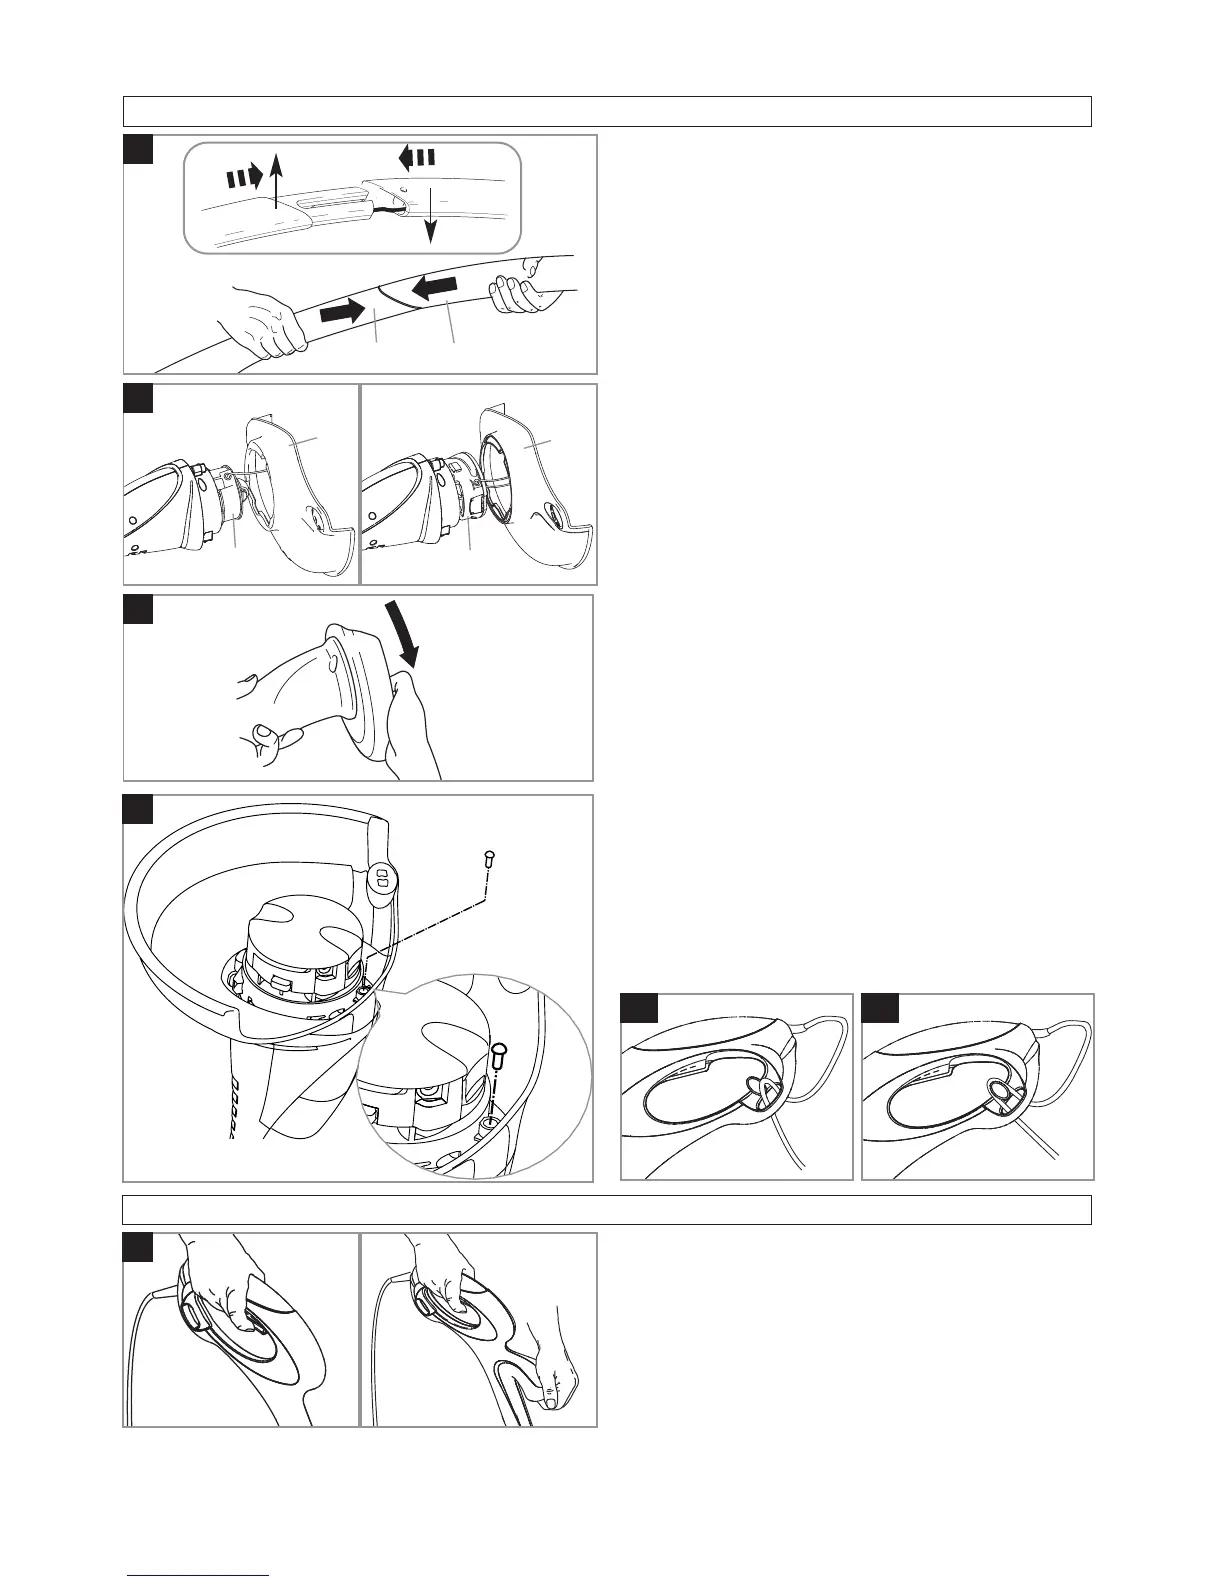
Shaft Assembly (A)
1. Locate the lower shaft (A1) into the upper shaft (A2).
2. Grasp firmly and hold steady the lower shaft. Locate
the upper shaft and snap together firmly.
•The unit is correctly assembled when the gap be-
tween the upper and lower shaft has been closed.
Safety Guard Assembly (B) & (C)
1. Locate the safety guard (B1) over the cutting head
(B2). Ensure the nylon line is fed through the hole in
the safety guard as illustrated in fig B.
2. Push into location and turn safety guard in the direc-
tion illustrated in Fig C, until a click is heard and the
safety guard is securely locked in position.
3. With the screw provided, insert into the guard as illus-
trated in Fig D and tighten to secure.
• ENSURE THE SAFETY GUARD IS SECURELY IN
PLA
CE BY ATTEMPTING TO TWIST GUARD.
Cable Restraint (E1) & (E2)
1. Form loop in mains cable and push the loop through
the slot as illustrated in picture (E1).
2. To secure, position loop over the hook and pull the
cable back through the slot as illustrated in picture
(E2).
A
1
2
Starting and Stopping
1
2
B
Mini Trim/MT21
Mini Trim Auto/
Auto +/MT25
C
2
1
E1 E2
F
WARNING
Cutting head continues to rotate after the trimmer has
been switched off.
To start your trimmer
Squeeze the switch lever (F).
To stop your trimmer
Release the switch lever (F).
2
1
D