1. S witch of f the prod uct and dis con-
nect fro m the mai ns electr i city supply.
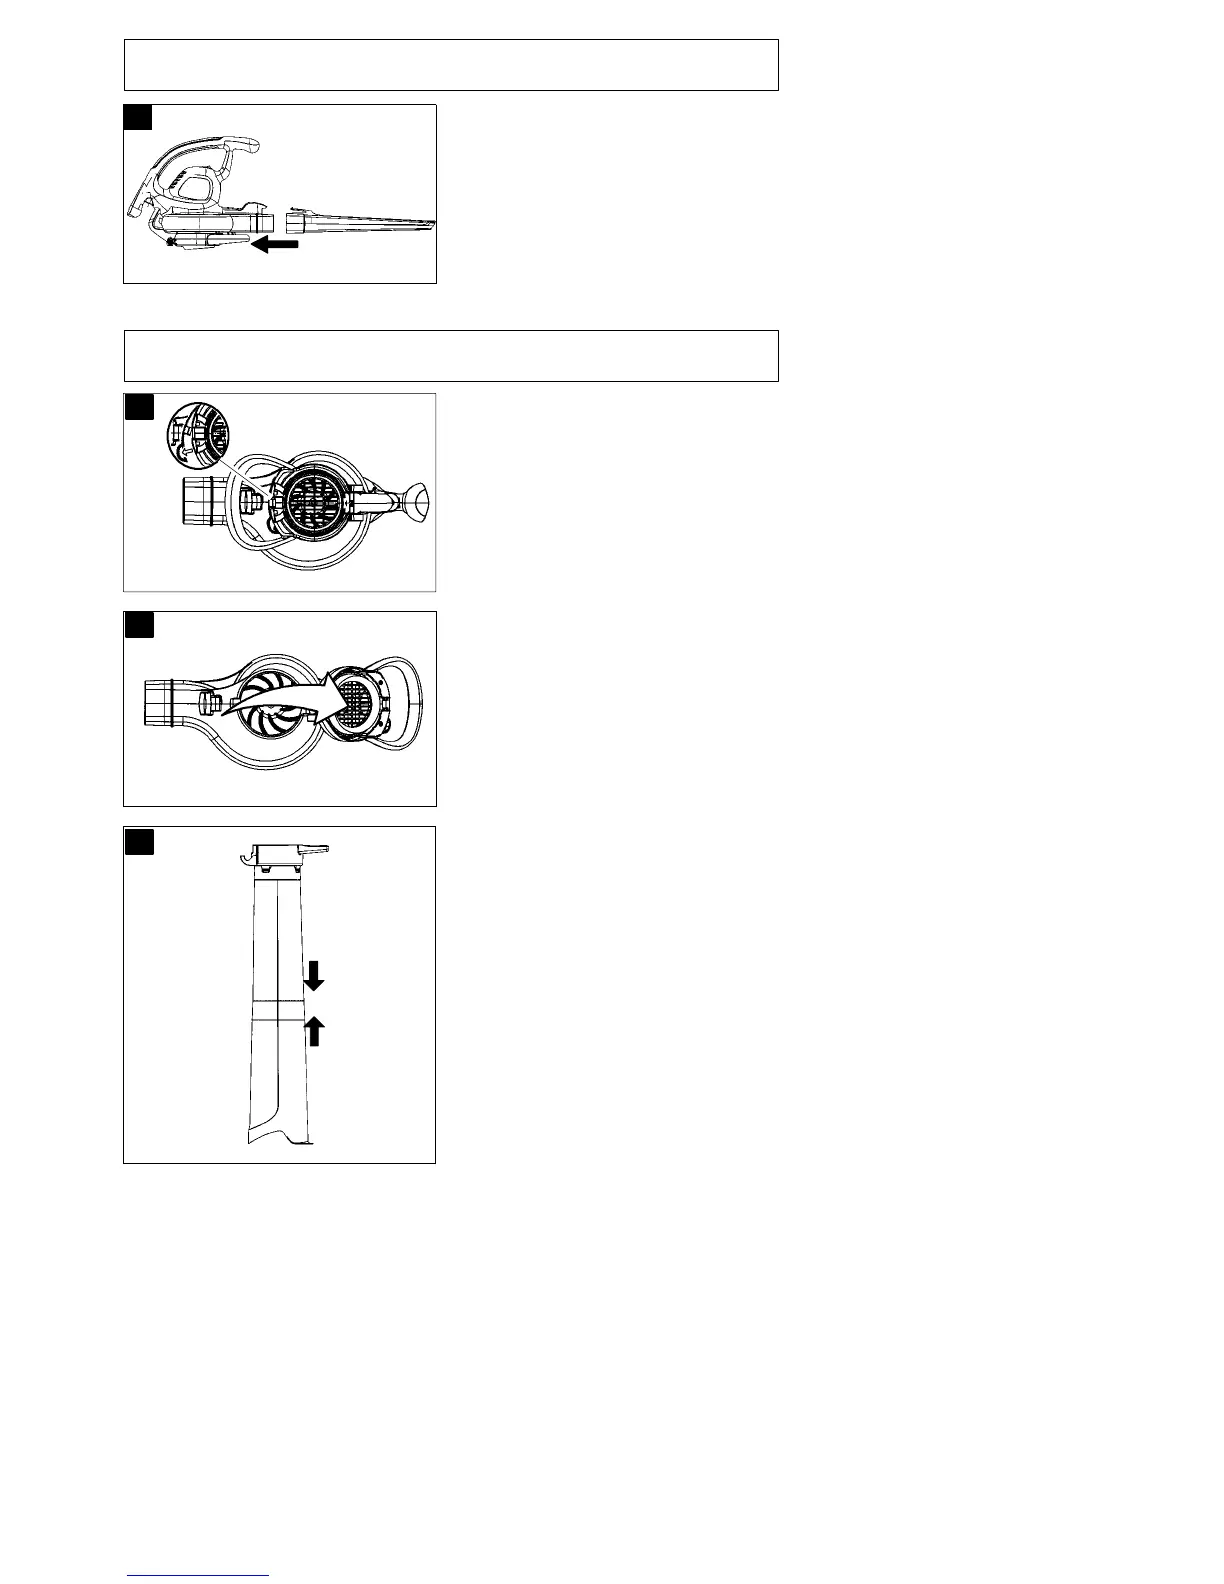
2. Align the grooves on the blower
tube with the grooves on the b lower
outlet. Push the blower tube onto
the blower outlet until it snaps into
place as illustrated in figure A.
Tube is secured to blower unit by
tube release button.
3. To remove the blower tube, press the
tube release button while pulling on
tube.
Vacuum Assembly
B
1. S witch of f the prod uct and dis con-
nect fro m the mai ns electr i city supply.
2. Open the inlet co ver by releasing
the latch as illustrated in figure B.
C
3. Pull up on the vacuum ass ist
handle as illustrated in figure C.
Allow latch to snap into rear handle
of blower.
D
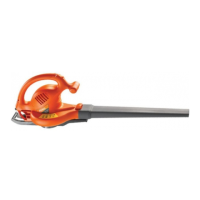
NOTE: There are 2 vacuum tubes,
an upper tube and a lower tube. The
upper tube has a hinge and hooks on
one end and is c ut straight on both
ends. The upper tube attaches to the
blower unit. The lower tube has a
curved end that you point toward the
ground during vacuum use. The lower
tube attaches to the upper tube.
4. To attach the lower v acuum tube to
the upper vac uum tube, first align
the seams of the two tubes as illus-
trated in figure D.Pressthetwo
tubes together until the lower tube
is fully seated in the upper tube.