Inspect the area to be cut before each use. Remove all
objects such as stones, broken glass, nails, wire, string
etc, which can be thrown or become entangled in the
trimmer head.
Warning: The cutting line continues to
rotate after the machine has been switched off.
Warning: Beware of finger entrapment
while putting the upper and the lower shaft
together [Fig. A1].
Unplug the device immediately in case it doesn’t stop
anymore.
Do not lean over the trimmer guard – objects may be
thrown by the cutting line.
Don’t use the trimmer for pond, river, stream, or creek
care. Water in the product could cause a malfunction,
or an electrical shock.
Do not operate the trimmer in explosive atmospheres,
such as in the presence of flammable liquids, gases or
dust. Trimmers create sparks which may ignite the dust
or fumes.
If the unit starts unintentionally when the mains plug
is connected, disconnect the mains at once. Contact
FLYMO to check the unit.
2. ASSEMBLY
Danger! Risk of physical injury!
Cut injury when the product starts
acciden tally.
v Before you assemble the product, make sure
that the mains cable is disconnected.
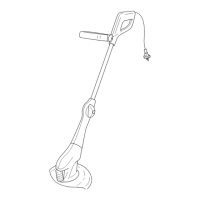
To assemble the trimmer [ Fig. A1/A2/A3/A4 ]:
1. Put the upper shaft
1
and the lower shaft
2
together
until they make a click (click).
The product is correctly assembled when there is no
gap between the upper shaft and the lower shaft.
2. Put the cover
3
on the trimmer head
4
while you
feed the cutting filament
5
through the opening in the
cover
3
.
3. Push the cover
3
into the trimmer head
4
and turn the
cover
3
anti-clockwise (see fig. A3) until it makes a click
(click).
4. Put the screw
6
into the cover
3
and tighten the
screw
6
.
Make sure, the cover
3
is securely in place (try to turn
the cover
3
).
3. OPERATION
Danger! Risk of physical injury!
Cut injury when the product starts
accidentally.
v Before you connect, adjust or transport the
product, disconnect the mains cable and trans-
port the product by the bottom handle.
To connect the trimmer:
v Connect the mains cable into a 230 V mains socket.
Work position [ Fig. O2/O3 ]:
1. Hold the product by the handle and the upper shaft
so that the trimmer head
4
is tilted a small distance
forward.
2. Swing the trimmer head
4
in and out of the cutting
area. Take small cuts.
Make sure, the filament does not touch hard objects such
as walls, stones and fences to prevent the filament from
welding together or breaking.
To adjust the plant guard [ Fig. O8 ]:
Down: Working position / Up: Parking position
The plant guard
8
allows to trim the grass close to plants
and trees without damaging them with the cutting filament.
v Turn plant guard
8
up or down into the required
position until it locks into place.
To start the trimmer [ Fig. O1 ]:
Danger! Risk of physical injury!
Risk of injury if the product does not stop
when you release the start button.
v Do not bypass the safety devices or switches.
For example do not attach the start lever
i
to
the handle.
To start:
The product is fitted with a two-handed safety device
(start lever
i
with safety interlock
u
) to prevent the
product from being turned on by accident.
1. Push the safety interlock
u
and pull the start lever
i
.
2. Release the safety interlock
u
.
The product will start.
To stop:
v Release the start lever
i
.
To extend the cutting filament (double auto feed
system) [ Fig. O10 ]:
A clean cut is achieved only with the maximum filament
o
length.
The cutting filament
o
is lengthened automatically
when the filament cassette comes to a standstill after
switch off.
6
41025-85.960.01.indd 641025-85.960.01.indd 6 13.09.21 12:0613.09.21 12:06

 Loading...