Version 2 2 1 July 2021
Waterproofing
The Tx should not be used in the rain without a waterproof muff. The Rx should be mounted on the
tray with all wires kept clear of the rudder linkages. Liberal use of CorrosionX or similar
waterproofing is strongly recommended.
Switching Sequence
Having assured the user there is no risk of interference from another radio frequency source, the
maker recommends that a particular switching sequence be observed, which is: Tx ON, Rx ON…
Rx OFF, Tx OFF.
Additionally, when switching on, if switches or sticks are not in their correct position, screen and
audible warnings will be activated. If however sails have been rigged, after the Tx is switched ON,
return the winch stick to a mid-range postilion before switching on Rx. This will prevent possible
damage to sheets, sheet pulley or winch servo overload if sheets have been set too tight.
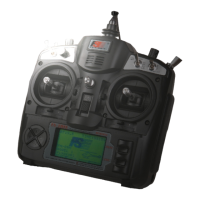
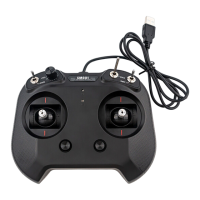
FlySky Operational Range
The operational range of the FS-i6 is dependant on the condition of batteries and the orientation of
both Rx antenna and how the Tx is held. The Rx may have one or two antennae. The latter should
be mounted at a right angles to each other on the underside of the deck or as high as possible
above the tray. Unless there is electro-magnetic interference, or signal attenuation from metal
yacht masts, range should never be a limiting factor while sailing. Line-of-sight transmission is
always important. Most sources quote a range of 300-400 m but the system has been shown
controlling a drone out to 2.3 km. At more than 100 metres, it may be difficult to see the yacht, but
still have control.
LCD Screen Brightness
LCD brightness can be controlled using System Menu/LCD brightness. Might be useful
when operating in bright sunlight.
Screen Saver
If the Tx is not used for a short period of time the screen brightness will fade and an audible alarm
will sound. The brightness can be restored by pressing any button and the alarm can be switched
off using the power switch. This can be changed by upgrading the software. Search YouTube for
“FlySkyi6 Upgrade” videos.
Binding
As explained above, each Tx has a unique ID and the slave Rx must be programmed to process
only those signals from the master transmitter. The maker advises the supplied Tx/Rx combination
is already “bound” but you may wish to operate two or more Rx from the one Tx in different boats.
Hence the need for further “binding”. To bind a second Rx you must first select a new model
number. Both the Instruction Manual and YouTube tutorials are clear enough as to how binding is
done. Follow the sequence exactly.
The FlySky system provides for the control of up to 20 models which means you could have
different set-ups, but each would require separate binding.
Binding Procedure
1. Rx should be adjacent Tx.
2. Insert battery in Tx but do not switch on.
3. Insert black binding key tool (supplied with the Tx) into B/VCC port on Rx
4. Insert Rx battery into any port (Ch1-Ch6). Red LED will flash indicating the Rx is not bound.
5. Hold down BIND KEY on Tx and switch on Tx - labelled POWER.
6. Release BIND KEY when binding is complete. The Red LED will remain steady.
 Loading...