19
lighter than normal aircraft so that for the same wing area, the wing loading is much lower and the aircraft can perform better with
smaller motors and propellers. In terms of controlling the airplane, the major difference between a flying wing and a standard
aircraft design is that both elevator, or “pitch” control (for up and down) and aileron (for banking right and left to turn the airplane)
are merged into two flight surfaces instead of three. This convergence of elevator and aileron control is termed “elevons”. In order
to fly RAZOR, you are required to have either 1) elevon mixing capabilities in your transmitter, or 2) an on-board mixing unit such as
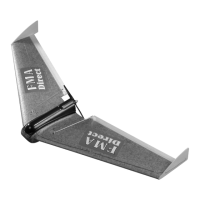
the FMA Direct MX80 installed in the aircraft that is capable of elevon mixing. Another difference inherent to RAZOR is the absence of
rudder control which is the vertical control found on normal aircraft and allows the pilot to create turns by “yaw” which changes the
direction of the tail relative to the nose of the aircraft. All turns with RAZOR will be performed by banking the airplane left or right as
opposed to creating yaw. Once you get past the initial stages of set-up and trimming the model, RAZOR is easy to fly and capable of
performing most basic aerobatic maneuvers not requiring rudder control. The slope, park, and 400 Class models are designed to fly
at slow to moderate speeds, are great for thermaling, gliding, and modest aerobatics. The 600 Class models are designed for higher
speed, better maneuverability and greater piloting skill levels.
QUICK REVIEW
This section assumes that you have successfully completed the assembly portion of the manual. You have completed installation of
the propulsion equipment (STEPS 23 - 25, 36), flight pack equipment (STEP 37) and installed the battery (STEP 46). You have
properly installed the servo arms and completed initial radio setup (STEP 47). You have installed pushrods and control linkages and
have set the elevons for 2 degrees up elevator (STEP 49). Finally, you have marked and checked the CG (STEPS 53, 54) to ensure that
the plane balances properly.
SETTING UP ELEVON MIX
Make certain the aircraft is anchored, that the propeller is free of obstructions, and that the throttle control and throttle trim are set
in the full off position before you turn the transmitter and then the ESC power switches on. Follow the instructions provided with
your transmitter or with your on-board mixing unit to enable elevon mixing. Once you have successfully completed this step, the
following should occur:
1) Pulling back on the elevator control stick causes both elevons to move up.
2) Pushing forward on the elevator control stick causes both elevons to move down.
3) Pushing the aileron control stick right causes the right elevon to move up and the left elevon to move down.
4) Pushing the aileron control stick left causes the left elevon to move up and the right elevon to move down.
5) While holding full left aileron control, pulling back on the elevator control stick causes the right elevon to move up slightly while
the left elevon stays up.
PRE-FLIGHT CHECK AND RANGE TEST
Always perform the following pre-flight test before flying the model:
1) Make sure the propeller is free of all obstructions.
2) Make sure the throttle control stick and throttle trim lever are set in the full off position.
3) Turn the transmitter power on and then turn the ESC power switch on.
4) Verify that the transmitter controls the proper channels on the receiver; i.e., throttle control runs the motor as the propeller
“pushes” air away from the back of the airplane; elevator and aileron controls move the servos.
5) Perform the previous, numbered sequence under SETTING UP ELEVON MIX before each flight to verify that mixing is set up
properly.
6) With the antenna collapsed to the first section on the transmitter and the aircraft anchored and elevated several feet off the
ground on a non-conductive surface, walk away from the airplane moving the elevator/aileron stick(s) on the transmitter. At 100
feet, make certain the propeller is free of obstructions, and move the throttle control to full on. Check to see that you still have
full control of the flight surfaces. Throttle back quickly to avoid using up valuable battery power.
GLIDE TEST
Glide testing the airplane is always best when one person is launching the aircraft and another is controlling it. Determine the
direction of the wind. On a gentle slope, hold the airplane over your head and run slowly into the wind. Give the airplane a gentle
push with the nose pointing straight ahead and the wings level. Correct the flight path with the transmitter controls. If you are glide
testing a 600 Class aircraft, run faster and throw the plane harder as the airplane is heavier. Make adjustments to your trim settings
until the aircraft glides straight ahead with a gentle downward sink rate. Remember, if the aircraft pitches up and stalls, trim the
elevator control to add more down elevator. If the aircraft dives, trim the elevator control to add more up elevator. Make
adjustments to the flight control linkages until the correct glide test results are obtained with the trims set at neutral. Note: if you
are flying a 600 Class aircraft, be aware that you will most likely add more up trim in a glide test than is required for powered flight.
POWERED FLIGHT
Make sure your flying site has enough area to maneuver the aircraft without getting too close to roads, buildings, trees, or power
lines. 400 and 600 class RAZOR models are not intended as park fliers. They require a flying field the size of a football field or larger.
Never fly over the heads of spectators, and keep the aircraft in sight at all times. A radio control aircraft is a big responsibility and
should not be taken lightly. Even an experienced pilot has an occasional lapse of concentration or problems with his equipment.
For at least the initial flight, have an experienced R/C modeler launch or fly the aircraft for you. Determine the direction of the wind.
Power up the system as in the pre-flight check. We cannot stress enough the importance of keeping your hands clear of the
propeller at all times! Hold the airplane over your head, power the motor to full throttle, and run briskly into the wind. While
holding about 50% up elevator, give the airplane a strong toss with the nose pointing straight ahead and the wings level. Be sure to
pull your arm down and away from the airplane as you launch to clear the propeller! Correct the flight path with the transmitter
controls. If you are launching a 600 Class aircraft, run faster and throw the plane harder as the airplane is heavier. As you fly the
plane, make adjustments to your trim settings until the aircraft flies straight and level with the transmitter control stick centered.
 Loading...