4
Issue/Rev. 0.6 (2/06)
Removal and Replacement of Flowmeter Internals Size
4 Inch (Shipped Before April 1990) and Size 3 Inch
Shipped Before January 1989
1) Locate the flow direction arrow on the turbine flow
meter body, or the words “Inlet” or “Outlet” stamped
near the ends. Set the flowmeter body on end with
the outlet map.
2) Assemble the rear support assembly, giving atten-
tion to aligning the grooves in the pinion bolt with the
slots in the cage.
3) Install the lock washer and nut. The threads on the
pinion bolt should only extend halfway through the nut,
(about 2-1/2 turns).
4) Insert three vanes with the tapered bottom edges match-
ing the sloping bottom of the grooves in the pinion bolt.
5) Locate the three wide and shallow grooves running in a
length-wise direction in the turbine flowmeter body.
6) Insert the support assembly into the body, bearing end
first, with the vanes sliding down the shallow grooves.
The assembly will come to rest against a shoulder.
7) Rotate the entire support assembly about 60 degrees,
so that the vanes are no longer lines up with the ac-
cess grooves in the body.
8) Tighten the nut slowly, working the assembly back
and forth so the vanes will seat properly. Tighten the
nut secruely.
9) Turn the body over and slip the rotor onto the rear
bearing just installed.
10) Assemble and install the front support in the same
manner. It may be necessary to pull or push on the
pinion bolt to work the assembly in far enough to read
the shoulder, before rotating. The pinion bolt is pulled
back, the vanes are forced outward.
The rear pinion bolt can be identified by the 1/2 inch diam-
eter carbide bearing which protrudes 1-7/32 inches.
The rear pinion body, or cage, can be identified as follows:
4 inch flowmeter front and rear cages are identical.
3 inch (shipped before January 1989) front cage overall
length is 2-21/32 inches and the slots begin 3/8 inches from
the open end.
Rear cage overall length is 2-15/16 inches and the slots
begin a little over 3/4 inch from the open end.
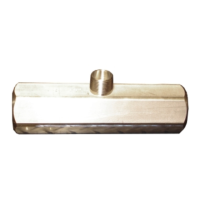
Removal of Flowmeter Internals
Size 4 Inch (Figure 5)
1) Remove the internals by retracting the set screw and rap-
the sliding vane, if necessary, to relieve the locking pres-
sure.
2) If spirolox rings are installed, remove them before attempt
ing to remove the supports.
3) Remove the rotor support fromt he flowmeter.
4) Remove the rotor from the flowmeter.
5) Repeat steps 1 through 3 to remove the second support.
Replacement of Flowmeter Internals
Size 4 Inch (Figure 5)
1) If your flowmeter body is grooved for spirolox rings, it is
recommended that the rings be installed.
Note: Lock rings are provided to absorb shock and
should be replaced when replacing the internals.
2) Advance the sliding vane with the set screw until the whole
support assembly fits closely in the bore of the flowmeter
body.
3) Position the support assembly against the shoulder in the
flowmeter body and tighten the set screw.
4) Install a spirolox ring if a groove has been provided for.
5) Meter bodies shipped after December 1, 1970 have three
grooves machined in each end. The sliding vane has an
“ear”, detail “B”, to engage one of these grooves. The front
support assembly should be positioned so that the sliding
vane engages the upper-left-hand groove. The sliding vane
on the rear support should engage the upper-right-hand
groove. Both sliding vanes should be in line.
6) For installation in older bodies (prior to December 1, 1970),
which are not grooved, the sliding vane can be turned
upside down (Figure 5) so the ear is buried in the support.
Figure 5