10
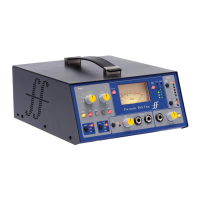
USING THE OPTICAL COMPRESSOR
It is normally a good idea to add compression to an electric guitar. This will even out
inconsistencies in volume, helping it to sit nicely in the track. Compression will also have
the effect of adding more sustain to a guitar. Try starting with the OPTICAL
COMPRESSOR set as follows:
• COMPRESSION set around 12 o’clock
• TIGHT switch engaged
• PUNCH switch engaged
• RELEASE set around 3 o’clock
• TUBE SOUND set as desired
• MAKEUP set around the ‘10’ position
ADDING EFFECTS USING FOOT PEDALS
Plug all foot pedals between the guitar and the TrakMaster. Put the OPTICAL
COMPRESSOR in bypass (switch disengaged) and use the 3-BAND EQUALISER to set
the tone you want, then switch in the effects you want to use. If necessary, use the 3-
BAND EQUALISER to modify the tone after the effects have been added.
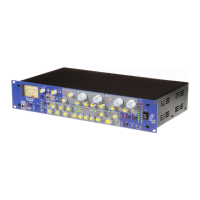
RECORDING ELECTRIC BASS
Since it is normally desirable for the bass to stay at a consistent volume in the rhythm track,
it is common to add a quite a lot of compression. Set the OPTICAL COMPRESSOR as
follows:
• COMPRESSION set around 12 o’clock
• TIGHT switch engaged
• PUNCH switch engaged
• RELEASE set around 3 o’clock
• TUBE SOUND set as desired
• MAKEUP set around the ‘10’ position
Try experimenting with the RELEASE control and the TIGHT switch to get the sound
you want. If you want a punchier bass sound, engage the PUNCH switch. If you want a
more rounded bass sound, leave the PUNCH switch disengaged. For a funky sound when
slapping, set the COMPRESSION control quite high, engage the TIGHT switch, and
leave the PUNCH switch disengaged.
Use the BASS control (in INST mode) to give the bass guitar more depth. The FREQ
control should sound best when set between 60 Hz and 150 Hz. Use the PRESENCE
control to add more of the upper harmonic content that gives punch (or the ‘click’ sound
when using a plectrum.)
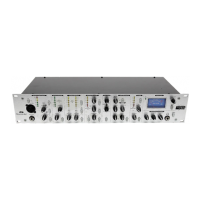
IMPROVING SOUND QUALITY USING THE 3-BAND
EQUALISER
The TrakMaster’s equalisation section is extremely versatile. The choice of VOCAL and
INST modes for both the low frequency and high frequency bands ensures that no matter
what kind of material you’re processing, the EQ can do exactly what you need it to do.
You can use the 3-BAND EQUALISER to fix the following problems:
Muddy: Use the BASS control to reduce some of the low frequencies. Solo the track, set
the BASS control to full cut, and adjust the FREQ (in either INST or VOCAL modes)
until the sound is more balanced. Then listen to the track in context with the rest if the
mix, and adjust the amount of cut on the BASS control to give the correct sound in
context. If necessary you may also need to increase the amount of TREBLE (in VOCAL
mode if dealing with vocals).
Flat: Increase the PRESENCE control. You may need to increase the amount of TREBLE
(in VOCAL mode if dealing with vocals), and then some BASS if the result has too much
top end. However, beware of overdoing this effect by adding too much.
Harsh: Use the PRESENCE control to reduce the strength of these frequencies. You may
also want to add some BASS, and if necessary, reduce some TREBLE.
Lost in the mix: Increase the PRESENCE control. Avoid using too much BASS as you
will be boosting frequencies in the same range as other instruments on the track.
MIXING DOWN
When mixing down the final multitrack recording of your song, the TrakMaster can be
connected in one of two ways:
Connect the selected output channel of your recorder to the line input of the TrakMaster,
and connect the line output of your TrakMaster to the selected line input of your mixer.
Use the insert point on the channel strip of your mixing board to insert the TrakMaster
using its line input and output.
Don’t be afraid to be outrageous when mixing down. For example, don’t always try to
make the vocal sound natural, since one that stands out in the mix is often heavily effected.
In pop music, the vocal is invariably heavily compressed, and has equalisation added. In the
OPTICAL COMPRESSOR section, try using the TUBE SOUND control to give an
analogue tape/tube sound.