Do you have a question about the FoodSaver FM5400 and is the answer not in the manual?
Essential safety precautions to follow when using electrical appliances to reduce risks of fire, shock, or injury.
Key recommendations for optimal use, including not substituting canning, using specific bags, and handling liquids.
Indicate current setting and vacuum progress for added control.
Works with FoodSaver® zipper bags, containers, canisters* and marinators*.
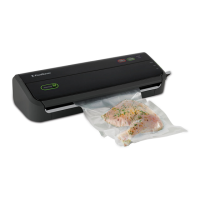
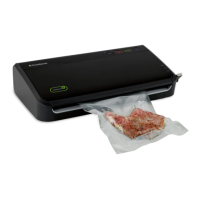
Insert bag and press Vacuum and Seal Activation Bar to start the vacuuming sealing process.
Seals bags or unlocks bag material for access.
Press to vacuum and seal. Automatically closes and grasps bag.
Catches overflow liquids and is dishwasher-safe.
Initiates and turns off the appliance.
Stops vacuum process or creates a seal on multilayer bags.
Indicates sealing process or error status.
Illuminates when vacuum process is engaged.
Manually controls vacuum process to avoid crushing delicate items.
For optimal vacuuming and sealing of moist or juicy foods.
Immediately halts the current function.
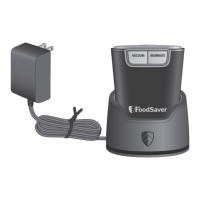
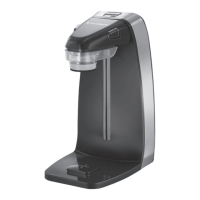
Used with FoodSaver® accessories like the Retractable Handheld Sealer.
Initiates a sequence for optimal flavor infusion in food.
Works with FoodSaver® zipper bags, containers, canisters* and marinators*.
Manually control the vacuum process and avoid crushing delicate items.
Instructions for cleaning the main appliance, including gaskets and drip tray.
Instructions for emptying and cleaning the reservoir of the handheld sealer.
Explains how vacuum sealing extends food life and inhibits microorganism growth.
Guidelines for safely thawing and reheating foods stored in vacuum-sealed bags.
Instructions for vacuum sealing hard cheeses to maintain freshness.
Tips for pre-freezing and sealing meat and fish for best results.
Recommends blanching vegetables before vacuum sealing to preserve quality.
Advice on vacuum sealing baked goods, suggesting canisters or pre-freezing.
Recommends using canisters for storing leafy vegetables after washing and drying.
Tips to prevent particles from entering the vacuum pump.
Guidance on pre-freezing and vacuum sealing fruits and berries.
Methods for vacuum sealing liquids, including pre-freezing and using bottle stoppers.
Efficient storage of meals and sandwiches using stackable containers.
Tips for maintaining snack food freshness, recommending canisters for crushable items.
Information on protecting non-food items from oxidation, corrosion, and moisture.
Addresses issues related to overheating or prolonged vacuum pump operation.
Solutions for bags not evacuating properly, including seal checks and wrinkles.
Guidance for a loose or torn upper gasket, including cleaning and replacement.
Troubleshooting steps for sealing failures, such as moisture, debris, or wrinkles.
Checks for power connection, outlet functionality, and unit status.
Steps to ensure the unit is powered, plugged in, and the seal bar is activated.
Ensuring sufficient bag material and proper insertion technique.
Diagnosing and fixing causes of air re-entry, like seal wrinkles or punctures.
Addresses issues of bag melting, suggesting cooldown periods and using specific bags.
Ensures correct lid placement and accessory button usage for containers.
Instruction on how to properly pull the roll from the bag dispenser.
Details the five-year limited warranty coverage, exclusions, and limitations.
Provides contact information and procedures for obtaining warranty service.
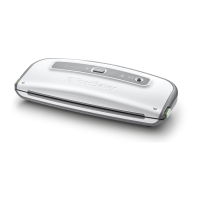
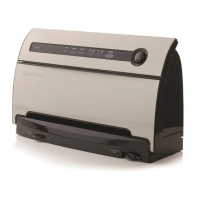
The FoodSaver FM5400 Series is a vacuum sealing system designed to extend the life of foods by removing air from sealed containers, thereby reducing oxidation and inhibiting the growth of microorganisms. This process helps to preserve nutritional value, flavor, and overall quality of food. The system is intended for household use and is not a substitute for refrigeration or freezing for perishable foods.
The core function of the FoodSaver FM5400 Series is to vacuum seal food in specially designed bags, rolls, and accessories. This involves creating an airtight seal after removing air from the container. The appliance features a Power Button to initiate operation, a Seal Button for immediate sealing or creating seals on multilayer film bags, and a PulseVac™ Button for manual control over the vacuum process, which is particularly useful for delicate items. An Adjustable Food Settings Button allows for optimal vacuuming and sealing of moist or juicy foods, with a Moist Indicator Light that flashes when moisture is detected in the drip tray. The Accessory Button is used for vacuum sealing with FoodSaver® accessories like zipper bags, containers, canisters, and marinators, utilizing the Retractable Handheld Sealer. A Marinate Button provides a ten-minute sequence of vacuum pulses and rests to infuse flavor into foods.
The device incorporates a Vacuum View Window, which provides visibility into the vacuum channel, drip tray, and sealing strip, making it easier to insert bags correctly. The Vacuum Channel is where the open end of the bag is inserted to begin the vacuuming and sealing process. The Vacuum and Seal Bar, when pressed, automatically closes the Vacuum View Window and grasps the bag to start the vacuum and seal cycle.
For making custom-sized bags from a roll, the appliance includes an Express Bag Maker Lower Seal and Cut Bar, a Bag Cutter, and a Bag Dispenser. The Unlock/Seal Lever is used to switch between seal mode (to make a seal) and unlock mode (to release bag material).
| Type | Vacuum Sealer |
|---|---|
| Power | 120 watts |
| Seal Type | Heat Seal |
| Bag Roll Storage | Yes |
| Built-in Cutter | Yes |
| Marinate Mode | Yes |
| Moist/Dry Food Settings | Yes |
| Pulse Function | No |
| Accessory Port | Yes |
| Vacuum Settings | 2 |
| Included Accessories | 1 roll of vacuum seal bags |