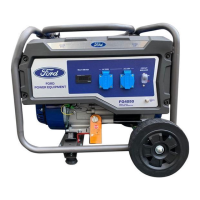
This document serves as the Operator's Manual for a Ford portable generator, model FG4650P, item F2E360R991. It provides comprehensive instructions for safe operation, assembly, maintenance, and troubleshooting of the device.
Function Description
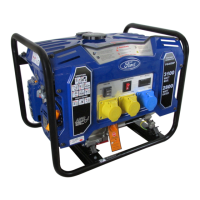
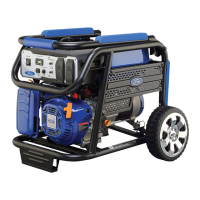
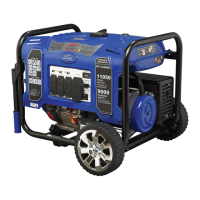
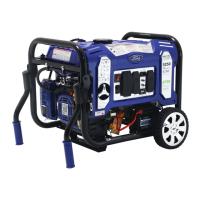
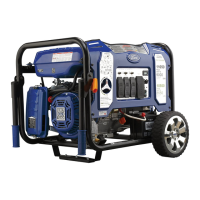
The Ford portable generator is an engine-driven, revolving field, alternating current (AC) generator designed to provide electrical power. Its primary function is to supply electricity for various applications, including operating tools, appliances, camping equipment, lighting, or serving as a backup power source during electrical outages. The generator is designed for portability, making it suitable for use in different locations where grid power is unavailable.
Usage Features
The generator is equipped with several features to facilitate its use and ensure safety.
Control Panel and Receptacles:
The control panel includes an ON/OFF switch, a main circuit breaker, circuit protectors, and a voltage selector switch. It also features an hour meter to track operational time for maintenance scheduling.
Multiple receptacles are available for connecting various electrical devices:
- 120 / 240 Volt AC, 30 Amp twist lock receptacle (NEMA L14-30): This receptacle is protected by a 15A main circuit breaker and is rated to operate 120 Volt AC, single phase, 60Hz loads up to 3600 watts (3.6 kW), and 240 Volt AC, single phase, 60Hz loads. It requires a NEMA L14-30 plug and a 4-wire cord rated for 240 Volts AC, 30 Amps. The same cord can be used for 120 Volt loads.
- 120 V duplex Receptacle (NEMA 5-20R): This duplex receptacle has a 20 Amp push-to-reset circuit breaker for overload protection. It is rated to operate 120 Volt AC, single phase, 60Hz loads up to 2400 watts (2.4 kW) at 20 Amps.
- 120 Volt AC, 30 Amp RV receptacle (TT-30): This receptacle is rated to operate 120 Volt AC, single phase, 60Hz loads up to 3600 watts (3.6 kW) at 30 Amps.
The manual emphasizes the importance of using high-quality, well-insulated, grounded extension cords that match the generator receptacles and load requirements. It also warns against overloading the generator and advises checking operating voltage and frequency requirements of all electrical devices before plugging them in.
Voltage Selector Switch:
This switch allows the generator to operate in either single voltage (120V) or dual voltage (120V/240V) mode. In 120V position, it provides full capacity through duplex (5-20R) and RV (TT-30) receptacles. In 120V/240V position, 120V receptacles receive half the available watts, while the 240V 4-prong twist-lock receptacle receives full available watts. A critical safety instruction is to disconnect all electrical loads before moving this switch to prevent damage.
Starting and Stopping the Engine:
The starting procedure involves placing the generator on a level surface, ensuring all electrical loads are disconnected, turning the fuel valve to "ON," sliding the choke lever to "Choke" (unless the engine is warm), turning the engine ON/OFF switch to "ON," and then pulling the recoil handle rapidly. Once the engine runs for several seconds and warms up, the choke lever is gradually moved to the "RUN" position.
To stop the engine, all loads must first be disconnected. Then, the fuel valve is turned to "OFF," followed by turning the engine ON/OFF switch to "OFF."
Grounding:
The generator must always be properly grounded to prevent electrocution. A ground terminal on the back of the frame is provided for connecting to a driven ground rod using a No. 8 AWG copper wire. This protects against electric shock from static electricity buildup or undetected ground faults.
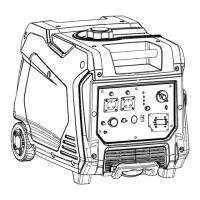
Portability:
The generator is designed with handles and no-flat foam-filled tires for ease of movement. When transporting, the handles should be folded down, and the unit should be tilted to balance on its wheels. For carrying, the manual strongly advises against lifting the generator alone due to its weight and recommends lifting with legs, not the back, to avoid injury.
Cold Weather Operation:
For operation in humid conditions where temperatures drop to 40°F (4°C), specific steps are recommended to prevent carburetor and/or crankcase breather system freezing. These include replacing old fuel with fresh fuel, using synthetic 5W-30 or SAE 5W-30 engine oil, turning the fuel valve to the open position, ensuring regular maintenance, and sheltering the unit from elements. A temporary cold weather shelter can be created using the original shipping carton.
Maintenance Features
Regular maintenance is crucial for extending the generator's life and performance, and for maintaining warranty validity. The manual provides a detailed maintenance schedule and instructions for various components.
Maintenance Schedule:
- After First 5 Hours: Change oil.
- After 8 Hours or Daily: Clean debris, check engine oil level.
- Annually (25 hr Use): Check and clean air cleaner, change engine oil (more often in dirty conditions), check muffler and spark arrester.
- Annually (100 hr Use): Service spark plug (replace with specified equivalents), service fuel valve, inspect muffler and spark arrester, check and clean air cleaner (replace air filter), clean cooling system.
Engine Oil:
The manual provides instructions for adding and checking engine oil, emphasizing the need to add oil before first operation and to check the level before each subsequent operation. It specifies using 4-Cycle engine oil (SAE10W-30) and warns against using E15 or E85 fuel. A viscosity chart is provided to select the appropriate oil based on outdoor temperatures, with specific notes on SAE 30 and 10W-30 usage.
Air Filter:
A dirty air filter can reduce engine life, hinder starting, and decrease performance. Instructions are given to remove and clean the air filter by tapping or blowing out dirt, and to replace it annually.
Spark Plug:
Maintenance includes disconnecting the spark plug wire, cleaning carbon deposits from the electrode with a wire brush, checking and adjusting the electrode gap (.700 mm - .80 mm), and reinstalling/tightening the spark plug. Replacement with equivalent parts (BOSCH F7TC, NGK BP6ES, CHAMPION N9YC) is recommended annually.
Spark Arrestor:
The spark arrestor should be inspected for breaks or holes and replaced if necessary. Carbon deposits should be removed with a brush. Instructions are provided for removing and reinstalling the spark arrestor from the muffler.
Fuel System:
- Fuel Filter Replacement: Instructions are given for replacing a clogged fuel filter, which involves turning off the fuel valve, removing fuel lines, replacing the filter, and reinstalling the lines. The fuel tank must be empty before this procedure.
- Draining Fuel Tank and Carburetor: To prevent gum deposits during long-term storage, the fuel system should be drained. This involves turning off the engine and fuel valve, removing the fuel line from the petcock, draining fuel into a suitable container, and then draining the carburetor via its drain screw. The manual stresses the importance of proper disposal of used fuel.
Long-Term Storage:
For long-term storage, the generator should be cleaned, and the air cooling slots inspected. Fuel stabilizer can be added for semi-long term storage, but for long-term storage, the fuel should be drained. The generator should be stored indoors to prevent freezing and kept in an upright position. Engine long-term storage involves pouring 1 teaspoon of 10W30 engine oil into the spark plug hole, reinstalling the spark plug, and pulling the recoil starter cord several times to coat cylinder walls, then slowly pulling until compression is felt to prevent corrosion.
Troubleshooting:
A troubleshooting guide is included to help diagnose and resolve common issues such as the engine running but no AC output, engine bogging down under load, engine not starting or running rough, and engine lacking power or "hunting." Solutions range from resetting circuit breakers and cleaning filters to replacing spark plugs and contacting service departments.