2626
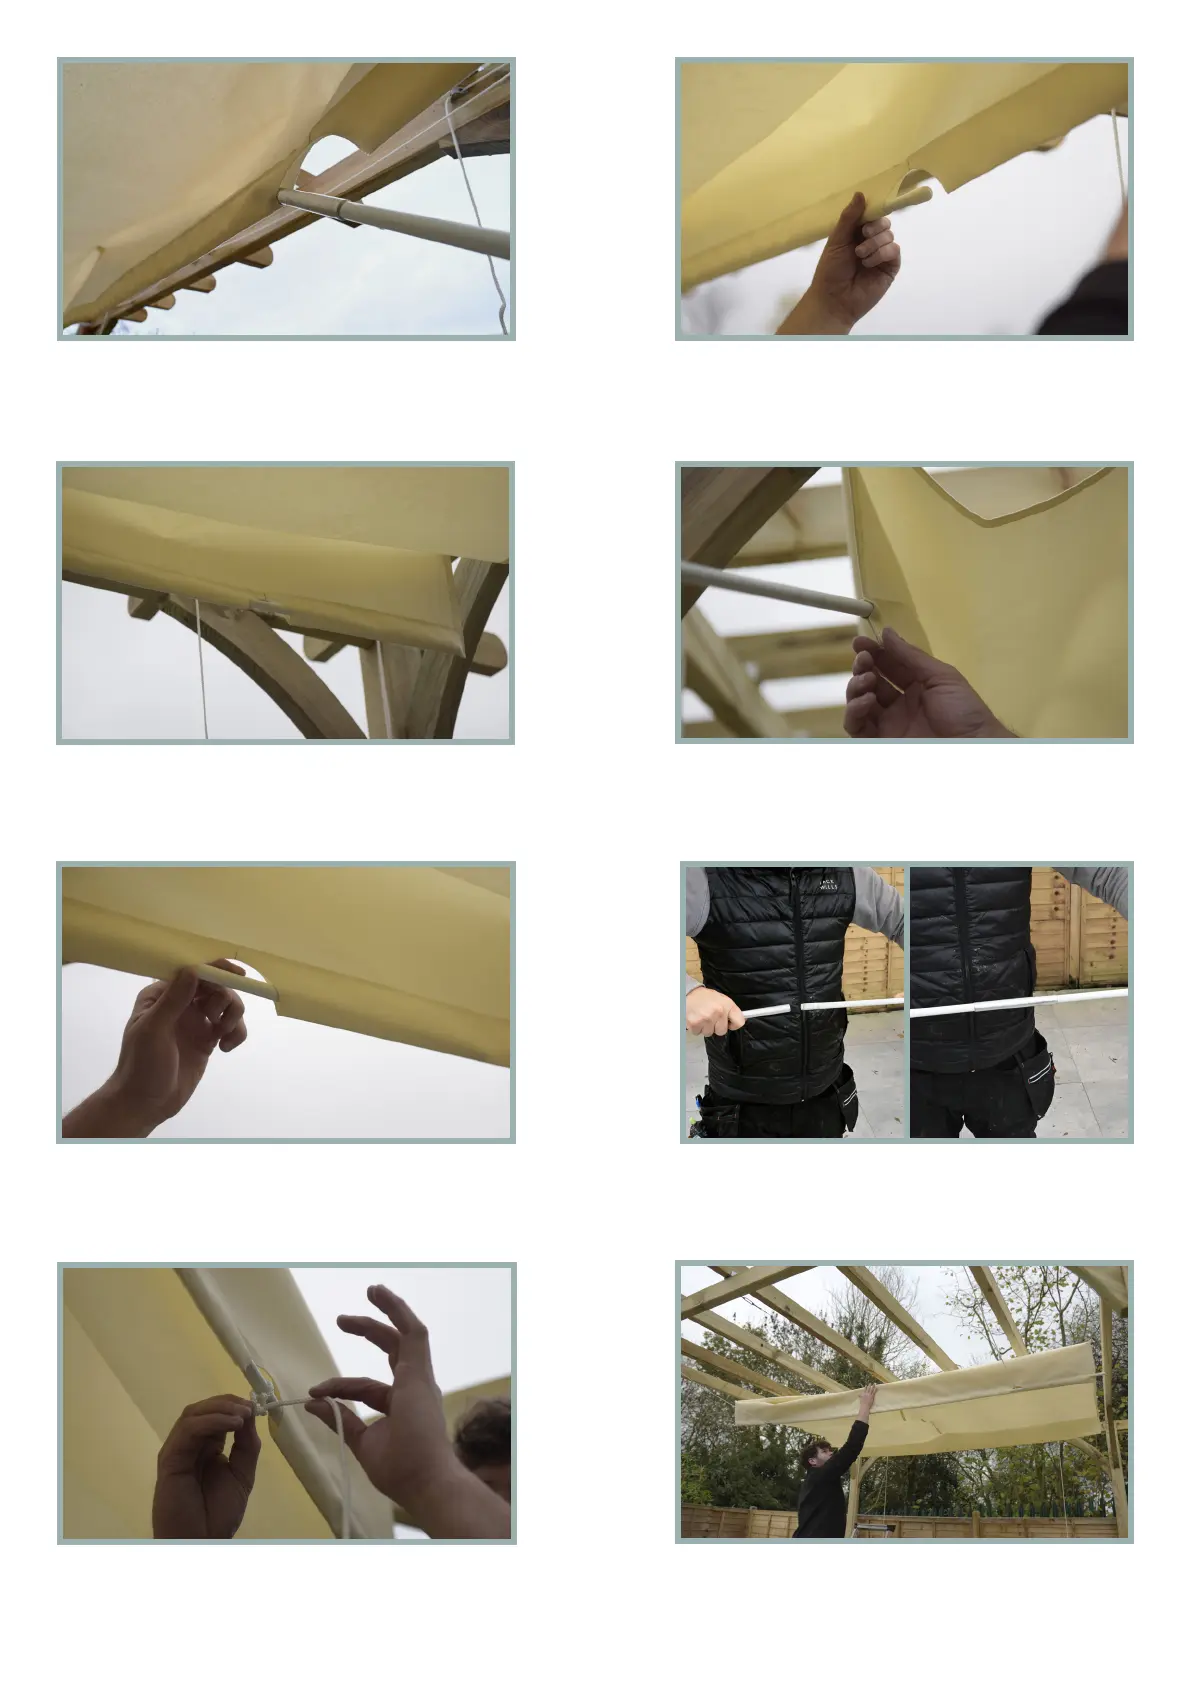
Once inserted, slide the Pole Section back to the
sealed edge of the Canvas.
Using the Long Rope on the front of the pergola, tie
it to the Pole that is in front of it. Repeat this process
for the Small Rope to the Pole cutout futher along.
3131
3232
The Large and Small Ropes tied to the Pole will look
like the above. Once both ropes are tied to the pole,
push the whole Canvas towards the back of the
Pergola.
Your rst Pole Section will look like the above.
2727
2828
Using the other Pole Section, insert it into the small
hole on the opposite edge of the Canvas, as shown
above.
Slide the Pole Section all the way through the
Canvas until it meets the metal end on the other
Pole Section.
2929
Connect the Pole Sections as shown above. This will
to be done inside the Canvas. Please be aware of
pinch points when connecting the Pole Sections.
2525
Using the Pole Section with the metal end, slide it
through one of the cutouts. Ensure the metal end is
facing towards the middle of the Canvas.
3030


 To Next Page