15
5.2 Installation of Indoor phone/handset
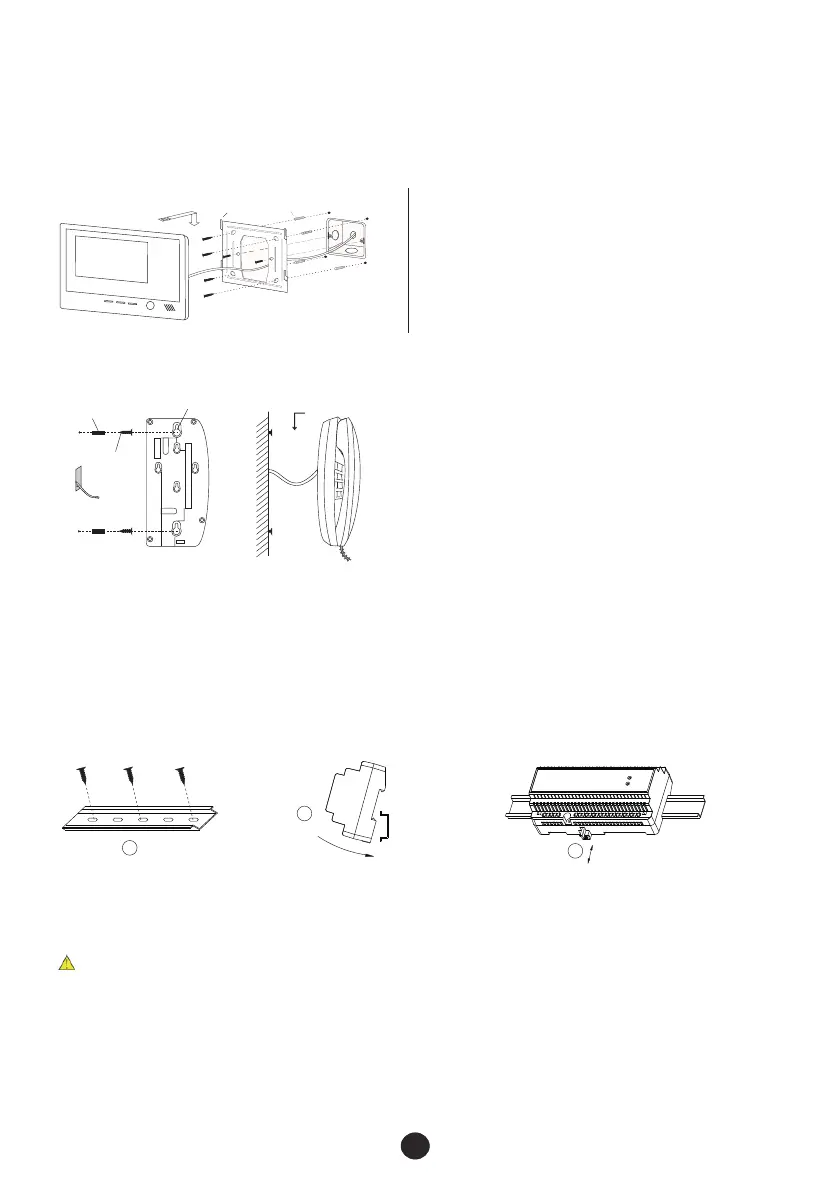
5.2.1 Install video indoor phone
All video indoor phones are mounted with brackets on the wall, in the same way as the following steps.
There are different size brackets. Please use the matched ones for your indoor phones.
a. Fix the bracket on the wall with the screws
( or ).
b. Move the indoor phone and put it on the bracket
after connect the cable( ).
① ②
③
bracket
I
nd
o
o
r p
h
o
ne
expansion plugs
③
②
①
Hook
Figure A
j k
l
installation holes
expansion plugs
screws
c. Move the audio handset close to the raised screws. Use the raised screws and installation holes to hand
up the audio handset on the wall after connection as Figure B( ).③
a. Measure the gap between two installation holes.
b. Install the expansion plugs and screws in the wall as Figure A (① ②). Please leave the screws
raised a proper length from the wall.
5.2.2 Install audio handset
5.3 Installation of isolation module
1
2
3
Fix the rail. Hang the box on the rail. Pull out the latch, push the box on the rail and then
release the latch.
5.4 Installation of power supply
The same as 5.3.
①Fused spur should be used for mains supply to PSU’s.
②Products may be demaged if the power is over the range.
③Connect the terminal(
④Do not open the casing.
⑤Do not install the power supply externally or in dusty environment.
⑥Eusure power supplies are well ventilated.
⑦Installation position should be not less than 1.5mm.
⊥)of the power supply to the Groud terminal of the products.
Figure B