8 9
Basic Connections
2
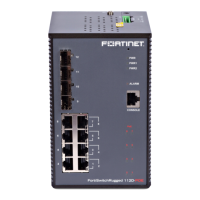
In systems configured with the redundant power option, connect PWR1 and PWR2
to separate independent power sources for power redundancy. The FSR-112D-POE
supports +/-48V to +/-57V DC for the PoE output, +/-50V to +/-57V DC for the PoE+
output and +/-12 to +/-57 DC for non-PoE operations.
Connect the Ethernet Port to a network appliance using an Ethernet cable
Caution: The wiring of input terminal block shall be installed by skill person.
b. Terminal block is mating with Plug and suitable for 12-28AWG, Wire Type: Cu,
FW2. Torque value 4.5 lb-in.
Warning:
• This product is intended to be UL Listed supplied by a Power Adapter or DC
power source which output complies with ES1/SELV: ambient temperature 75°C
minimum, output rating 48-57 Vdc, 5A minimum.
• If using Class I power adapter or Class I DC power source, power cord shall be
connected to a socket-outlet with earthing connection.
Note: The FortiSwitchRugged 112D-POE device does not support interconnectivity
to other FortiSwitchRugged 112D-POE devices using the PoE ports. Fortinet
recommends using the SFP ports to interconnect switches.
Power Connection
Setup Options
3
Network Connection
Power Connection
V2- V2+
PWR-2 Fault
1A@24V
PWR-1
V1- V1+
Seperate
Power Outlet
or UPS
DC Power Supply
PWR-2
+/-50 to +/-57Vdc,
5A for PoE+
PWR-1
+/-48 to +/-57Vdc,
5A for PoE
PWR-1 & PWR-2 accepts
+/-48 to +/-57Vdc @ 5A
and/or
+/-50 to +/-57Vdc @ 5A
Redundant Power Inputs
DC Power Supply
Seperate
Power Outlet
or UPS
Ethernet Port
https://
Web Browser
To Connect to the GUI
1. Connect the Ethernet cable.
2. Configure the management computer to be on the same subnet as the internal
interface as the FortiSwitch Rugged unit:
IP address: 192.168.1.2
Netmask: 255.255.255.0
3. Visit 192.168.1.99 in your web browser.
4. Login using username “admin” and no password.
5. Configure your device and save your settings.
6. Register your device from the dashboard page.
 Loading...
