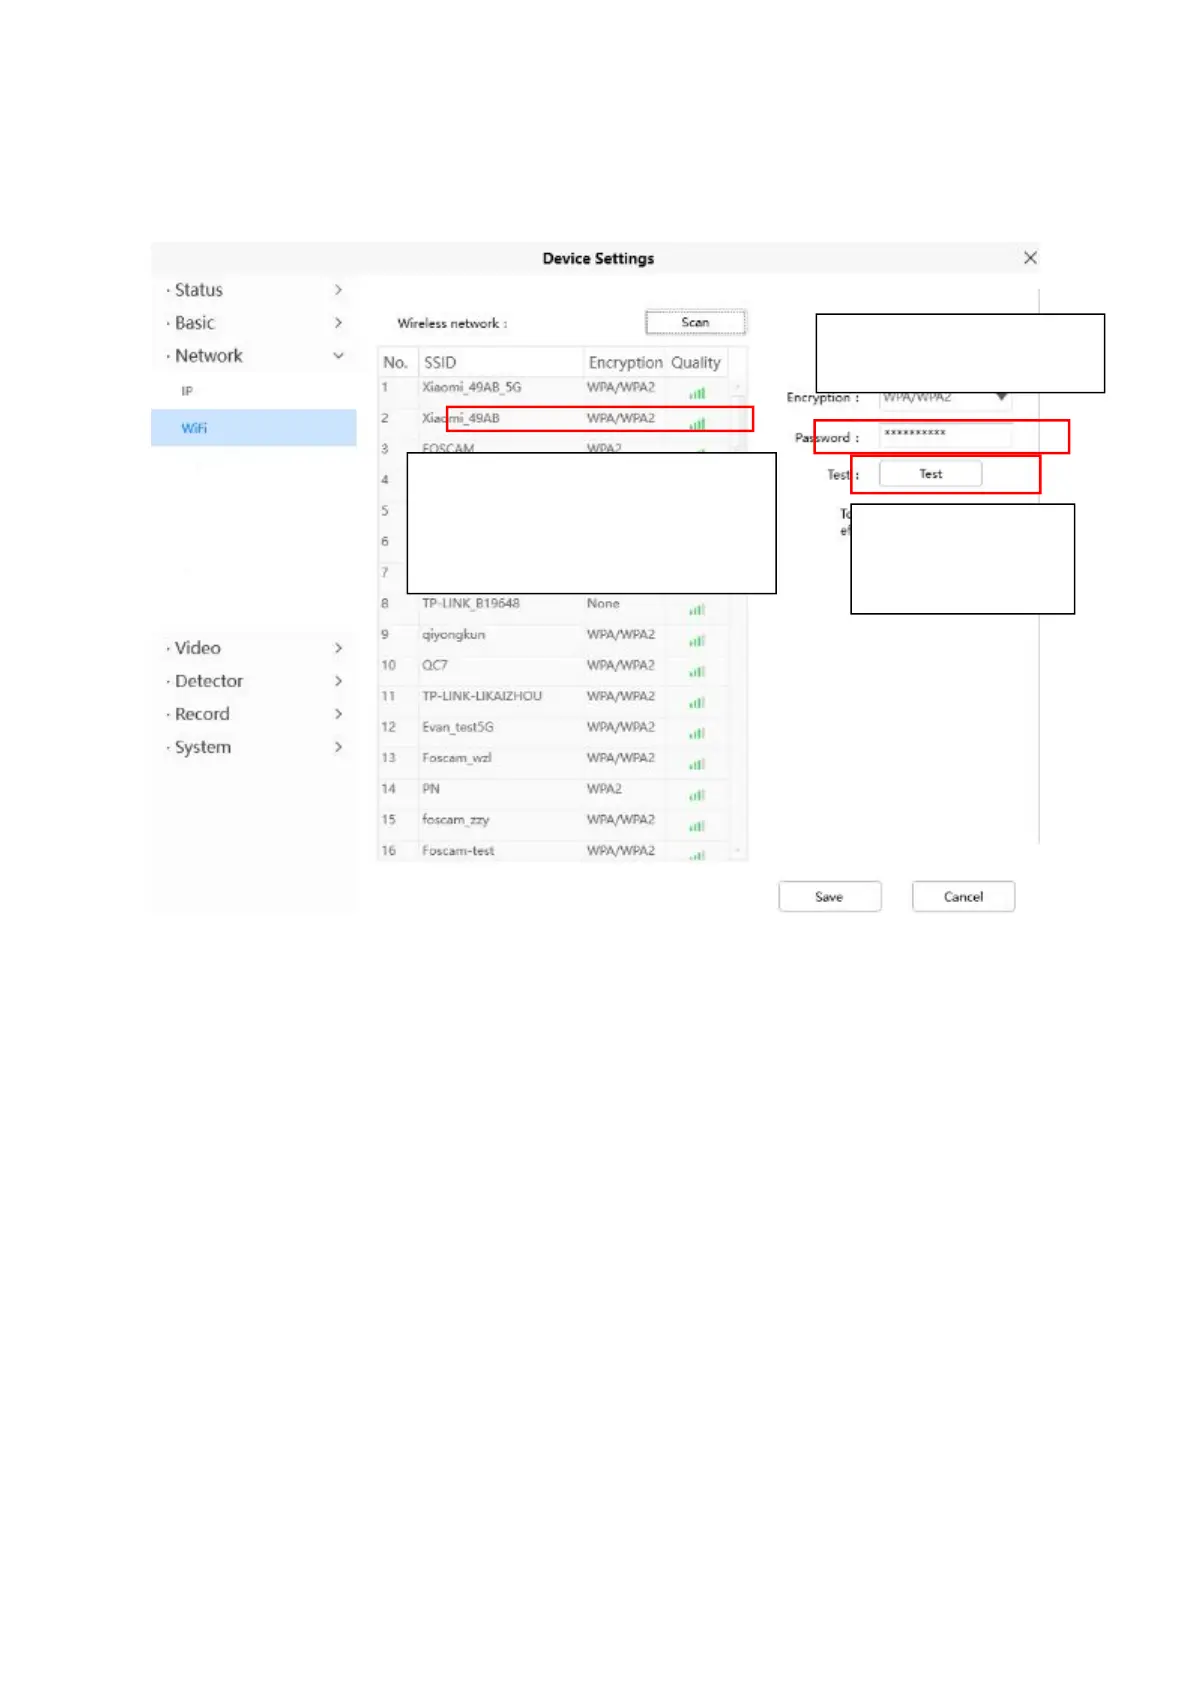
Step 2: Click the SSID (name of your router) in the list, the corresponding information related to your
network, such as the name and the encryption, will be filled into the relevant fields automatically.
You will only need to fill in the password of your network. Make sure that the SSID, Encryption and the
password you filled in are exactly the same for your router.
Step 3: Please click on the Save button after all settings have been entered and disconnect the network
cable.
Never shut down the power of the camera until the IP camera is able to connect to the wireless network.
The LAN IP address will disappear on the window of Add Device when the camera is configuring a
wireless connection. Wait about 1 minute, the camera should obtain a wireless connection, and the LAN
IP of the camera will show again on the window of Add Device The IP address may have changed
after the camera receives a wireless connection,Congratulations! You have set up the wireless
connection of the camera successfully.
NOTE: If you fail to make a wireless connection, please refer to your seller or contact us directly for
assistance.
4.6.3 Video
This section allows you to configure On screen display, Snapshot and IR LED settings.
4.6.3.1 On Screen Display
This page is used to add time stamp and device name on the video.
1 Click the SSID of your router
and the relevant information
will be filled in the fields
automatically.
2 Enter the password of
your router .
3 Click Test to check
if the password is
correct or not.