40
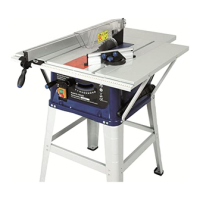
20. Then fix again the plate with the four screws provided in the package.
21. Place the four feet which you have previously assembled with the crossbars in the
bottom of the circular saw.
22. Use the screws and the nuts to firmly fix the saw to the base. Each foot is supported by
4 screws and nuts.
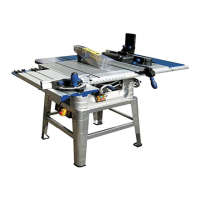
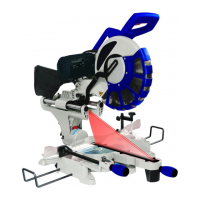
Assemble the ferrule for angling the saw blade on the axle of the front side of the machine and
tighten the screw of the handle as illustrated (Fig. 8).
CAUTION: Before any adjustment, repair or maintenance work, and before changing the
blade, switch off the machine and disconnect it form any current source by removing the plug
from the socket.
7) Loosen the screw fixing the protection to the riving knife and remove the bench
insert by loosening the 8 Phillips flat head screws (Fig. 9).
8) After unlocking the height knob, turn the other handle anti-clockwise to move the
axle of the blade in its highest position (Fig.10). Remove the locking nut of the saw
blade and the external flange. Then assemble the saw blade (teeth must point
towards the front side of the machine). Fix the blade with the flange and the nut.
9) Check that the blade is perfectly fixed, that the riving knife is aligned and at the right
distance from the blade (see adjustment of the knife), then re-assemble the bench
insert.
10) Re-assemble the protective cap: place it on the high part of the riving knife in order
that the hole of the protective cap is perfectly aligned with the one of the riving knife,
and fix it with the screw and the nut.
Height adjustment
handle
Angle locking knob
Ferrule for angling
the saw blade
ASSEMBLY OF THE HEIGHT AND ANGLE ADJUSTMENT HANDLE
ASSEMBLY OF THE SAW BLADE