3 High Flow Inline Water Filter System User Guide
Installation
This system comes complete with an installation kit enabling it to be connected to
15mm (½”) male thread to an existing tap or mixer tap (Cold supply only - hot water
should be ltered prior to heating). Also includes extending kit, where extra length is
required.
Installation requirements
1. 15mm (½”) Cold water exi-connector to tap.
2. Water supply pressure: 200-860 kPa.
3. Water supply temperature: 2°-38°C.
Alternative ttings may be required if being connected to anything other than 15mm
(½”) copper pipe. No electrical or drainage requirements needed.
Installation Procedure
Note: The use of a second spanner is recommended to prevent the brass
ttings from further tightening when installing (or disconnecting) the exible
hose.
1. Select suitable location that is close to the existing tap. Remember to allow
access room for changing lter and a suitable place where water spillage will not
cause damage. Location should not be in direct sunlight.
2. Isolate water supply and release water pressure by operating faucet lever.
Disconnect existing braided hose connections.
3. Attach non-return valve to water supply with plumbers tape, then attach chrome
adaptor onto non-return valve with plumbers tape.
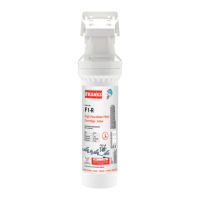
4. Install F1-R cartridge to the head assembly (see g. 1). Please note arrow on
cartridge.
5. Install system assembly by positioning it in the desired location, marking the
position of xing holes and xing with mounting screws. (F1 Highow Water Filter
can be mounted horizontally and vertically) Allow room for the connecting tubes
and for removing the cartridge (70mm).
6. Connect the braided hose onto chrome adaptor, then connect to the F1 Highow
Water Filter head assembly inlet. Ensure the hose is kink free.
INSTALLATION GUIDE