4
HT-300
Under Sink Heating Tank Installation Instructions and Use and Care Guide
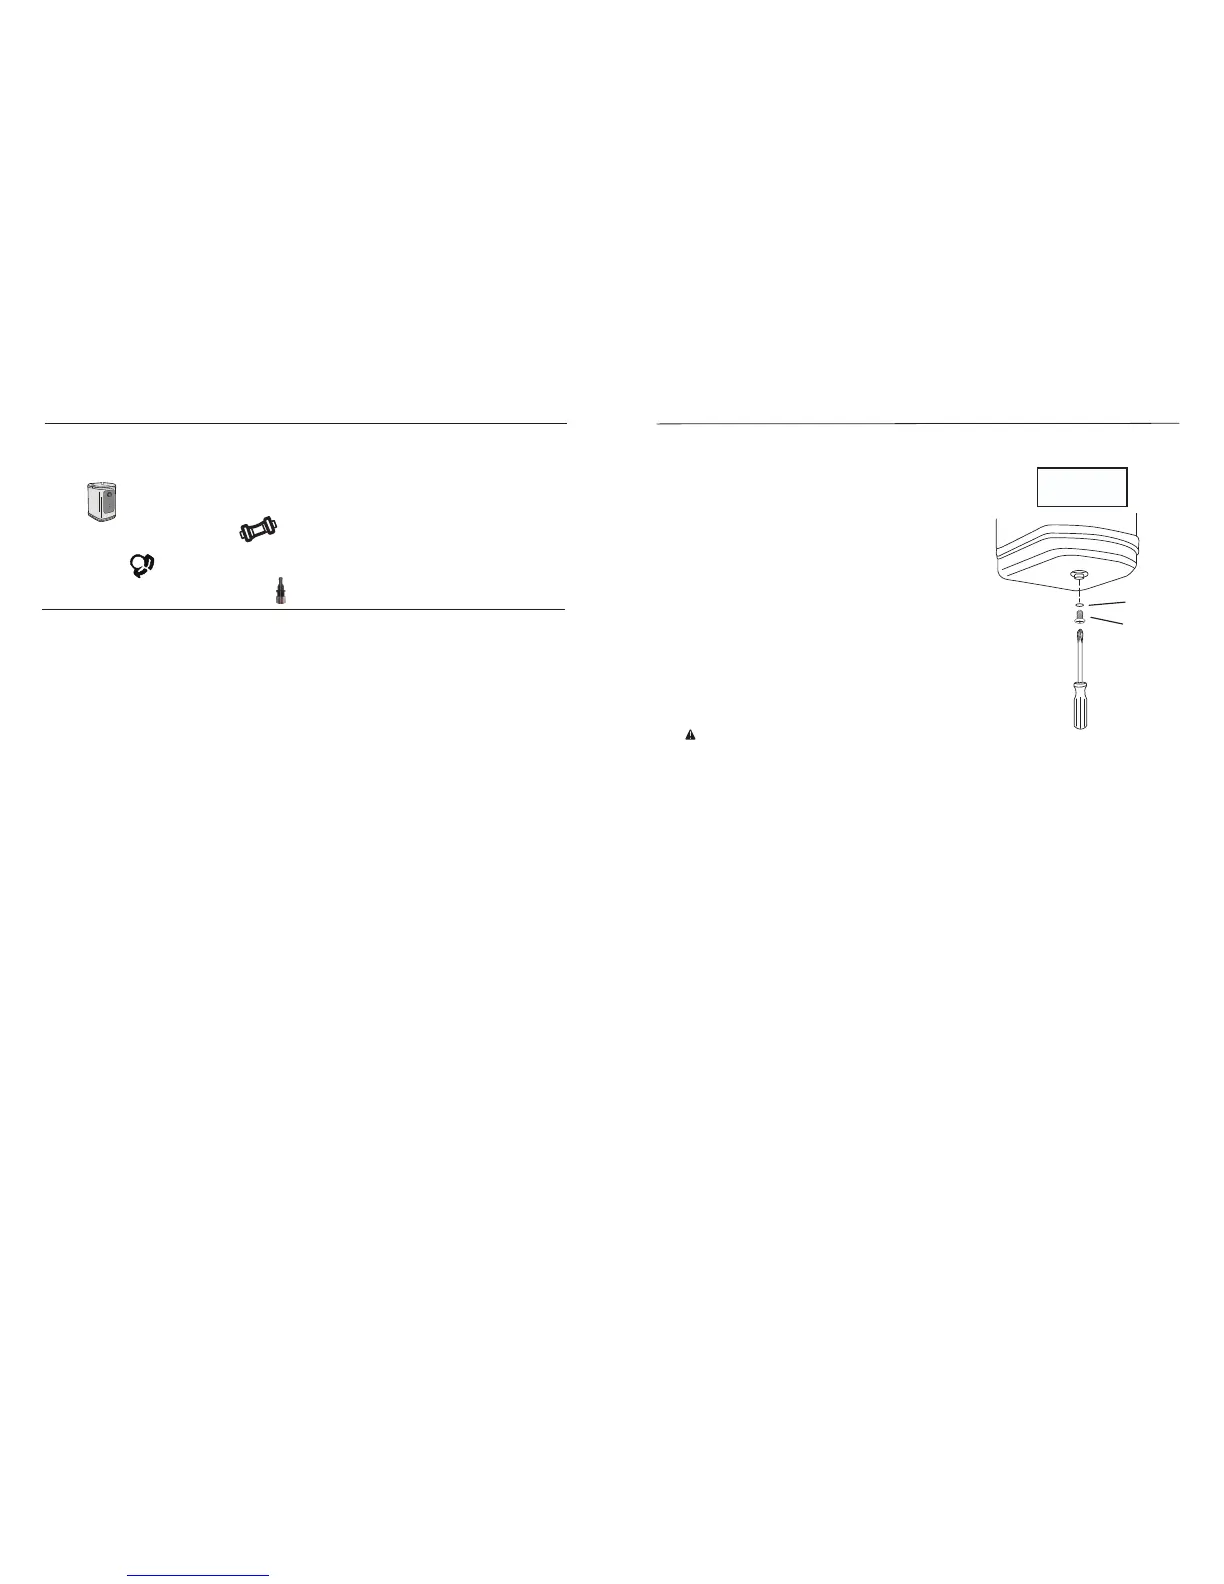
CONTENTS IN BOX:
When you purchase the HT-300 heating tank- contents include:
1. Tank
2. 1/4” push fi tting for water inlet tube
3. Hose Clamp
4. Connector/Reducer adapter for tank outlet
INSTALLATION REQUIREMENTS
For best results, Franke recommends its products be installed by a licensed, professional plumber. The
installer should familiarize themselves with how this heating tank will be installed. Make certain to observe
all local plumbing and building codes during installation of this unit. Proper installation is the responsibility
of the installer. Water connections using push fi ttings DO NOT require any type of sealing compounds
to prevent leakage. Use of any sealing compounds in push fi tting connections will VOID THE PRODUCT
WARRANTY.
TYPE OF FAUCET REQUIRED
Although this system should function with any “open vent” style dispensing faucet (see pg. 2) when properly
installed, we can only guarantee proper performance when this tank is paired with a Franke dispensing
faucet, so we strongly recommend using only genuine Franke dispensing faucets with the HT-300 Heating
Tank.
TOOLS AND MATERIALS REQUIRED (NOT PROVIDED)
1. Two mounting bracket screws and plastic support (if attaching to dry wall).
2. Ruler or measuring tape
3. Pliers
4. Hand or electric drill
5. Small drill bit for starter holes
6. Gloves
7. Safety glasses
8. Open end wrench
9. Drip pan or bucket
IMPORTANT INFORMATION
This product is not intended to produce a continuous fl ow of hot water. This model will produce up to 60
cups of water per hour at approximately 200F (93C)+/-5. Due to high water temperature, for safety reasons
the tank is not under pressure. Consequently, there is a slight delay of water fl ow after the faucet has been
turned on. This is normal and indicates the tank is functioning properly.
9
HT-300
Under Sink Heating Tank Installation Instructions and Use and Care Guide
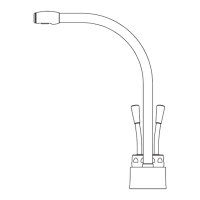
CLEANING AND MAINTENANCE
To prevent damage when the dispenser is exposed to freezing
temperatures, or for seasonal shutdown, the water must be
drained..
1. Unplug the heating tank from power supply.
2. Turn thermostat control dial to OFF position (fully counter
clockwise).
3. Turn faucet on and run water until water is cold.
4. Place a 3 quart container under the drain plug at bottom
of the tank. Use a screwdriver to remove the screw and
O-ring in the drain tube opening. When tank is fully drained
replace O-ring and screw. Tighten to reseal the drain as in
Diagram 4.
WARNING
Do not plug appliance into power supply if
tank is empty.
5. Only use mild cleaners to clean the tank. Cleaners with
acids, abrasives, alkaline or organic solvents will result
in deterioration of the plastic components and void the
warranty.
O-ring
screw
DIAGRAM 4