Do you have a question about the Franklin QUIKSET REBOUND PRO and is the answer not in the manual?
Guidance for preparing the assembly area and verifying parts before starting the product setup.
Connect the left and right base tube sets using the pre-assembled locking brace.
Attach the backboard support tube set to the tops of the assembled base tubes.
Connect back tubes using washers, bolts, and wing nuts.
Connect the backboard to the backboard support tube sets.
Connect net hanger tubes to the backboard.
Attach the electronic scorer and face plate to the backboard.
Attach paddles with sensors to the backboard and plug into the electronic scorer.
Slide the rim with net into the brackets on the backboard.
Attach middle and front ramp tubes to the base using hardware.
Connect the front ramp tubes to the middle ramp tubes.
Slide horizontal tubes through net sleeves and connect them.
Connect front horizontal tubes to the front ramp tubes.
Slide net hanger tubes into the ball return net sleeves.
Attach the control box to the front horizontal tubes using a screw.
Connect the control wire between the control box and electronic scorer.
Inflate the rubber basketballs using the provided pump and needle.
Fold up the front of the ball return and secure with lock pins for storage.
How to activate, navigate, and control the electronic scoreboard functions.
Instructions for playing the 'Beat the Time Clock' game mode.
Instructions for playing the '3 Point Beat the Time Clock' game mode.
Instructions for playing the 'Battle Back' game mode.
Instructions for playing the 'Horse' game mode.
Instructions for playing the 'Check Point' game mode.
Instructions for playing the 'Around the World' game mode.
Instructions for playing the 'Left and Right Shoot' game mode.
Instructions for playing the 'One to One' game mode.
| Brand | Franklin Sports |
|---|---|
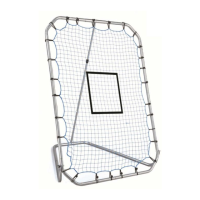
| Model | QUIKSET REBOUND PRO |
| Sport | Baseball |
| Material | Steel, Nylon |
| Color | Black |
| Included Components | Rebounder |