EasyManua.ls Logo

Franklin MLB DELUXE RETURN TRAINER User Manual

Franklin MLB DELUXE RETURN TRAINER
2 pages
To Next Page IconTo Next Page
Page #1 background imageLoading...
Page #1 background image
WARNING: Use extreme caution when assembling the net to the frame. The bungee
cords are under extreme tension and must be attached carefully. Eye protection is strongly
recommended during assembly.
0[LT5V
43)+,3<?,
9,;<95;9(05,9
(::,4)3@05:;9<*;065:
(+<3;(::,4)3@9,8<09,+
Step 9:
Attach target ribbon by weaving through net and tying o at ends.
Step 7:
Line up holes on (3) and (7) and attach with buttery screw. Repeat with (3) and (6).
Step 8:
Tighten “Innite Angle” adjustment system. Spread out net and nd red corner markers. Use
bungees to attach corners rst. Then attach the remaining bungees in the following order: 4
on top, 6 on left, 4 on bottom, and 6 on right, spread evenly on each side. To attach bungees to
net, hold plastic ball in place and wrap free end around net, steel frame, and nally back
around plastic ball.
Step 6:
Assemble (11) to (10). Center (13) on (1) and attach (12) to (13).
Step 5:
Complete bottom frame by attaching (7) to (1) to (9) and (6) to (1) to (8).
Franklin Sports Inc.
Stoughton, MA 02072
Made in China
For replacements parts call
1-781-341-5178 or 1-800-225-8649
OR visit www.franklinsports.com
Ribbon
Attachment
Bungee
Attachment
12
9
8
7
6
1
13
1
11
10
Question and Answer IconNeed help?

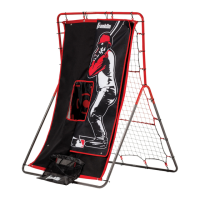
Do you have a question about the Franklin MLB DELUXE RETURN TRAINER and is the answer not in the manual?

Franklin MLB DELUXE RETURN TRAINER Specifications

General IconGeneral
SportBaseball
BrandFranklin Sports
MaterialNylon
ColorRed/White/Blue
Included ComponentsTrainer

Summary

MLB Deluxe Return Trainer Assembly Instructions

Step 5: Complete Bottom Frame

Instructions to complete the bottom frame by attaching specific numbered parts (7, 1, 9, 6, 8).

Step 6: Assemble Tubes

Instructions for assembling tubes (11 to 10) and attaching part (12) to (13) centered on (1).

Step 7: Attach with Butterfly Screw

Instructions to align holes on parts (3) and (7), attach with a butterfly screw, and repeat for (3) and (6).

Step 8: Attach Net with Bungees

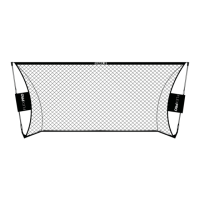
Guidance on tightening the adjustment system, spreading the net, and attaching corners and remaining bungees.

Step 9: Attach Target Ribbon

Instructions for weaving the target ribbon through the net and tying off the ends.

Step 1: Make 'U' Shape Frame

Instructions to slide part (13) through (1) and attach (2) to both sides of (1) to form a 'U' shape.

Step 2: Create Second 'U' Shape

Instructions to make another 'U' shape by attaching part (3) to both sides of another part (1).

Step 3: Combine 'U' Frames

Instructions to combine the top 'U' frame with the bottom 'U' frame using parts (4) and (5).

Step 4: Attach Tubes with Pins

Guidance on sliding part (10) onto (9) and attaching (8) with a push pin to secure the frame.

Related product manuals