47–01 Fuel Tank Draining and
Vent Checking
Remove the plug or open the drain valve at the bot-
tom of the fuel tank, and allow the tank to drain until
all traces of water and sediment have disappeared;
install the plug or close the drain valve.
On earlier vehicles with a screw-on fuel cap, remove
the fuel cap and clean it with solvent. Make sure the
fuel cap vent is open. Install the cap.
On vehicles with a quarter-turn fuel cap, check to be
sure the vent line at the inboard side of the fuel tank
is clean and not plugged.
47–02 Gasoline In-Tank Fuel
Filter Replacement
The fuel pump module is located in the fuel tank on
gas powered vehicles, and is fitted with a fuel filter
on its base. The fuel pump draws fuel from the bot-
tom of the fuel tank to prevent cavitation on turns or
inclines. The in-tank fuel filter prevents dirt and sedi-
ment that collects on the bottom of the fuel tank from
entering the fuel system. The in-tank fuel filter must
be changed periodically to ensure proper fuel system
operation.
1. Park the vehicle on a level surface. Apply the
parking brakes, and chock the tires.
2. Disconnect the batteries to prevent static dis-
charge.
WARNING
Release the fuel system pressure before removing
the fuel pump module. Otherwise fuel could spray
out, possibly resulting in severe personal injury
and property damage, including fire. Always wear
proper eye protection when releasing the fuel sys-
tem pressure. Fuel squirted into the eyes can
cause serious injury, including blindness.
3. Release the fuel system pressure and drain the
fuel tank.
WARNING
Gasoline is flammable and can ignite if exposed to
open flame, intense heat, or other ignition source.
Do not drain fuel near, or expose fuel vapor to
open flame or intense heat. Exposure to open
flame, intense heat, or other ignition source could
start a fire, possibly resulting in personal injury or
property damage. When working on a fuel system,
have a fire extinguisher within easy reach.
3.1 Remove the fuel tank cap to release the
fuel tank pressure.
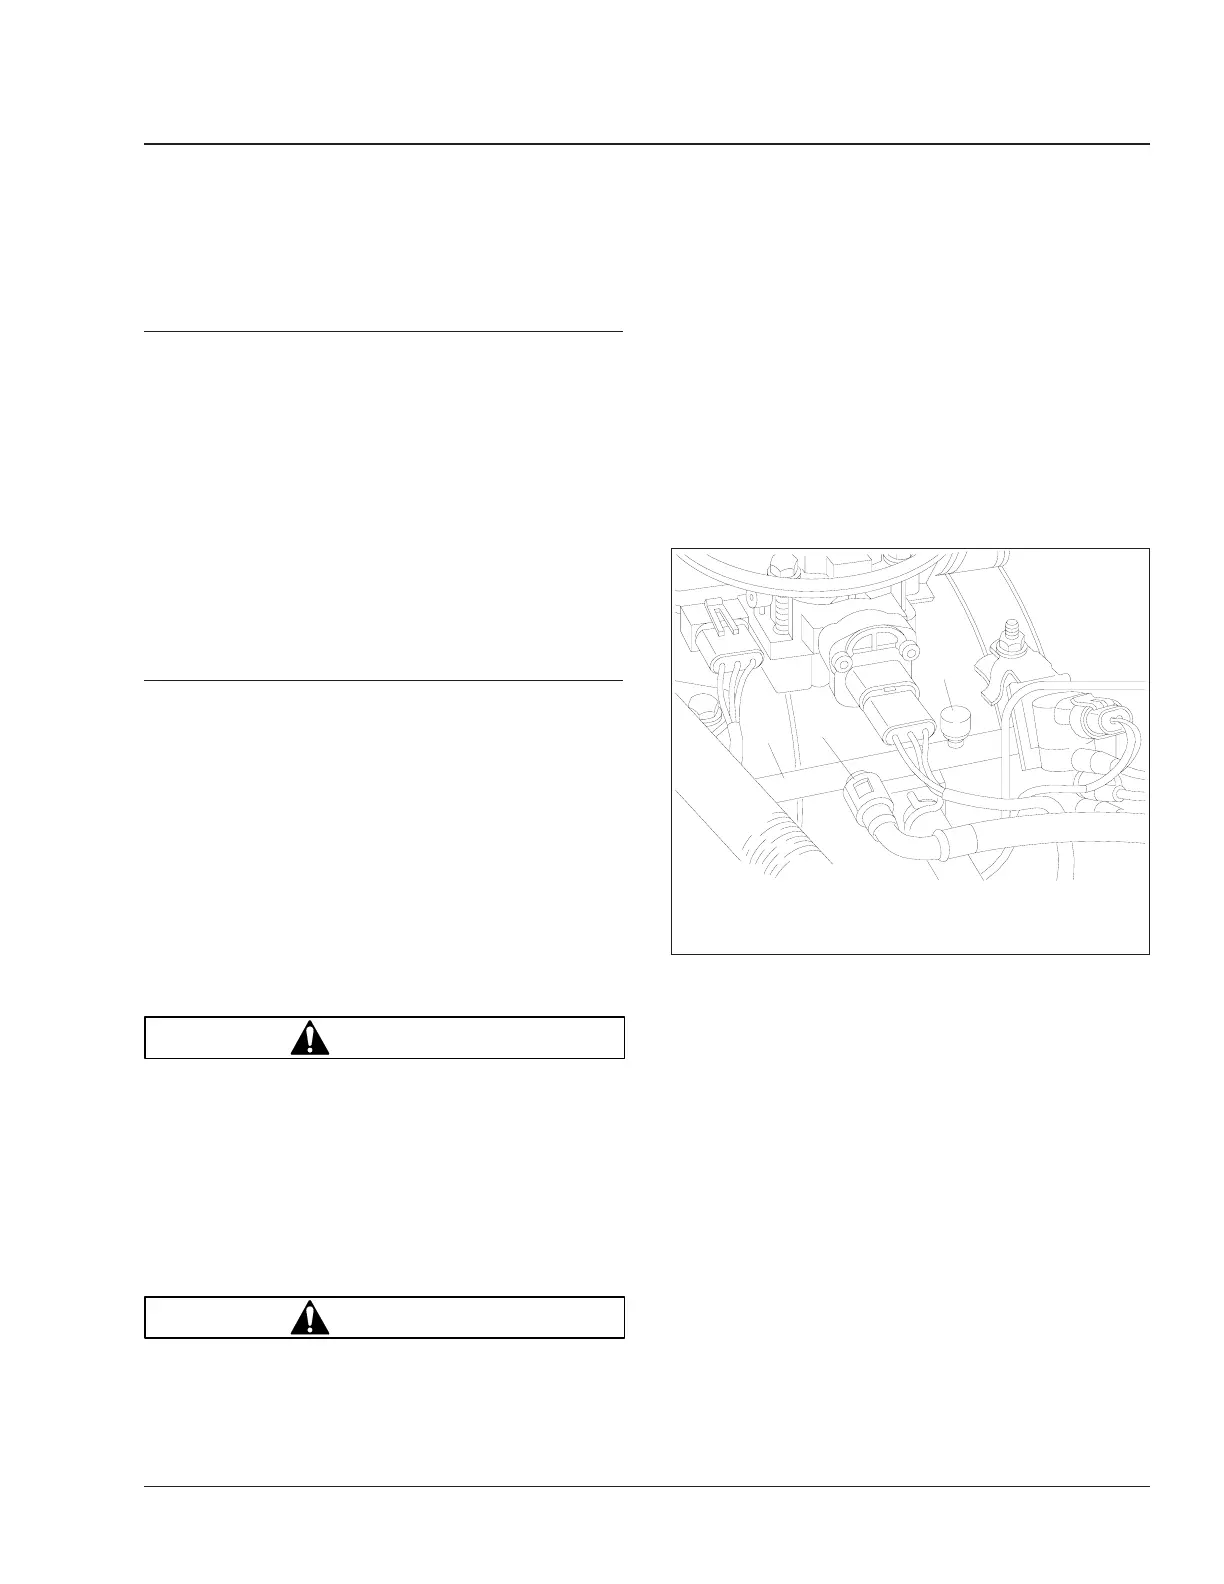
3.2 Unscrew the protective plastic cap from
the pressure test port on the fuel rail. See
Fig. 1, Ref. 3.
3.3 Obtain a Kent-Moore fuel pressure gauge
tool set (#5069), or equivalent tool. Re-
move the gauge from the hose. Place
one end of the hose into an approval
gasoline container. See Fig. 2.
IMPORTANT: Do not allow fuel to spill onto
the engine intake or exhaust manifolds.
Place a shop towel under and around the
pressure test port when the pressure is re-
leased from the fuel rail.
3.4 Place a shop towel under the test port,
then screw the other end of the hose onto
the test port. Allow the fuel to flow into
the gasoline container until fuel pressure
is completely released.
f010914
03/17/95
1
2
3
1. Fuel Rail
2. Fuel Supply Line
3. Fuel Pressure Test Port Protective Cap
Fig. 1, Fuel Pressure Test Port
Fuel 47
Business Class Trucks Maintenance Manual, January 1998 47/1