4.2 If the fluid is hot, any level within the OK
band (see Fig. 13) is satisfactory. If the
level is below the OK band, use a funnel
to add just enough fluid to bring the level
up to the MAX mark. Do not overfill.
4.3 If fluid is above the MAX mark, drain off
any excess fluid at one of the cooler
lines. If the cooler lines are too hot, use a
suction gun and flexible tubing with a di-
ameter of 1/8 inch to 3/16 inch (3 mm to
4.75 mm).
NOTE: See Table 6 for approved transmission
lubricants, and Table 7 for lubricant capacities.
5. To prevent dirt and water from entering the trans-
mission, be sure the dipstick cap is properly
seated.
6. When the fluid level is correct, shut down the
engine and release the parking brake.
Approved Chrysler Transmission Lubricants
Lubricant Type
Temperature
in °F (°C)
SAE
Viscosity
Mopar ATF Plus, Type 7176 — —
Table 6, Approved Chrysler Transmission Lubricants
Chrysler Transmission Lubricant Capacities
Transmission Model
Refill Capacity in
Quarts (liters)
46RH (Full Capacity) 10.9 (10.3)
46RH (Fill Amount After Fluid
Change)
2.0 (1.9)
46RH (Fill Amount After Overhaul) 6.0 (5.7)
Table 7, Chrysler Transmission Lubricant Capacities
26–07 Chrysler Transmission
Band Adjusting
Front Band Adjusting
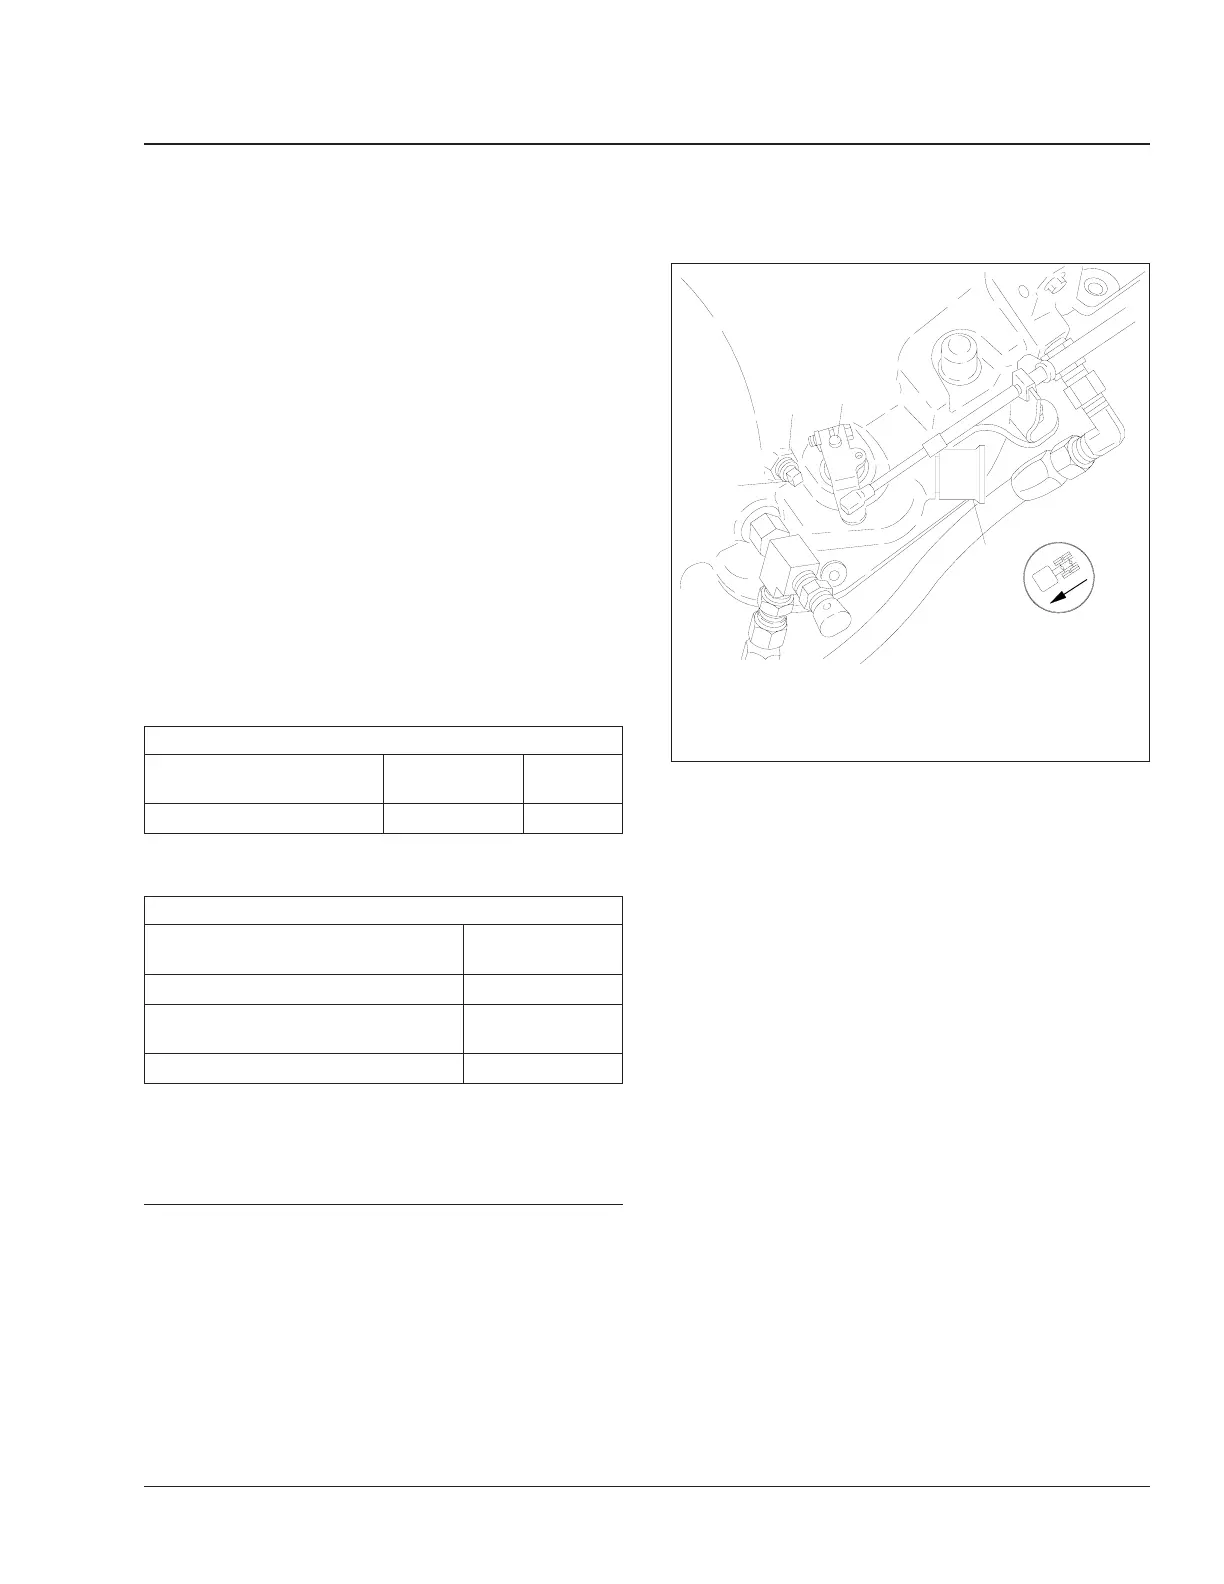
The front (kickdown) band adjusting screw is located
on the left-hand side of the transmission case above
the manual lever shaft and the park/neutral position
switch. See Fig. 14.
1. Raise the vehicle.
2. Loosen the locknut on the front band adjusting
screw.
3. Back off the locknut three to five turns. Make
sure the adjusting screw turns freely in the trans-
mission case. If necessary, apply lubricant to the
screw threads.
4. Set the adjusting screw. To turn the adjusting
screw, use a 5/16-inch 8-point socket ona0to
100 lbf·in (0 to 1100 N·cm) torque wrench.
4.1 Tighten the adjusting screw 72 lbf·in (800
N·cm).
4.2 Back off the adjusting screw 2-7/8 turns.
5. Holding the adjusting screw in position, tighten
the locknut 30 lbf·ft (41 N·m).
6. Lower the vehicle.
Rear Band Adjusting
The rear (low-reverse) band adjusting screw is lo-
cated on the lower surface of the valve body. It is
accessible only when the oil pan and filter are re-
moved. See Fig. 15.
1. Raise the vehicle.
f260303
1
12/13/94
2
3
4
1. Front Band Adjusting Screw
2. Locknut
3. Manual Lever Shaft
4. Park/Neutral Position Switch
Fig. 14, Front Band Adjusting Screw, Chrysler
Transmission 26
Business Class Trucks Maintenance Manual, February 2003 26/15