20–03 Fan Clutch Checking
(Noise Emission
Control)
Eaton Viscous Fan Clutch
CAUTION
If the fan drive assembly is damaged, replace the
unit as soon as possible. Operating a seized or
otherwise damaged clutch reduces fuel economy,
and could cause serious engine damage.
See Group 20 of the
Business Class
®
Trucks Ser-
vice Manual
for replacement instructions.
1. With the engine off, rotate the fan at least one
full turn by hand. It should have a smooth,
steady drag. If it does not, replace the fan clutch.
2. Check for physical damage to the fan or fan
shroud.
3. At the fan clutch mounting:
3.1 Check for correct drive belt alignment and
tension. For specifications, see Group 01
of the
Business Class
®
Trucks Service
Manual
3.2 Check for wear of the fan clutch bearings.
There should be no side-to-side or in-
and-out movement of the fan clutch.
3.3 Do all of the checks in Section 20.02 of
the
Business Class
®
Trucks Service
Manual
.
Horton Advantage
®
Fan Clutch
NOTE: If any part of the fan clutch needs to be
repaired or replaced, after performing the
checks below, see Group 20 of the
Business
Class
®
Trucks Service Manual
.
1. Disconnect the electrical cables from the battery.
Drain all air from the air system. If equipped with
an air starter, drain the air starter reservoir.
WARNING
If the engine starts during this procedure, the fan
could cause personal injury. If the vehicle is
equipped with an air starter, be sure that the air
starter reservoir is drained.
2. Inspect the electrical connections and wires to
the fan clutch solenoid. Secure the connection if
loose; replace wires and connectors if damaged.
3. Clean the fan clutch air solenoid valve filter, if
equipped.
3.1 Unscrew the fan clutch solenoid valve air
filter assembly and remove the filter ele-
ment.
3.2 Clean the filter element with cleaning sol-
vent.
3.3 Reassemble the clutch valve solenoid air
filter assembly and install on the vehicle.
4. Visually check the fan for bent, cracked, or dam-
aged blades. Replace if damaged. Check for ad-
equate clearance between the fan and other
components.
5. Check the fan belt for wear, tension, and align-
ment. Correct if necessary.
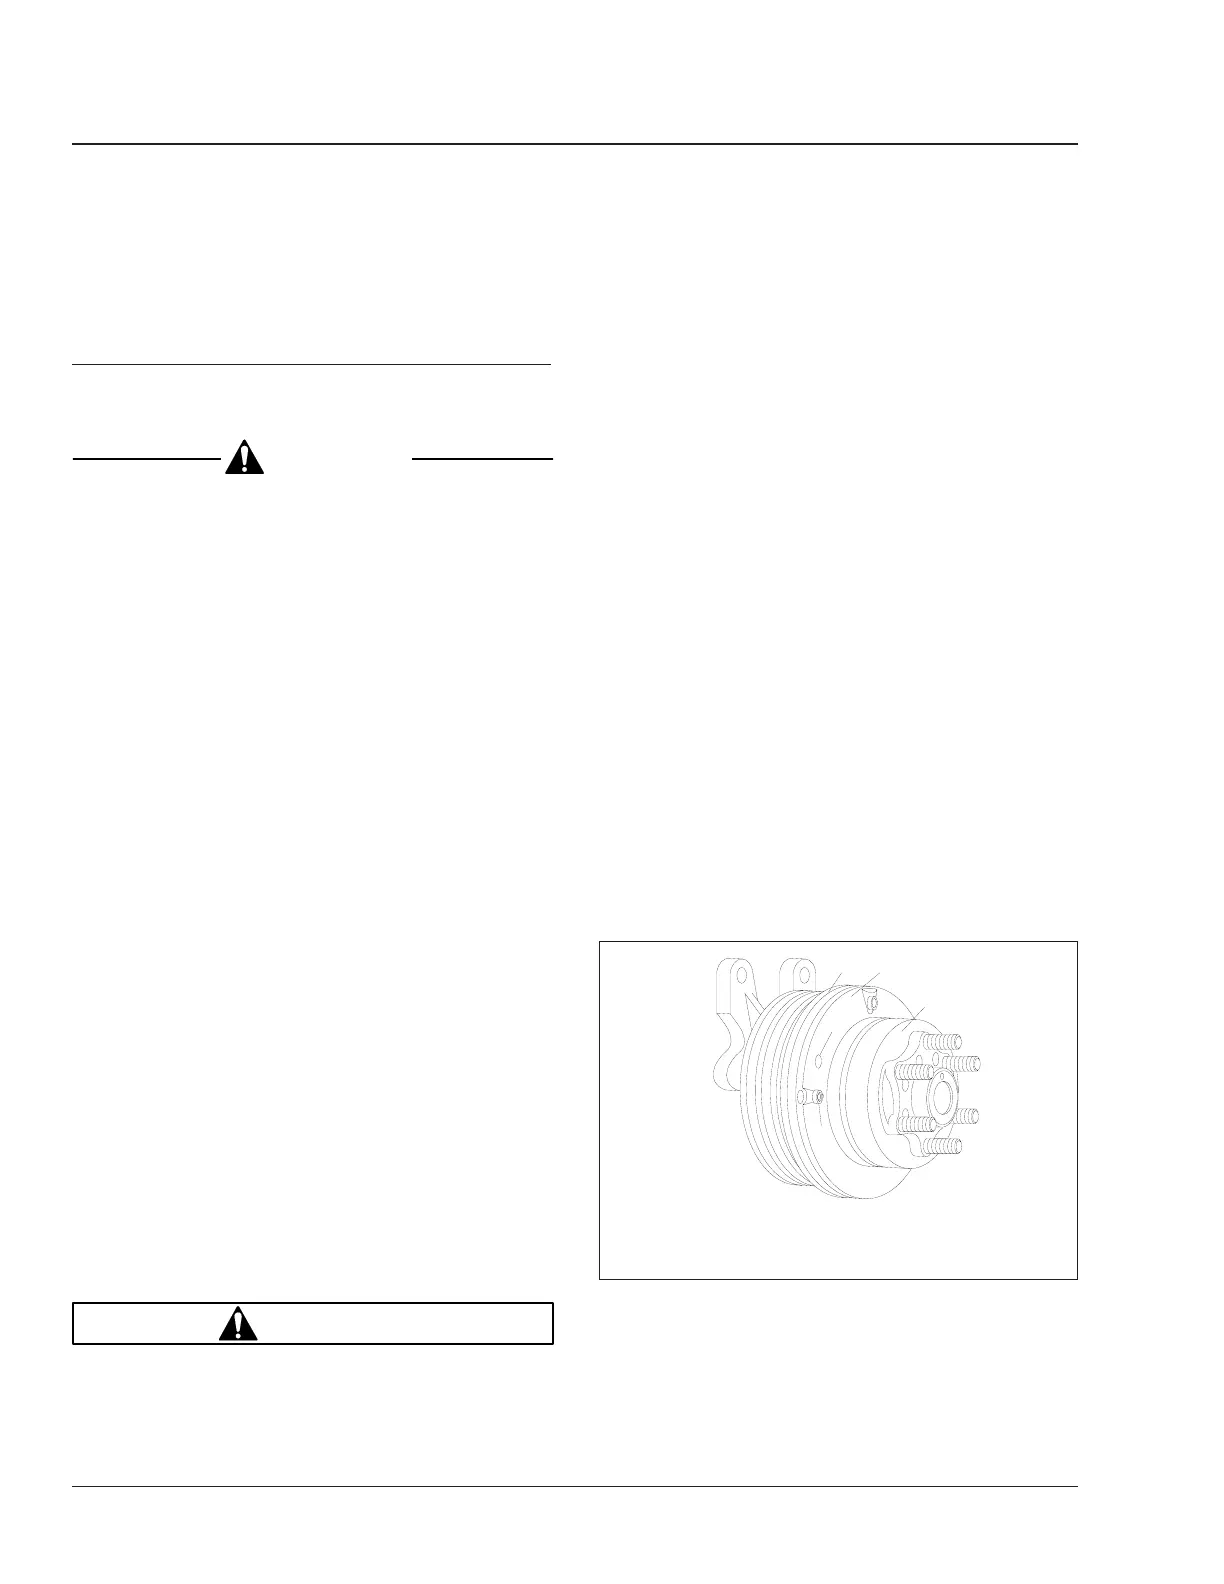
6. Check for wear on the friction facing. See Fig. 5.
Replace the friction facing if it is worn to a 1/16-
inch (1.6-mm) thickness or less. Also check the
facing for signs of oil contamination or burn
marks. If evidence of oil or burn marks are
found, replace the friction facing.
7. Connect the battery cables. Start the engine, and
charge the air system to 120 psi (827 kPa). Shut
f200290
1
2
08/08/94
3
4
5
1. System Sentry
®
Fuse
2. Safeguard Hole
3. Friction Facing
4. Piston Friction Disc
5. Air Chamber
Fig. 5, Horton Advantage Fan Clutch
Engine Cooling/Radiator20
Business Class Trucks Maintenance Manual, August 200320/4