7
Circuit Protection
As a protection against surcharge, a 15 amp, 120 volt fuse is provided for each of the electric outlet(s) (2 max.) located on top of
the control panel. To access the fuse(s) raise the control panel cover. Models with no electric outlet have no fuse.
*GOOD
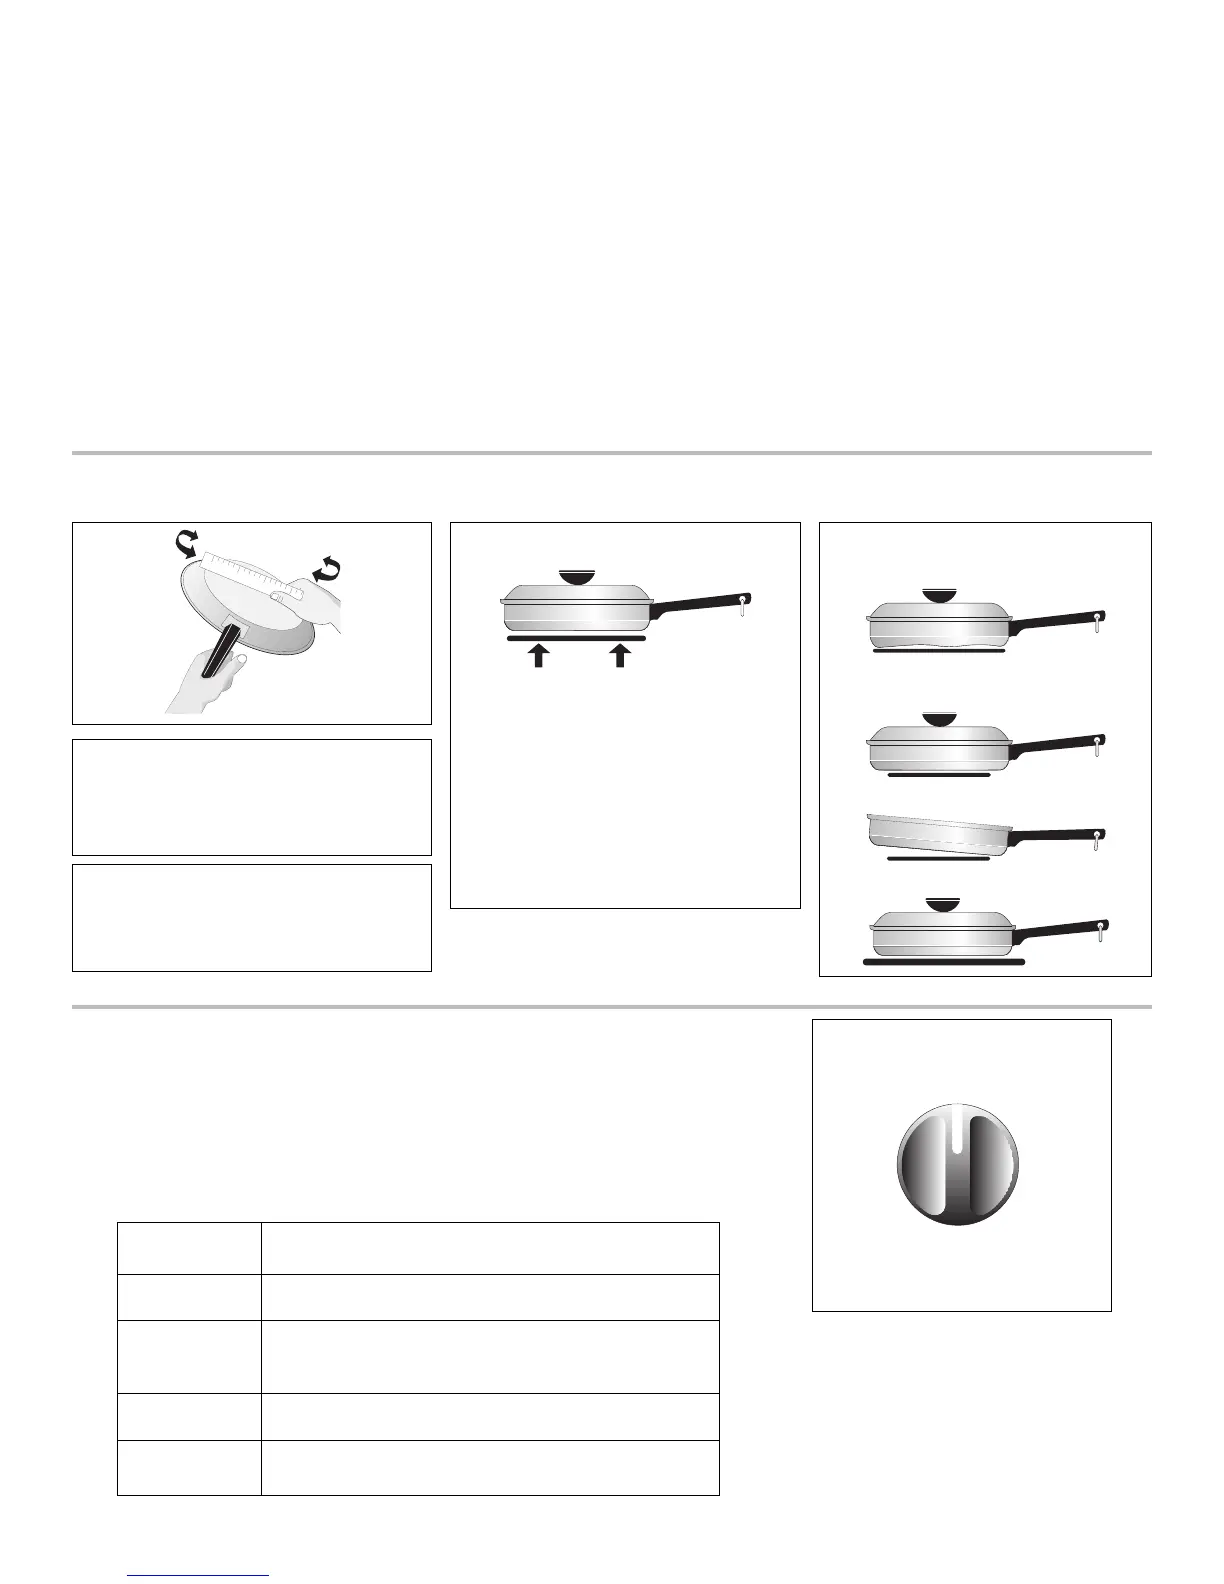
• Flat bottom and straight sides.
• Tight fitting lids.
• Weight of handle does not tilt pan. Pan
is well balanced.
• Pan sizes match the amount of food to
be prepared and the size of the surface
element.
• Made of material that conducts heat
well.
• Easy to clean.
POOR
• Curved and warped pan bottoms.
• Pan overhangs unit by more than 2.5
cm (1”).
• Heavy handle tilts pan.
• Pan is smaller than element.
* Specialty pans such as lobster pots, griddles
and pressure cookers may be used but must
conform to the above recommended cook-
ware requirements.
Pans should have flat bottoms that make
good contact with the entire surface ele-
ment. Check for flatness by rotating a ruler
across the bottom. There should be no
gaps between the pan and ruler.
Note: Always use a utensil for its intended
purpose. Follow manufacturer’s instruc-
tions. Some utensils were not made to be
used in the oven or on the cooktop.
Selecting Surface Cooking Utensils
For best results and energy conservation, choose cooking utensils that have these characteristics:
Models with Touch Pad Control (only)
NOTE: When the oven is in a baking, convection baking, broiling or self-cleaning operation, a cooling fan may automatically
turn on and off to cool internal parts. It is normal and the fan may continue to run even after oven is turned off.
Indicator Light
Some models have an indicator light for each heating unit, other models have an indicator light for each pair of heating units. Some
models have indicator lights only with the warmer zone and warmer drawer.
The indicator light glows as soon as a heating unit is turned on. Check if the indicator light glows when the control knob of the
individual heating unit is turned on. If the knob is set to a very low temperature setting, the indicator may glow and yet, the heating
unit may not be heating at all. If this happens, turn the knob to a higher setting until the heating unit comes on.
When cooking is finished, a glance at the indicator lights is an easy check to be sure all the control knobs have been turned to OFF.
Setting Surface Controls (some models)
1. Place the pan on the surface element.
2. Push in and turn the surface element control knob to desired setting.
3. The surface signal light will glow when one or more elements are turned on.
Always turn the element off before removing the pan.
The suggested settings found in the chart below are based on cooking inmedium-
weight aluminum pans with lids. Settings may vary when using other types of pans.
OFF
HI
LO
19
28
37
46
5
Note: The size and type of utensil
used, and the amount and type of
food being cooked will influence the
setting needed for best cooking re-
Setting
MAX
MEDIUM
MEDIUM LOW
MIN
Type of Cooking
Start most foods, bring water to a boil, pan broiling.
Maintain a slow boil, thicken sauces and gravies,
steam vegetables.
Keep foods cooking, poach, stew.
Keep warm, melt, simmer.
 Loading...