SMALL CO
2
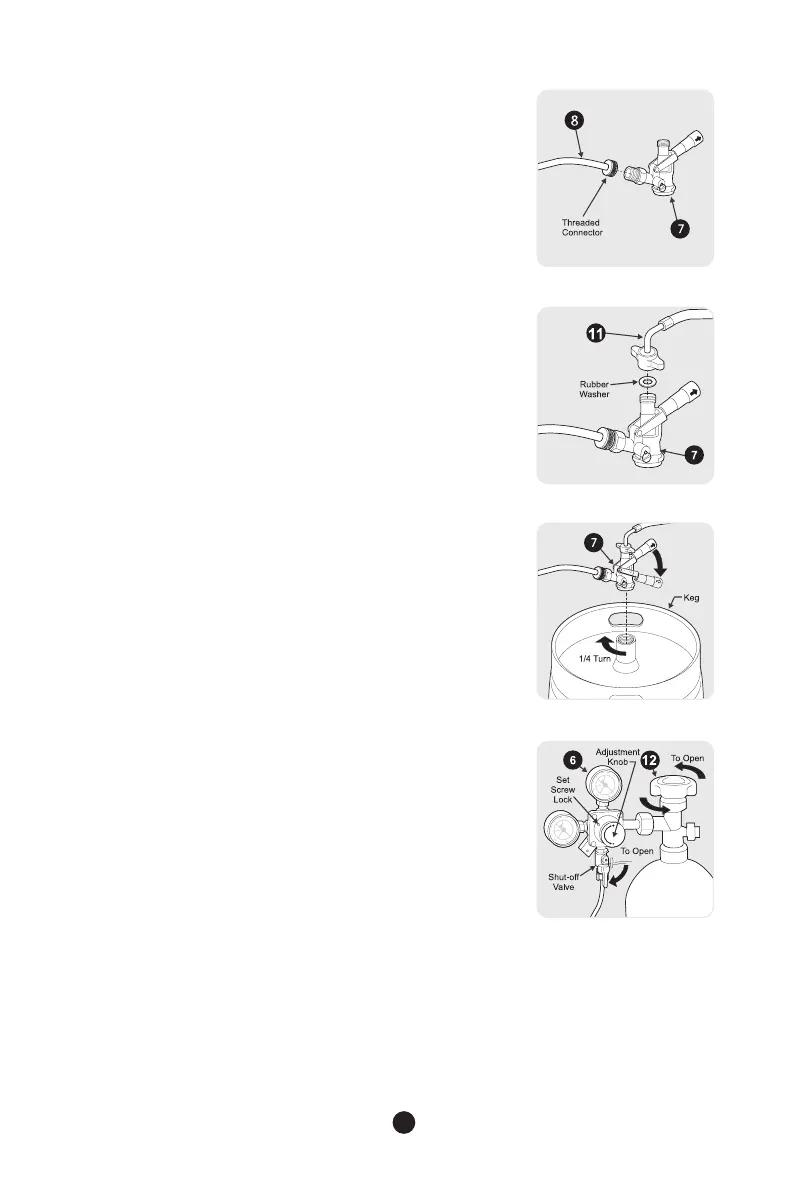
HOSE TO COUPLER CONNECTION
• Secure other end of small hose (8) to the threaded
end of keg coupler (7) as shown. Be sure to fully
tighten fitting.
CLEAR HOSE TO COUPLER CONNECTION
Place one of the supplied rubber washers inside
the wing nut on the one end of the clear hose
(beverage delivery line) and attach to keg coupler
(7). Be sure to tighten the nut securely to prevent
leakage. DO NOT overtighten. Overtightening may
damage the gasket in the nut.
COUPLER TO KEG INSTALLATION
• Align locks on keg coupler (7) with housing on
top of keg and push down on the keg coupler (7).
Make sure top handle is in the up position.
• Turn the tap head handle clockwise 1/4 turn. The
tap head is now secured to the keg.
• Pull the tap handle out and push down until it locks
into place to open the port in the keg.
DELIVERY HOSE PRESSURIZATION
• Open the CO
2
canister valve all the way by turning
counterclockwise until it stops. This valve seals
at both the fully open and fully closed positions.
Failure to completely open or close the valve could
result in premature loss of CO
2
pressure.
• Open the regulator shut-off valve by moving it to
the 6 o’clock position.
• Check gauge pressure. Adjust the regulator
adjustment knob Knob as necessary until the pressure
reads between 12 to 14 psi. You may first need to
loosen set screw located behind knob. After setting
regulator to correct pressure, set screw may be retightened
to lock knob in place.
NOTE: Depending on your choice of beer, you may require a
different keg coupler (7). Check with your local beer
distributor to determine which type of system you need, and
order additional keg couplers as needed.
8