EasyManua.ls Logo

Frigidaire FAH126R2T User Manual

Frigidaire FAH126R2T
11 pages
To Next Page IconTo Next Page
Page #1 background imageLoading...
Page #1 background image
Do This First
(for existing sleeve)
Note that the air conditioner dimensions are: 24"wide,
14
1
2
"high, and 18
1
2
"deep (without front). Install Air
Conditioner according to these installation instructions
to achieve the best performance. Save these installation
instructions for future reference.
Items in Kit
You may not need all parts in the kit. Discard unused
parts.
Qty.
Tapered Spacer Blocks 17"Long 2
Centering/Support Blocks 4
1
2
"x 3
1
2
"x 1
1
2
" 2
Plastic Divider 1/8” x 4
1
2
"x 14
1
2
" 1
Stuffer Seal 1"x 1
1
2
"x 84" 1
Seal 1
1
2
"x 1
1
2
"x 26
1
2
" 2
Seal 1
1
2
"x 1
1
2
"x 14" 2
Seal 1
1
2
"x 3/8"x 26
1
2
" 2
Seal 1
1
2
"x 3/8"x 14" 2
Seal 1” x 3/4"x 14" 1
Trim Frame (side legs) 2
Trim Frame (top & bottom legs) 2
Ground Wire (green) 1
Nut for grounding screw 1
Grounding Screw 1
Grille (plastic) 1
Nuts (plastic) 4
Screw w/washer 4
How to Install
1. Identify the wall-sleeve brand for your installation,
from the chart below.
Brand
Wall Sleeve Dimensions
(inches)
W
idth Height Depth
White-Westinghouse
Frigidaire 25
1
2
15
1
4
16, 17
1
2
Carrier (52F Series)
}
or 22
General Electric/
Hotpoint 26 15
5
8
16
7
8
Whirlpool 25
7
8
16
1
2
17
1
8
or 23
Fedders/Emerson 27 16
3
4
16
3
4
or 19
3
4
Sears/Kenmore 25
3
4
16
7
8
18
5
8
Emerson/Fedders 26
3
4
15
3
4
15
Carrier (51S Series) 25
3
4
16
7
8
18
5
8
Friedrich 27 16
3
4
16
3
4
NOTE:All wall sleeves used to mount the new Air
Conditioner must be in sound structural condition and
have a rear grille that securely attaches to sleeve, or
rear flange that serves as a stop for the Air Conditioner.
CAUTION: When installation is complete, replacement
unit MUSThave a rearward
slope as shown.
2. Remove old Air Conditioner from wall sleeve and
prepare wall sleeve as follows:
— Clean interior (do not disturb seals).
Wall sleeve must be securely fastened in wall before
installing Air Conditioner. Drive more nails or screws
through sleeve, into wall, if needed.
— Repair paint if needed.
3. If not existing, drill a 3/16"clearance hole for ground-
ing screw through left side of wall sleeve, in a clear area
about 3 inches maximum (to suit) back from front edge
of sleeve as shown below. Next attach ground wire
inside sleeve, using grounding screw and nut. Pull loose
end of ground wire out front of sleeve, and temporarily
bend it down and around lower edge of sleeve.
Wall sleeve to unit
sleeve grounding
4. Prepare the wall sleeve for installation of the new unit
per the following Brand instructions.
#1 Emerson 15"Deep
#2 Fedders 19
3
4
"Deep
#3 Fedders or Friedrich 16
3
4
"Deep
#4 General Electric/Hotpoint 16
7
8
"Deep
#5 Sears or Carrier (51S Series) 18
5
8
"Deep
#6 Whirlpool 17
1
8
"Deep
#7 Whirlpool 23"Deep
#8 White-Westinghouse/Frigidaire/ 16"+ 17
1
2
"Deep
Carrier (52F Series)
#9 White-Westinghouse/Frigidaire 22"Deep
5. Install new unit into wall sleeve.
6. To attach ground wire to the new unit, remove the
screw from the left side front.
7. Assemble and install the
Trim Frame (see instruction).
P/N 66121627
REAR
UNIT
FRONT
LEVEL
1/4” to 5/16”
Wall
Sleeve
3"
Max.
3
/16
"
Hole
1"
8,000-12,000 BTU TTW
Installation Instructions:
1
Question and Answer IconNeed help?

Do you have a question about the Frigidaire FAH126R2T and is the answer not in the manual?

Frigidaire FAH126R2T Specifications

General IconGeneral
TypeWindow Air Conditioner
Cooling Capacity12000 BTU
Voltage115V
Amperage10.8A
Weight75 lbs
Noise Level54 dB
Area to Cool550 sq. ft.
Operating Current10.8A
Power Cord Length6 ft
FeaturesRemote Control
RefrigerantR410A

Summary

General Installation Preparation

Do This First

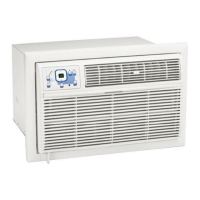
Perform initial checks and preparations for existing sleeves before installing the new unit.

Items in Kit

List of parts included in the installation kit; unused parts may be discarded.

How to Install Overview

General steps for installing the air conditioner, including identifying sleeve brand and basic procedures.

Emerson Wall Sleeve Installation

Redirect Louvers

Adjust rear louvers of the wall sleeve for proper unit fit and airflow.

Attach Seals and Blocks

Apply seals and centering/support blocks inside the wall sleeve as instructed.

Install Unit and Ground Wire

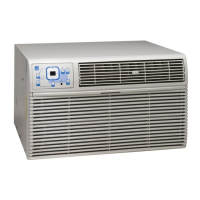
Insert the air conditioner into the sleeve and attach the ground wire.

Install Stuffer Seal and Trim Frame

Apply stuffer seal and assemble/install the trim frame for a finished appearance.

Fedders Wall Sleeve Installation

Redirect Louvers

Adjust rear louvers of the wall sleeve for proper unit fit and airflow.

Attach Blocks and Seals

Apply centering/support blocks and various seals inside the wall sleeve.

Cut and Install Spacer Blocks

Cut and position tapered spacer blocks within the wall sleeve as per diagram.

Install Unit, Ground Wire, and Seal

Insert the air conditioner, attach the ground wire, and apply stuffer seal.

Assemble Trim Frame

Assemble and install the trim frame to complete the installation.

Fedders or Friedrich Wall Sleeve Installation

Redirect Louvers

Adjust rear louvers of the wall sleeve for proper unit fit and airflow.

Attach Blocks and Seals

Apply centering/support blocks and various seals inside the wall sleeve.

Cut and Install Spacer Blocks

Cut and position tapered spacer blocks within the wall sleeve as per diagram.

Attach Seals

Apply specific seals to the louvered panel and inside the grille panel.

Install Unit, Ground Wire, and Seal

Insert the air conditioner, attach the ground wire, and apply stuffer seal.

Assemble Trim Frame

Assemble and install the trim frame to complete the installation.

General Electric/Hotpoint Wall Sleeve Installation

Redirect Louvers

Adjust rear louvers of the wall sleeve for proper unit fit and airflow.

Cut and Install Spacer Blocks

Cut tapered spacer blocks to specified length and install them in the sleeve.

Attach Seals

Apply specified seals to the sleeve and louvered panel.

Install Unit, Ground Wire, and Seal

Insert the air conditioner, attach the ground wire, and apply stuffer seal.

Assemble Trim Frame

Assemble and install the trim frame to complete the installation.

Sears or Carrier (51S Series) Wall Sleeve Installation

Redirect Louvers

Adjust rear louvers of the wall sleeve for proper unit fit and airflow.

Attach Spacer Blocks

Attach the specified tapered spacer blocks to the inside of the wall sleeve.

Attach Seals

Apply specified seals to the wall sleeve and louvered panel.

Install Unit, Ground Wire, and Seal

Insert the air conditioner, attach the ground wire, and apply stuffer seal.

Assemble Trim Frame

Assemble and install the trim frame to complete the installation.

Whirlpool Wall Sleeve Installation

Redirect Louvers

Adjust rear louvers of the wall sleeve for proper unit fit and airflow.

Attach Spacer Blocks

Attach the specified tapered spacer blocks to the inside of the wall sleeve.

Attach Seals

Apply specified seals to the wall sleeve, louvered panel, and grille.

Install Unit, Ground Wire, and Seal

Insert the air conditioner, attach the ground wire, and apply stuffer seal.

Assemble Trim Frame

Assemble and install the trim frame to complete the installation.

Whirlpool (23" Deep) Wall Sleeve Installation

Redirect Louvers

Adjust rear louvers of the wall sleeve for proper unit fit and airflow.

Attach Blocks and Spacer Blocks

Apply foam blocks and tapered spacer blocks inside the wall sleeve.

Attach Seals and Divider

Apply seals to the grille panel and install the plastic divider.

Install Unit, Ground Wire, and Seal

Insert the air conditioner, attach the ground wire, and apply stuffer seal.

Assemble Trim Frame

Assemble and install the trim frame to complete the installation.

White-Westinghouse/Frigidaire/Carrier (52F Series) Installation

Install Plastic Grille Panel

Install the plastic grille panel if the sleeve lacks a rear grille or panel.

Attach Seals

Cut and attach specified seals to the wall sleeve and grille panel.

Install Unit, Ground Wire, and Seal

Insert the air conditioner, attach the ground wire, and apply stuffer seal.

Assemble Trim Frame

Assemble and install the trim frame to complete the installation.

White-Westinghouse or Frigidaire (22" Deep) Installation

Install Plastic Grille Panel

Install the plastic grille panel if the sleeve lacks a rear grille or panel.

Attach Blocks, Seals, and Divider

Apply foam blocks, seals, and cut/install plastic divider as instructed.

Install Unit, Ground Wire, and Seal

Insert the air conditioner, attach the ground wire, and apply stuffer seal.

Assemble Trim Frame

Assemble and install the trim frame to complete the installation.

Trim Frame Assembly

Assemble Trim Frame

Assemble the four parts of the trim frame by connecting the side legs.

Install Trim Frame

Slide the assembled trim frame over the unit until flush with the wall sleeve.
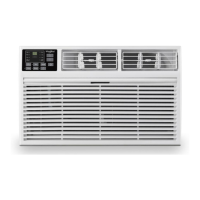
Related product manuals