EasyManua.ls Logo

Frigidaire FAK124Q1V2 User Manual

Frigidaire FAK124Q1V2
10 pages
To Next Page IconTo Next Page
Page #1 background imageLoading...
Page #1 background image
Electrical Shock and Personal Injury Hazard
Electrical ground is required on this appliance.
DO NOT ground to a gas line.
If
cold water pipe is interrupted by plastic,
non-m
etallic gaskets, or other insulating
materials, DO NOT use for grounding.
Check
with a qualified electrician if you are in
doub
t as to whether the appliance is properly
grounded.
DO NOT modify power supply cord plug. If it
doe
s not fit outlet, have a proper outlet
installed
by a qualified electrician.
DO NOT have a fuse in the neutral or
grounding circuit. A fuse in the neutral, or
grounding circuit could result in an elecrtrical
shock.
DO NOT use an extension cord with this
applian
ce.
Failure to follow these instructions could result in
electr
ical shock, serious injury, or death.
WARNING
Installation Instructions
For Slider Casement Air Conditioners
NOTE: These instructions describe installation in a typical wood framed window with a wood SLIDE-BY sash,
or installation in a metal CASEMENT window. Modification may be necessary when installing in windows made
differently than those shown in these instructions.
A high window accessory kit is available for window heights up to 62" (1575mm). Part # EA103W.
Meeting Electrical Requirements
OBSERVE ALL LOCAL GOVERNING CODES
AND ORDINANCES.
DO NOT, UNDER ANY CIRCUMSTANCES,
REMOVE THE POWER SUPPLY CORD
GROUNDING PRONG.
ELECTRICAL REQUIREMENTS
A 115 volt (103.5 minimum, 126.5 maximum), 60
Hertz, AC only, 15 ampere fused electrical supply
is required. A time delay fuse or time delay circuit
breaker is also required. A separate circuit, serving
only this appliance, MUST be provided.
NOTE: If codes permit, and a separate
grounding wire is used; it is recommended that a
qualified electrician determine that the grounding
path is adequate and not interrupted by plastic,
non-metallic gaskets, or other insulating materials.
RECEPTACLE WIRING
Receptacle wiring should be a minimum of 14
gauge. Use copper wire only. It is your responsibility
to provide proper and adequate receptacle wiring,
installed by a qualified electrician.
P/N 220215A055
SUBJECT PAGE
Mee
ting Electrical Requirements 1
Elec
trical Connection 2
Preparing
For Installation 2
Installing Unit in a Sliding Window 4
Al
ternate Window Jamb Applications 7
Installing Unit in a Casement Window 8
TABLE OF CONTENTS

Other manuals for Frigidaire FAK124Q1V2

Question and Answer IconNeed help?

Do you have a question about the Frigidaire FAK124Q1V2 and is the answer not in the manual?

Frigidaire FAK124Q1V2 Specifications

General IconGeneral
BrandFrigidaire
ModelFAK124Q1V2
CategoryAir Conditioner
LanguageEnglish

Summary

Meeting Electrical Requirements

Electrical Grounding and Safety

Covers electrical grounding requirements, proper plug use, and avoiding extension cords.

Electrical Supply Requirements

Details voltage, Hertz, AC requirements, fused supply, time delay, and separate circuits.

Grounding Prong and Receptacle Wiring

Emphasizes not removing the grounding prong and proper receptacle wiring with copper wire.

Electrical Connection and Preparation

Recommended Grounding Method

Explains the 3-prong grounding plug, receptacle requirements, and electrician consultation.

Installation Tips and Tools

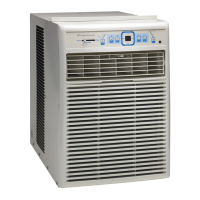
Provides tips for window types and lists necessary tools for installation.

Installation Safety Precautions

Warns about unit weight, lifting, checking window condition, codes, handling sharp fins, and falling.

Window Sizing and Installation Kit

Installation Kit Contents Overview

Lists all components included in the installation kit for assembly.

Window Dimension Requirements

Specifies minimum and maximum width/height for window installation.

Installing Unit in a Sliding Window

Attach Support Brace to Platform

Details attaching the support brace to the platform using bolts for a 45-degree angle.

Marking Window Jamb for Platform

Instructs to mark a line 8-11/16 inches from the window jamb.

Center and Drill Platform Holes

Guides centering the platform assembly and drilling holes in the track or stool.

Platform Mounting Safety Caution

Warns about secure attachment of wood stool/track to prevent damage.

Sliding Window Installation Steps

Apply Track Seal and Attach Board

Covers applying track seal and attaching siding-protection board.

Position and Level Platform Assembly

Details placing, attaching, adjusting slope, and leveling the platform.

Measure and Mark Window Panel Height

Instructs measuring the window opening height and marking the plastic panel.

Sliding Window Unit Assembly

Prepare Window Panel and Channels

Covers cutting the plastic panel, fastening side channels, and applying seals.

Removing the Front Panel

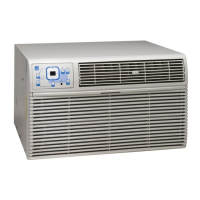
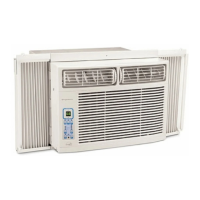
Details the process for safely removing the front panel of the AC unit.

Placing AC Unit in Window

Guides positioning the main AC unit into the prepared window opening.

Sliding Window Final Assembly

Securing Inner Sash and Safety Bracket

Covers securing the inner sash, installing the safety bracket, and adding seals.

Replacing the Front Panel

Explains how to reattach the front panel after other installation steps.

Alternate Window Jamb Applications

Adapting for Windows Without Stops

Provides methods for installing in windows lacking flanges or wood stops using angles.

Installing the Unit in a Casement Window

Casement Window Preparation Notes

Advises on opening the window, removing the crank handle, and potential sash removal.

Attach Support Brace for Casement

Details attaching the support brace to the platform for casement windows.

Drill Pilot Hole in Casement Jamb

Guides drilling a pilot hole in the window jamb for the platform assembly.

Apply Track Seal to Bottom Jamb

Instructs applying the track seal to the outside of the bottom window jamb.

Screw Platform Assembly to Jamb

Covers screwing the platform assembly to the casement window jamb.

Casement Window Installation Steps

Adjust Platform for Water Drainage

Details adjusting the platform slope for proper water drainage from the unit.

Attach Siding Protection and Prepare Panel

Covers attaching protection boards, measuring, and cutting the plastic window panel.

Mount Panel Frame and Side Channels

Guides fastening side channels and sliding the panel frame assembly into place.

Casement Window Unit Final Assembly

Cut and Apply Side Channel Seal

Details cutting the side channel seal and applying it to the cabinet side channels.

Removing and Replacing Front Panel

Explains how to remove and then reattach the front panel of the air conditioner.

Position and Secure AC Unit

Guides placing the AC unit in the window and securing it with screws.

Related product manuals