Window Mounting
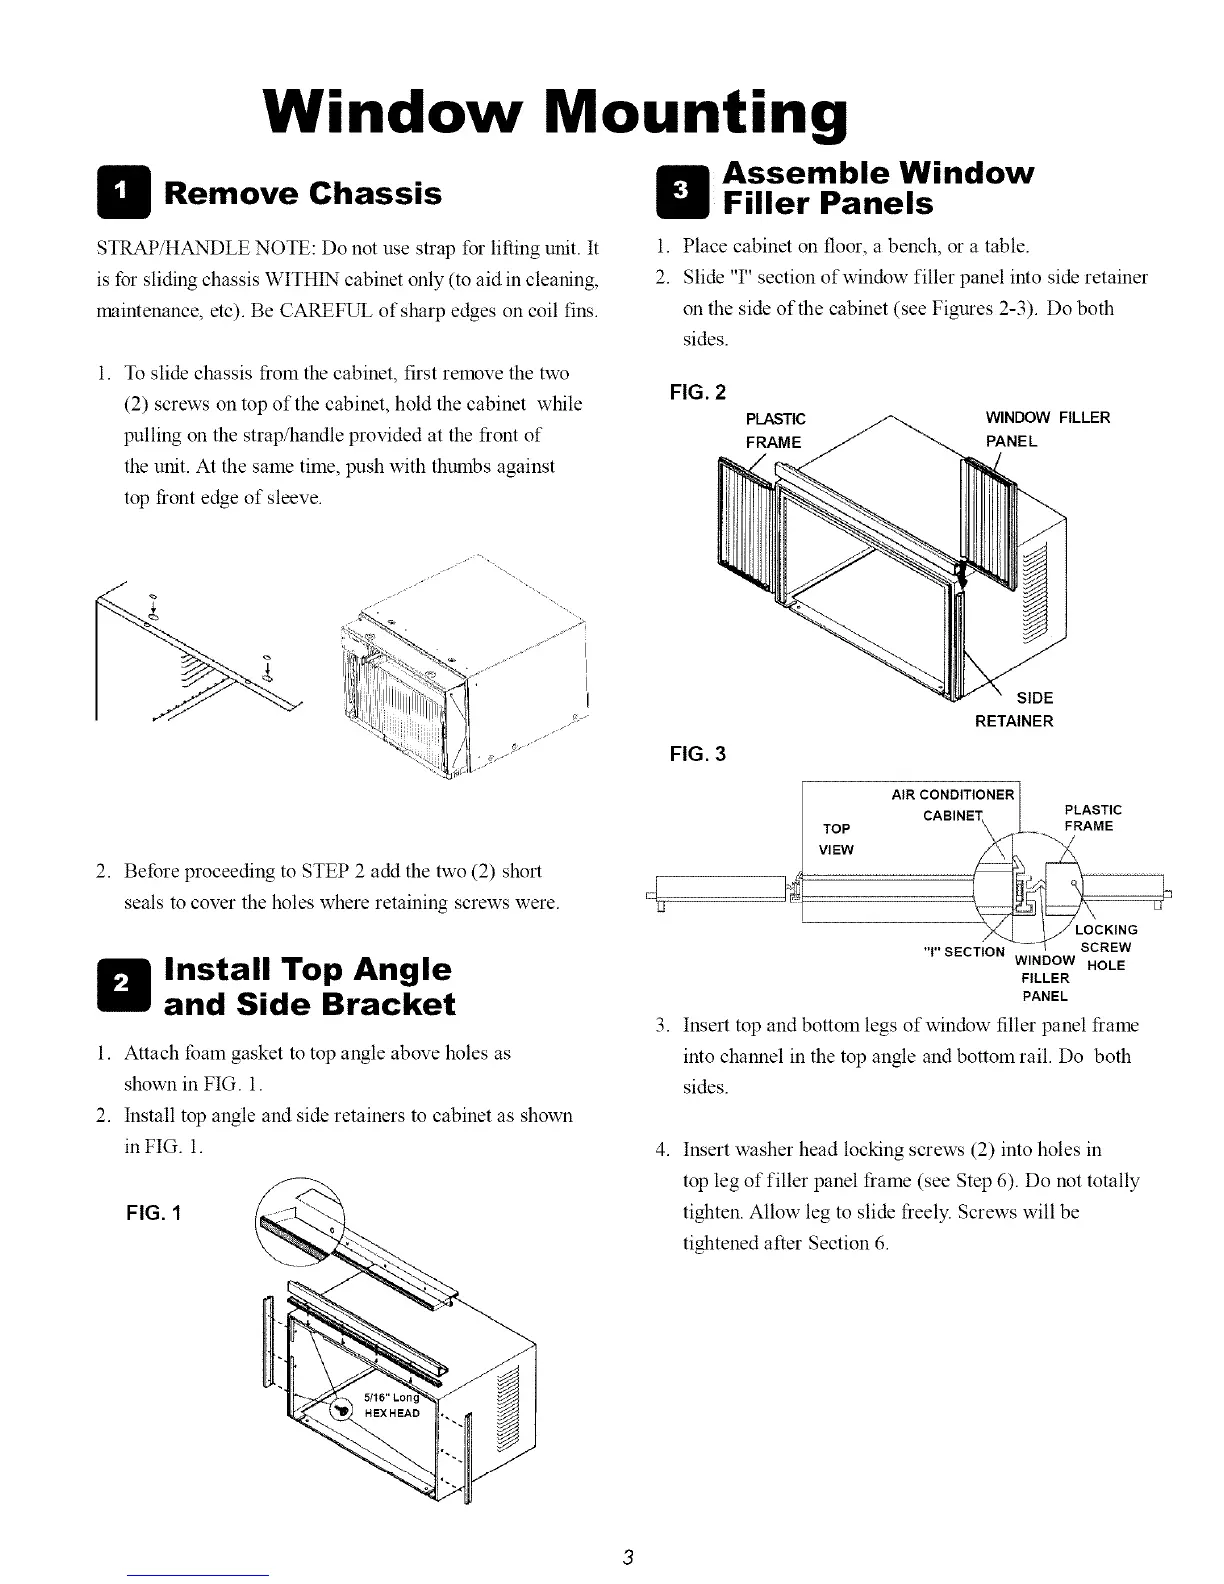
Assemble Window
Remove Chassis
Filler Panels
STRAP/HANDLE NOTE: Do not use strap for lifting unit. It
is for sliding chassis WITHIN cabinet only (to aid in cleaning,
maintenance, etc). Be CAREFUL of sharp edges on coil fins.
1. Place cabinet on floor, a bench, or a table.
2. Slide 'T' section of window filler panel into side retainer
on the side of the cabinet (see Figures 2-3). Do both
sides.
1. To slide chassis from the cabinet, first remove the two
(2) screws on top of the cabinet, hold the cabinet while
pulling on the strap/handle provided at the front of
the unit. At the same time, push with thumbs against
top front edge of sleeve.
FIG. 2
PLASTIC WINDOW FILLER
FRAME PANEL
T'h"_-_ ~_%..... !i
ii:ii!!!!!iiil]'i/i:i['_l I
,= <_ji=t .=
2. Before proceeding to STEP 2 add the two (2) short
seals to cover the holes where retaining screws were.
Install Top Angle
and Side Bracket
1. Attach foam gasket to top angle above holes as
shown in FIG. 1.
2. Install top angle and side retainers to cabinet as shown
in FIG. 1.
FIG. 1
.
FIG. 3
SIDE
RETAINER
AIR CONDITIONER
CABINI _ PLASTI
TOP ...... FRAME
Vl EW
'T' SECTION
WINDOW HOLE
FILLER
PANEL
Insert top and bottom legs of window filler panel frame
into channel in the top angle and bottom rail. Do both
sides.
.
Insert washer head locking screws (2) into holes in
top leg of filler panel frame (see Step 6). Do not totally
tighten. Allow leg to slide freely. Screws will be
tightened after Section 6.