EasyManua.ls Logo

Frigidaire FFEF3012UB - User Manual

Frigidaire FFEF3012UB
2 pages
Print Icon
To Next Page IconTo Next Page
Loading...
SERVICE DATA SHEET
Electric Ranges with ES 100/105 Electronic Oven Control
Electronic
Oven Control
(E.O.C. Rear View)
IMPORTANT
DO NOT REMOVE THIS BAG
OR DESTROY THE CONTENTS
WIRING DIAGRAMS AND SERVICE
INFORMATION ENCLOSED
REPLACE CONTENTS IN BAG
RTD SCALE
Temperature (°F) Resistance (ohms)
32 ± 1.9 1000 ± 4.0
75 ± 2.5 1091 ± 5.3
250 ± 4.4 1453 ± 8.9
350 ± 5.4 1654 ± 10.8
450 ± 6.9 1852 ± 13.5
550 ± 8.2 2047 ± 15.8
650 ± 9.6 2237 ± 18.5
900 ± 13.6 2697 ± 24.4
Resistance
Temperature
Detector
Electronic Oven Control (E.O.C.) Connections (J1)
p/n 316441457 (0606)
NOTICE - This service data sheet is intended for use by persons
having electrical and mechanical training and a level of knowledge
of these subjects generally considered acceptable in the appliance
repair trade. The manufacturer cannot be responsible, nor assume
any liability for injury or damage of any kind arising from the use of
this data sheet.
SAFE SERVICING PRACTICES
To avoid the possibility of personal injury and/or property damage, it is
important that safe servicing practices be observed. The following are
examples, but without limitation, of such practices.
1. Before servicing or moving an appliance remove power cord from
electrical outlet, trip circuit breaker to OFF, or remove fuse.
2. Never interfere with the proper installation of any safety device.
3. GROUNDING: The standard color coding for safety ground wires is
GREEN
or
GREEN WITH YELLOW STRIPES
. Ground leads are not
to be used as current carrying conductors. It is extremely important
that the service technician reestablish all safety grounds prior
to completion of service. Failure to do so will create a potential
safety hazard.
4. Prior to returning the product to service, ensure that:
All electric connections are correct and secure.
All electrical leads are properly dressed and secured away from sharp
edges, high-temperature components, and moving parts.
All uninsulated electrical terminals, connectors, heaters, etc. are
adequately spaced away from all metal parts and panels.
All safety grounds (both internal and external) are correctly and
securely reassembled.
Oven Calibration
Set the electronic oven control for normal baking at 350°F. Obtain an average
oven temperature after a minimum of 5 cycles. Press CANCEL or CLEAR
to end bake mode.
Oven Temperature Adjustment
(some models - do not use Bake or Broil while adjusting the oven
temperature):
1. Press & hold the BAKE key pad and release after the display begins flashing
the factory temperature setting of 00.
Note: If the oven temperature has been previously adjusted from the factory
setting, the current temperature adjusted value will flash in the display instead.
2. You may increase the oven temperature in 5°F increments with each press of
the UP ARROW key pad to a maximum oven adjustment of +35°F. You may also
adjust the oven temperature downward in 5°F increments with each press of
the DOWN ARROW key pad ( total adjustment range of -35 to +35 F. Note: Your
oven control was factory set in the (Fahrenheit) °F Temperature Display Mode.
To change for (Celsius) °C, see Changing the Temperature Display Mode
in the Oven Control Functions section of this Use & Care Manual.
3. If no other key pad is pressed after 5 seconds the display will begin to flash.
4. If you do not want to keep the display adjustment, press the CANCEL or
CLEAR key pad before the oven control beeps. This will cancel the temperature
adjustment procedure. To start this procedure over again begin with step 1
above OR;
5. If you want to keep the adjustment, wait until the display quits flashing and the
oven control beeps once.
6. The oven temperature adjustment has be accepted by the oven control and the
display will return to the time of day.
Notes: The oven temperature adjustment may be made if your oven control has
been set to operate in the (Celsius) °C Temperature Display Mode. In this
case each press of the UP ARROW or DOWN ARROW key pad will adjust in 1°C
increments upward (maximum +18°C) or downward (maximum -18°C), depending
on which arrow key pad is pressed.
Resistance Temperature Detector Scale
Electronic Oven Control (E.O.C.) Fault Code Descriptions (some models-models that display F1 or F3)
Note: Only two fault codes are displayed by this control - F1 or F3. Generally, F1 display implies the electronic oven control itself has detected an internal
malfunction. F3 implies the control has detected a sensor probe failure. In either case, an alarm will accompany a displayed F1 or F3.
1. Shorted keypad.
2. Control's internal checksum may have become corrupted.
3. Control has sensed a potential runaway oven condition. Control
may have shorted relay, RTD sensor probe may have gone bad.
1. Open RTD sensor probe. Note: The EOC will initially display an F1
for this condition. The EOC thinks a runaway oven condition exists.
2. Shorted RTD sensor probe. Note: The F3 for shorted probe should
only occur when the oven is active or when an attempt is made to
enter a mode.
Likely Failure Condition/Cause
Suggested Corrective Action
Fault Code
1. Disconnect power, wait 30 seconds and reapply power. If fault returns
upon power-up, replace EOC.
2. Check RTD sensor probe and replace if necessary. If oven is
overheating, disconnect power. If oven continues to overheat when
the power is reapplied, replace EOC. Severe overheating may require
the entire oven to be replaced, should damage be extensive.
3. Replace EOC.
1. Check resistance at room temperature and compare to RTD sensor
resistance chart. If resistance does not match the chart, replace RTD
sensor probe.
2. Check resistance at room temperature, if less than 500 ohms, replace
RTD sensor probe.
F1
F3
Runaway Temperature.
Shorted Keypad.
Bad Micro Identification.
Bad EEPROM Identification/Checksum error.
Open probe connection.
Shorted Probe connection.
Likely Failure Condition/Cause
Suggested Corrective Action
Fault Code
1. (F10 only) Check RTD Sensor Probe & replace if necessary. If oven is overheating,
disconnect power. If oven continues to overheat when the power is reapplied, replace EOC.
Severe overheating may require the entire oven to be replaced should damage be extensive.
2. (F11 & 13) Disconnect power, wait 30 seconds and reapply power.
3. (F11 & 13) If fault returns upon power-up, replace EOC.
1. (F30 or F31) Check resistance at room temperature & compare to RTD Sensor resistance
chart. If resistance does not match the RTD chart replace RTD Sensor Probe. Check Sensor
wiring harness between EOC & Sensor Probe connector.
2. (F30 or F31) Check resistance at room temperature, if less than 500 ohms, replace RTD Sensor
Probe. Check for shorted Sensor Probe harness between EOC & Probe connector.
F10
F11
F13
F30
F31
Electronic Oven Control (E.O.C.) Fault Code Descriptions (some models-models that display F10, F11, F13, F30 or F31)
Circuit Analysis Matrix
Question and Answer IconNeed help?

Do you have a question about the Frigidaire FFEF3012UB and is the answer not in the manual?

Summary

Service Data Sheet

Safe Servicing Practices

Essential safety guidelines for servicing appliances, covering power, grounding, and connections.

Oven Calibration Procedure

Steps to set the electronic oven control for normal baking at 350°F and calibrate.

Oven Temperature Adjustment

Guide to adjusting oven temperature settings in 5°F increments using arrow keys.

Resistance Temperature Detector Scale

Reference table for RTD resistance values corresponding to specific oven temperatures.

EOC Fault Code Descriptions

Details common Electronic Oven Control fault codes (F1, F3, F10, F11, F13, F30, F31) and troubleshooting.

Circuit Analysis Matrix

Matrix for analyzing oven circuits by correlating functions with EOC relays and checks.

Important Service Information

Critical instruction regarding enclosed wiring diagrams and service information.

General Troubleshooting Diagram

General Troubleshooting Schematic

Wiring schematic for troubleshooting the electronic oven control and components.

Servicing Warning

Important warning to disconnect power before servicing the unit.

Wire Color Code

Reference table for wire colors used in the wiring diagrams and their meanings.

Overview

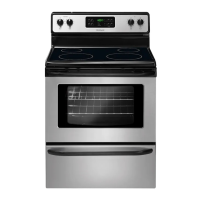
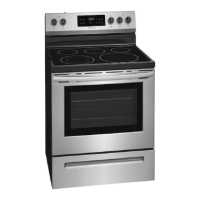
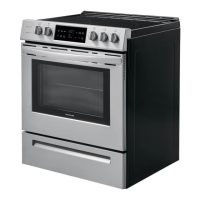
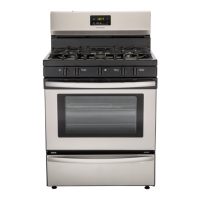
This document describes the Electric Ranges with ES 100/105 Electronic Oven Control, providing essential information for servicing, operation, and troubleshooting. It emphasizes safe servicing practices and offers detailed guidance on oven calibration, temperature adjustment, and fault code interpretation.

Function Description

The Electronic Oven Control (EOC) is the central component managing the oven's functions, including temperature regulation, baking, broiling, and displaying operational status. It interacts with various sensors and heating elements to maintain desired cooking conditions. The control is designed to provide precise temperature management for optimal cooking results. It also incorporates safety features, such as fault code detection, to alert users and technicians to potential issues, preventing runaway temperatures or other malfunctions. The EOC can operate in both Fahrenheit and Celsius temperature display modes, offering flexibility based on user preference.

Usage Features

Oven Calibration:

To ensure accurate temperature control, the oven should be calibrated. This involves setting the electronic oven control to a normal baking temperature of 350°F and obtaining an average oven temperature after a minimum of five cycles. The CANCEL or CLEAR button is used to end the bake mode after calibration.

Oven Temperature Adjustment:

The EOC allows for fine-tuning of the oven temperature to compensate for variations or personal preferences. To adjust the temperature, press and hold the BAKE key pad until the display begins flashing the factory temperature setting of "00." If the temperature has been previously adjusted, the current adjusted value will flash instead.

  • Increasing Temperature: Press the UP ARROW key pad to increase the oven temperature in 5°F increments, up to a maximum adjustment of +35°F.
  • Decreasing Temperature: Press the DOWN ARROW key pad to decrease the oven temperature in 5°F increments, down to a maximum adjustment of -35°F.
  • Temperature Display Mode: The control is factory-set to Fahrenheit (°F). To change to Celsius (°C), refer to the "Changing the Temperature Display Mode" section in the Use & Care Manual.
  • Saving or Cancelling Adjustments: If no key pad is pressed for 5 seconds, the display will flash. To cancel the adjustment, press CANCEL or CLEAR before the control beeps. To save the adjustment, wait until the display stops flashing and the control beeps once. The display will then return to the time of day.
  • Celsius Mode Adjustment: If the oven control is set to Celsius, each press of the UP ARROW or DOWN ARROW key pad will adjust the temperature in 1°C increments, with a maximum range of ±18°C.

Maintenance Features

Safe Servicing Practices:

Prioritizing safety during servicing is crucial to prevent personal injury or property damage. Key practices include:

  • Power Disconnection: Always remove the power cord, trip the circuit breaker to OFF, or remove the fuse before servicing or moving the appliance.
  • Safety Devices: Never interfere with the proper installation or function of any safety device.
  • Grounding: Ensure all safety ground wires (typically GREEN or GREEN WITH YELLOW STRIPES) are correctly reestablished before completing service. Ground leads must not be used as current-carrying conductors. Failure to reestablish grounds creates a potential safety hazard.
  • Electrical Connections: Verify that all electrical connections are correct and secure.
  • Wire Dressing: Ensure all electrical leads are properly dressed and secured away from sharp edges, high-temperature components, and moving parts.
  • Terminal Spacing: All uninsulated electrical terminals, connectors, and heaters must be adequately spaced away from all metal parts and panels.
  • Reassembly: All safety grounds (internal and external) must be correctly and securely reassembled.

Fault Code Descriptions (F1 or F3):

The EOC displays fault codes to indicate specific malfunctions. Only F1 and F3 codes are typically displayed.

  • F1 Fault Code: Generally indicates an internal malfunction within the electronic oven control itself.
    • Likely Causes: Shorted keypad, corrupted control's internal checksum, or the control sensing a potential runaway oven condition (which could be due to a shorted relay or bad RTD sensor probe).
    • Corrective Actions: Disconnect power, wait 30 seconds, and reapply. If the fault persists, replace the EOC. Check and replace the RTD sensor probe if necessary. If the oven is overheating, disconnect power; if it continues to overheat upon power reapplication, replace the EOC. Severe overheating may necessitate replacing the entire oven.
  • F3 Fault Code: Indicates a sensor probe failure.
    • Likely Causes: Open RTD sensor probe (initially displays F1 as the EOC thinks a runaway condition exists) or shorted RTD sensor probe (F3 for shorted probe occurs when the oven is active or an attempt is made to enter a mode).
    • Corrective Actions: Check RTD sensor probe resistance at room temperature against the RTD scale. Replace the probe if the resistance does not match. If resistance is less than 500 ohms, replace the RTD sensor probe.

Fault Code Descriptions (F10, F11, F13, F30 or F31):

Some models may display additional fault codes.

  • F10 (Runaway Temperature):
    • Corrective Actions: Check and replace the RTD Sensor Probe if necessary. If the oven is overheating, disconnect power. If it continues to overheat upon power reapplication, replace the EOC. Severe overheating may necessitate replacing the entire oven.
  • F11 (Shorted Keypad) & F13 (Bad Micro Identification/EEPROM Identification/Checksum error):
    • Corrective Actions: Disconnect power, wait 30 seconds, and reapply. If the fault returns upon power-up, replace the EOC.
  • F30 (Open probe connection) & F31 (Shorted Probe connection):
    • Corrective Actions: Check RTD sensor probe resistance at room temperature against the RTD Sensor resistance chart. Replace the probe if the resistance does not match. Check the sensor wiring harness between the EOC and the sensor probe connector. For F31, if resistance is less than 500 ohms, replace the RTD Sensor Probe. Check for a shorted Sensor Probe harness between the EOC and the Probe connector.

Resistance Temperature Detector (RTD) Scale:

This scale provides a reference for checking the resistance of the temperature probe at various temperatures, aiding in diagnosing sensor probe failures. For example, at 32°F, the resistance should be 1000 ± 4.0 ohms, and at 350°F, it should be 1654 ± 10.8 ohms.

Circuit Analysis Matrix:

This matrix outlines the EOC relay states for different functions (Bake, Broil, Door Open, Door Closed), indicating which L1 to Bake, L1 to Broil, and Door Switch COM-NC relays are active. For instance, during Bake, both L1 to Bake and L1 to Broil relays are active (Broil alternates with the Bake element). When the door is open, the Door Switch COM-NC relay is active.

Frigidaire FFEF3012UB Specifications

General IconGeneral
TypeFreestanding
Fuel TypeElectric
Oven Capacity5.3 cu. ft.
Number of Burners4
Control TypeElectronic
ColorBlack
Number of Oven Racks2
Convection OvenNo
Warranty1 Year Limited
Cooktop SurfaceCeramic Glass
Width30 inches
Height46.5 inches

Related product manuals