14
PVC
CEMENT
W
a
t
e
r
C
Y
C
L
E
R
M
e
t
e
r
e
d
P
o
o
l
P
u
r
i
f
i
e
r
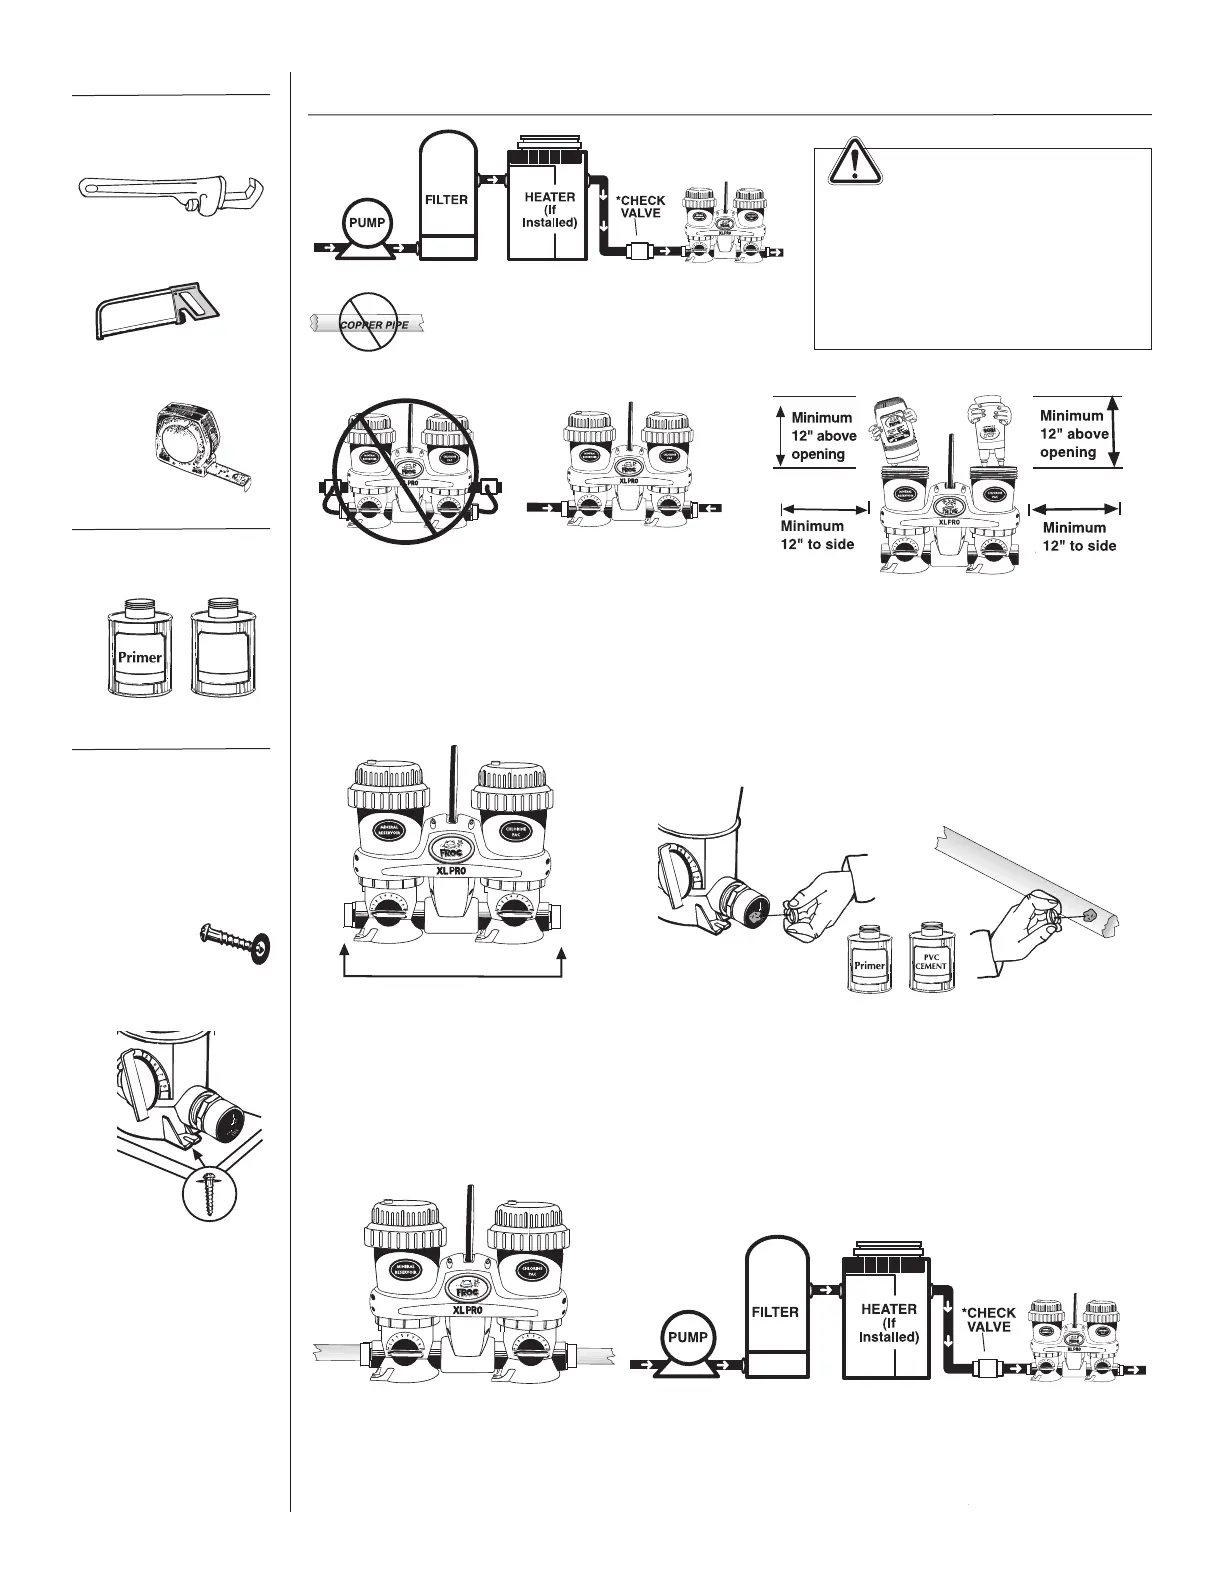
In-line Installation
Do NOT install
POOL FROG
XL PRO® off-line.
Following Primer directions, brush Primer on the inside
of the male adapters and to ends of pipe. Repeat this
process with PVC cement following directions on that
product.
Measure the distance between
outside male adapters and cut
out a section of pipe 3” less
than that dimension.
Allow a minimum of 12” above and on each
side of POOL FROG XL PRO® to ensure room
for easy replacement of POOL FROG® Mineral
Reservoir and POOL FROG® Pac.
Insert PVC pipe into male
adapters with a twisting action.
Hold in place 5 to 10 seconds
to bond.
TOOLS NEEDED
Hacksaw
MATERIALS NEEDED
Tape Measure
Primer and PVC Cement
RECOMMENDED
Corrosion Resistant
Check Valve
#10 x 1 1/4” Phillips
Pan Head Screws with
Washers
Use Phillips pan head
screws through the
mounting holes at the
POOL FROG® Cycler
bases to secure the
POOL FROG XL PRO®
into a treated wood
base.
Isolating the POOL FROG XL PRO® by installing a
corrosion resistant check valve is recommended.
1.
3.
4.
Pipe Wrench
Bi-flow valve design
allows water flow in
either direction.
2.
Do NOT install in copper pipe
if using POOL FROG® Pac as
chemical corrosion occurs.
• Install after all equipment and as far
as possible from heater.
• Any additional sanitizing equipment
that is installed with FROG® must be
installed after FROG® (never before)
on the return line to the pool.
WARNING