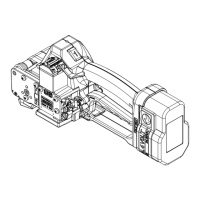
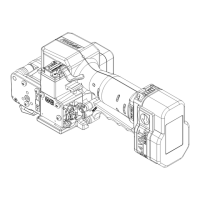
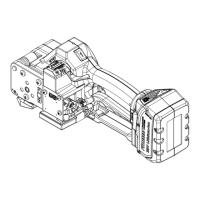
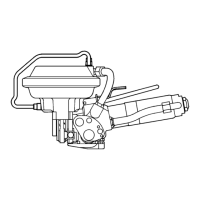
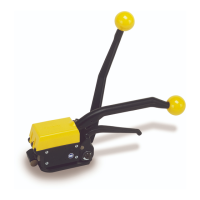
This document provides the operation manual and spare parts list for the FROMM Model P324 Battery-Powered Plastic Strapping Tool.
Function Description
The FROMM Model P324 is a battery-powered plastic strapping tool designed to strap packages using plastic strapping. The tool automates the tensioning, friction welding, and separation of plastic straps. Users manually feed the strap around the package or use a strap feeder, then insert the strap into the tool. The tool then performs the tensioning, sealing, and cutting operations.
Important Technical Specifications
Tool Size with Battery:
- Length: 355 mm / 14"
- Width: 122 mm / 4.8"
- Height: 128 mm / 5"
- Weight: 4.1 kg / 9 lbs
Noise Information:
- A-weighted equivalent continuous sound level at the work place: 81 dB (A) (determined according to DIN 45 635 T3 (11.85)).
Vibration Information:
- Weighted effective value of acceleration: less than 2.5 m/s² (determined according to DIN EN 28 662 T1 (01.93)).
Strap Material:
- Qualities: PET (Polyester) and PP (Polypropylene), plain or embossed.
- Dimensions: 10.0 - 16.0 mm x 0.4 - 1.05 mm. Users must use only plastic straps recommended by their sales shop and with the correct dimensions for the tool.
Strap Tension:
- Tensioning force: Adjustable from 300 - max. 2400 N / 67 - max. 540 lbs. (value depends on strap quality).
- Tensioning speed: Approx. 145 - 195 mm/s / 5.7 - 7.7 inch/sec.
- Joint strength: Approx. 75% of the tensile strength of the plastic strap (value depends on strap quality).
Working Temperature:
- Ambient temperature: 5° to 45° C (41° to 113°F). Best performance is achieved between 15° and 20°C (59° and 68°F).
Battery:
- NiCd (N5.4309): 14.4 VDC, 2.4Ah
- NiMH (N5.4316): 14.4 VDC, 3.0Ah
- Charging times (Standard charger): NiCd approx. 80 min., NiMH approx. 85 min.
- Charging times (Turbo charger): NiCd approx. 20 min., NiMH approx. 25 min.
Usage Features
General Safety:
- Users must read all instructions to avoid electric shock, fire, or serious injury.
- Work area must be clean, well-lit, and free from explosive atmospheres.
- Children and bystanders should be kept away.
- Electrical safety: Power tool plugs must match outlets; avoid body contact with earthed surfaces; do not expose to rain/wet conditions; do not abuse the cord; use suitable extension cords outdoors.
- Personal safety: Stay alert, use common sense, wear eye protection, avoid accidental starting, remove adjusting keys/wrenches before turning on, maintain proper footing, dress properly (avoid loose clothing/jewelry near moving parts), and use dust extraction/collection facilities if provided.
- Power tool use and care: Do not force the tool; do not use if the switch is faulty; disconnect power before adjustments/storage; store idle tools out of reach of children; maintain tools; keep cutting tools sharp; use the tool, accessories, and bits according to instructions.
- Battery tool use and care: Ensure switch is off before inserting battery; recharge only with specified charger; use only designated battery packs; keep battery pack away from metal objects when not in use; avoid contact with liquid ejected from battery.
Operation:
- Installation: Battery is delivered uncharged and must be charged before use. Do not expose to rain/wet conditions. Do not charge damaged batteries. Store batteries in dry, frost-proof rooms. Maximum ambient temperature is 50°C.
- Inserting the battery: Insert from bottom to top until both unlatching push buttons latch. The charge status is displayed shortly via LED indicators (Green: full, Green-yellow blinking: 3/4 full, Yellow blinking: 1/2 full, Yellow-red blinking: 1/4 full, Red blinking: empty).
- Removing the empty battery: If the red LED lights during tensioning or welding, the battery is exhausted. All electric functions are blocked. Recharge the battery. Push unlatching buttons and push battery out.
- Adjustments:
- Strap tension and tensioning speed: Adjusted with the upper knob. Clockwise increases tensioning force (300 N to 2400 N) and tensioning speed (145 mm/s to 195 mm/s). Counter-clockwise decreases them. Do not set tension too high to avoid strap tearing.
- Welding time: Adjusted with the lower knob. Clockwise increases, counter-clockwise decreases. Different welding times are required depending on strap size and quality.
- Feeding the strap: Feed the plastic strap around the package. Ensure the strap is free from oil, grease, and dirt for correct welding.
- Inserting the strap: Pull up the handle lever, insert both straps aligned into the strap guide, then release the lever.
- Tensioning the strap: Press and release the tension button until desired tension is reached. The operation can be interrupted and restarted. LED lights green during tensioning. Do not press the button after reaching preselected tensioning to avoid strap breakage. The tool must carry out a balance movement during tensioning; do not hinder its movement.
- Sealing the joint: Press the sealing lever down until it locks, then release. The plastic strap is welded and cut. LED lights green during welding. After the adjusted welding time, the cooling time begins (LED yellow). Do not remove the tool during cooling time. When LED lights green again, the sealing cycle is finished.
- Removing the tool: Pull up the handle lever, then pull the tool right/backwards and off the strapping.
- Seal Control: Regular visual inspection of the seal is necessary. A correct seal is completely welded over the strap width for approx. 19 mm. Too short welding time results in insufficient seal efficiency; too long welding time overheats the strap, affecting efficiency.
Maintenance Features
Exchange of Wearing Parts:
- Always remove the battery before maintenance.
- Tensioning wheel and grippers: Disassemble end cover, torsion spring, tensioning body, tensioning wheel with bearing, holders, and grippers. Reassemble in reverse, lubricating the internal toothing of the tensioning wheel with Molykote BR 2 plus. Observe the direction of rotation of the tensioning wheel and the position of the grippers.
- Cutter, welding stop gripper, and welding gripper: Involves disassembling various covers, springs, levers, pins, and inserts. Reassemble in reverse, paying attention to the fitting position of the cutter (secure screws N1.1305 with Loctite 222) and the tensioning wheel's direction of rotation.
- Lubrication:
- Rocker and bolt P32.1028: Klüber Isoflex NBU 15.
- Balls, ball cage, and running surface of balls on welding gripper: Klüber Isoflex Alltime SL2.
- Cutter and driver: Mobilux EP2.
- Internal toothing of the tensioning wheel: Molykote BR 2 plus.
- Adjustment of the coupler P32.1250: The coupler is factory-adjusted. If replacing the seesaw lever, coupler, or lever body, it must be readjusted. Remove the battery, fit the coupler, loosen screw N1.1553, displace thrust piece P32.1252 to touch seesaw levers without moving them, then retighten N1.1553. Control that the thrust piece touches the seesaw levers (X1) and both guide pins sit on the welding stop gripper (X2).
Service:
- Servicing and repair work must only be carried out by authorized service centers.
- If the tool breaks down, do not disassemble it; send it fully assembled to a local service center.
- Recommended service: After 12 months (one shift per day) or shorter periods for more intensive use.
Cleaning:
- Clean strap gripping parts regularly using compressed air to remove strap abrasion. Do not use mechanical tools, water, or aggressive solvents on the tool surface.