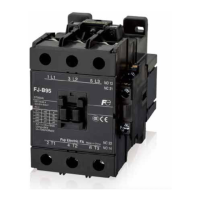
z Interlock unit SZ1KRM
(1) Connect the two AC contactors with two connection plates .
(2) Keep the protrusion of the movable part of the interlock unit close to
the right side.
(3) Insert it from just above and align it with the protrusion of the movable
part of the main element.
(4) After the mounting is completed, move the left and right protrusions to
confirm that they can move smoothly.
(5) After the interlock unit is mounted, it cannot be dismounted. (The interlock
unit has a structure that can hardly be dismounted after being mounted.)
Mounting methods
* The mounting on another side
is carried out in the same way
z Power connection kit for reversing
Mount it on the main circuit terminal. A wire has a power side
and a load side. Be sure not to mount them improperly.
Cautions for use
• When abrupt switching is needed, in order to prevent a
short-circuit accident, a device such as a time delay relay
can be used to carry out electrical interlock so that the
time of the switching between the contacts of the two AC
contactors is more than 15ms.
• Electrical interlock should be provided between the control
circuits on the forwarding and reversing sides.
Used on the load side
Used on the power side
1 3 5
2 4 6
1 3 5
2 4 6
Coupling element
Interlock
z Interlock unit SZ-RM-C
(1) Align the protrusion of the movable part of the interlock unit with the
dented portion of the movable part of the main element, and align the
interlocked circular protrusion with the dented portion on a side
of the main element. Snap the interlock in from both sides of the main
element.
(2) Insert the guide element of the coupling element into the guide rail
of the main element so that the hook of the coupling element is
stopped at the protrusion of the interlock.
(3) After the mounting is completed, respectively push the support parts of
the movable contacts of the left and right AC contactors from the front to
confirm whether the movement is smooth or not.
(4) During dismounting, use a screwdriver to pry the hook of the coupling
element and pull out the coupling element.
z SZ-RW21-C (For FJ-B18,B18/G)
z SZ-RW23-C (For FJ-B25,B32,B25/G,B32/G)
Wiring site
main circuit
Power side
Wiring site
Main circuit
Load side
Wire descriptions
UL No.1015 AWG14
(About φ1.6)
Colour: black
Wire descriptions
UL No.1015 AWG14
(About φ1.6)
Colour: black
Power side
Load side
1010361010
40
About 12
About 37
About 27
About 18
About 78
About 74
10 6106
Weight: 8g
Weight: 9g
Applicable types
FJ-B18RM
FJ-B18RM/G
Applicable types
FJ-B18RM
FJ-B18RM/G
Green
Green
Harness colour
Harness colour
Wiring diagram
Wiring diagram
Wiring site
Main circuit
Power side
Wiring site
Main circuit
Load side
Wire size
UL No.3271 AWG12
(About φ2)
Colour: black
Wire size
UL No.3271 AWG12
(About φ2)
Colour: black
Power side
Load side
1313401313
40
Approx. 12
Approx. 36
Approx. 96.5
Approx. 96.5Approx. 27
Approx. 22
13 13 13 13
Mass: 14g
Mass: 15g
Harness color
Orange
Harness color
Orange
Applicable types
FJ-B25RM,B32RM
FJ-B25RM/G,B32RM/G
Applicable types
FJ-B25RM,B32RM
FJ-B25RM/G,B32RM/G
Wiring diagram
Wiring diagram
Information subject to change without notice
31
FJ Series
 Loading...