E-mail
279
Scan
5
8 Select [Next].
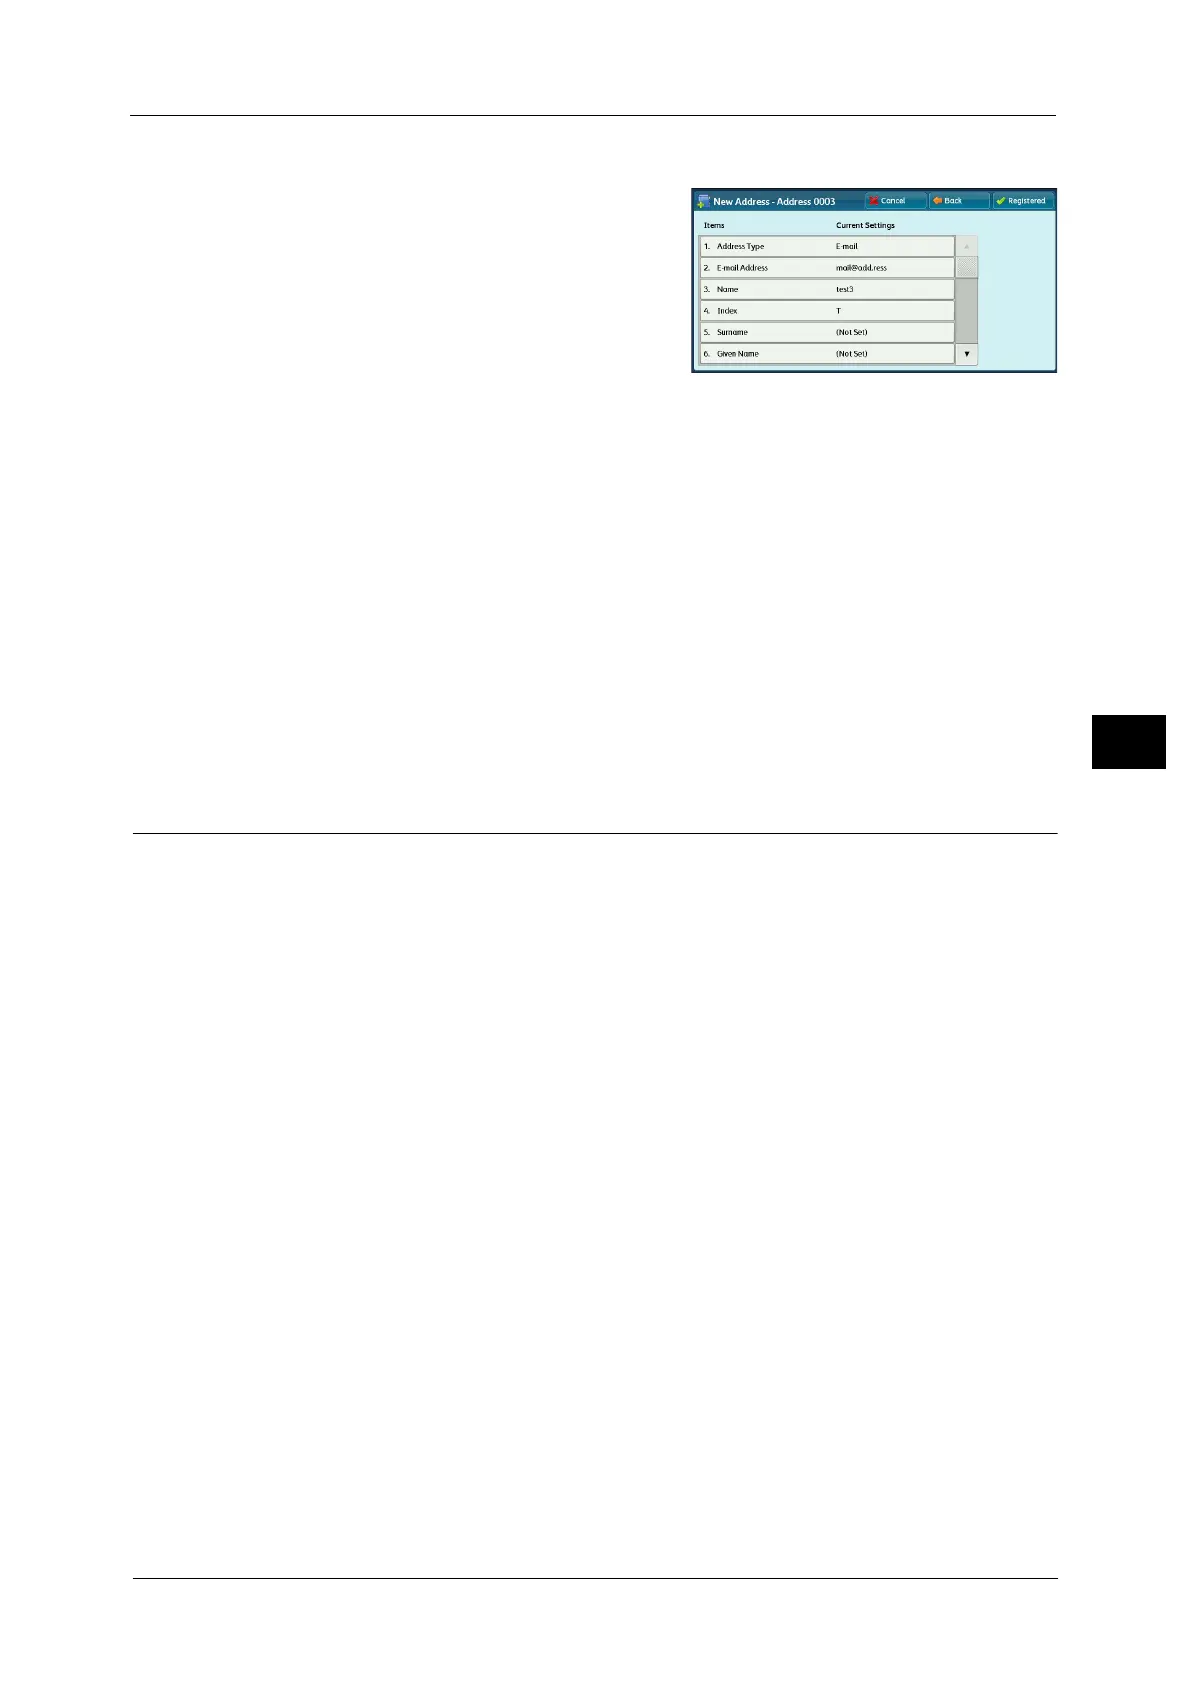
9 Specify the settings.
The following items appear:
z
Address Type
z
E-mail Address
z
Name
z
Index
z
Surname
z
Given Name
z
Custom Item 1
z
Custom Item 2
z
Custom Item 3
z
S/MIME Certificate (ApeosPort Series Only)
Note • To delete the input data and return to the [E-mail Address Book] screen, select [Cancel].
For more information on the setting items, refer to "5 Tools" > "Setup" > "Add Address Book Entry" in the Administrator
Guide.
10 Select [Registered].
Note • To return to the previous screen, press the [Back] button.
Specifying a Destination Using a One Touch Button
You can use the one touch buttons to specify the e-mail address, the name of the user who
can decrypt an encrypted file, and other information from the Address Book.
One touch buttons correspond to the address numbers from 0001 to 0070, or from 0001 to
0060.
For example, when the number you want to dial is registered to the address number 0001,
press one touch button <1>.
Note • One touch buttons can be used when the Fax service is available.
• There are two ways in which address numbers and stored programs are assigned to the one touch
buttons. Select either of the following. By default, [Type 1] is selected.
-[Type 1]
The buttons 1 to 70 are used for address numbers and correspond to the registered address
numbers 0001 to 0070, while the buttons M01 and M02 are used for stored programs and they
correspond to the registered stored programs 1 and 2.
-[Type 2]
The buttons 1 to 60 are used for address numbers and correspond to the registered address
numbers 0001 to 0060, while the buttons 61 to 70, M01 and M02 are used for stored programs
and they correspond to the registered stored programs 1 to 12.
• One touch button is available when the machine displays the [E-mail] screen, the [Advanced
Settings] screen, the [Layout Adjustment] screen, or the [E-mail Options] screen. The button is not
available when the pop-up menu is displayed, or when the other screen is displayed after an item is
selected.
When you press a one touch button when the machine displays the [Advanced Settings] screen, the
[Layout Adjustment] screen, or the [E-mail Options] screen, the screen switches to the [E-mail] screen
automatically.
 Loading...


