Printing and Deleting Stored Jobs
411
Job Status
11
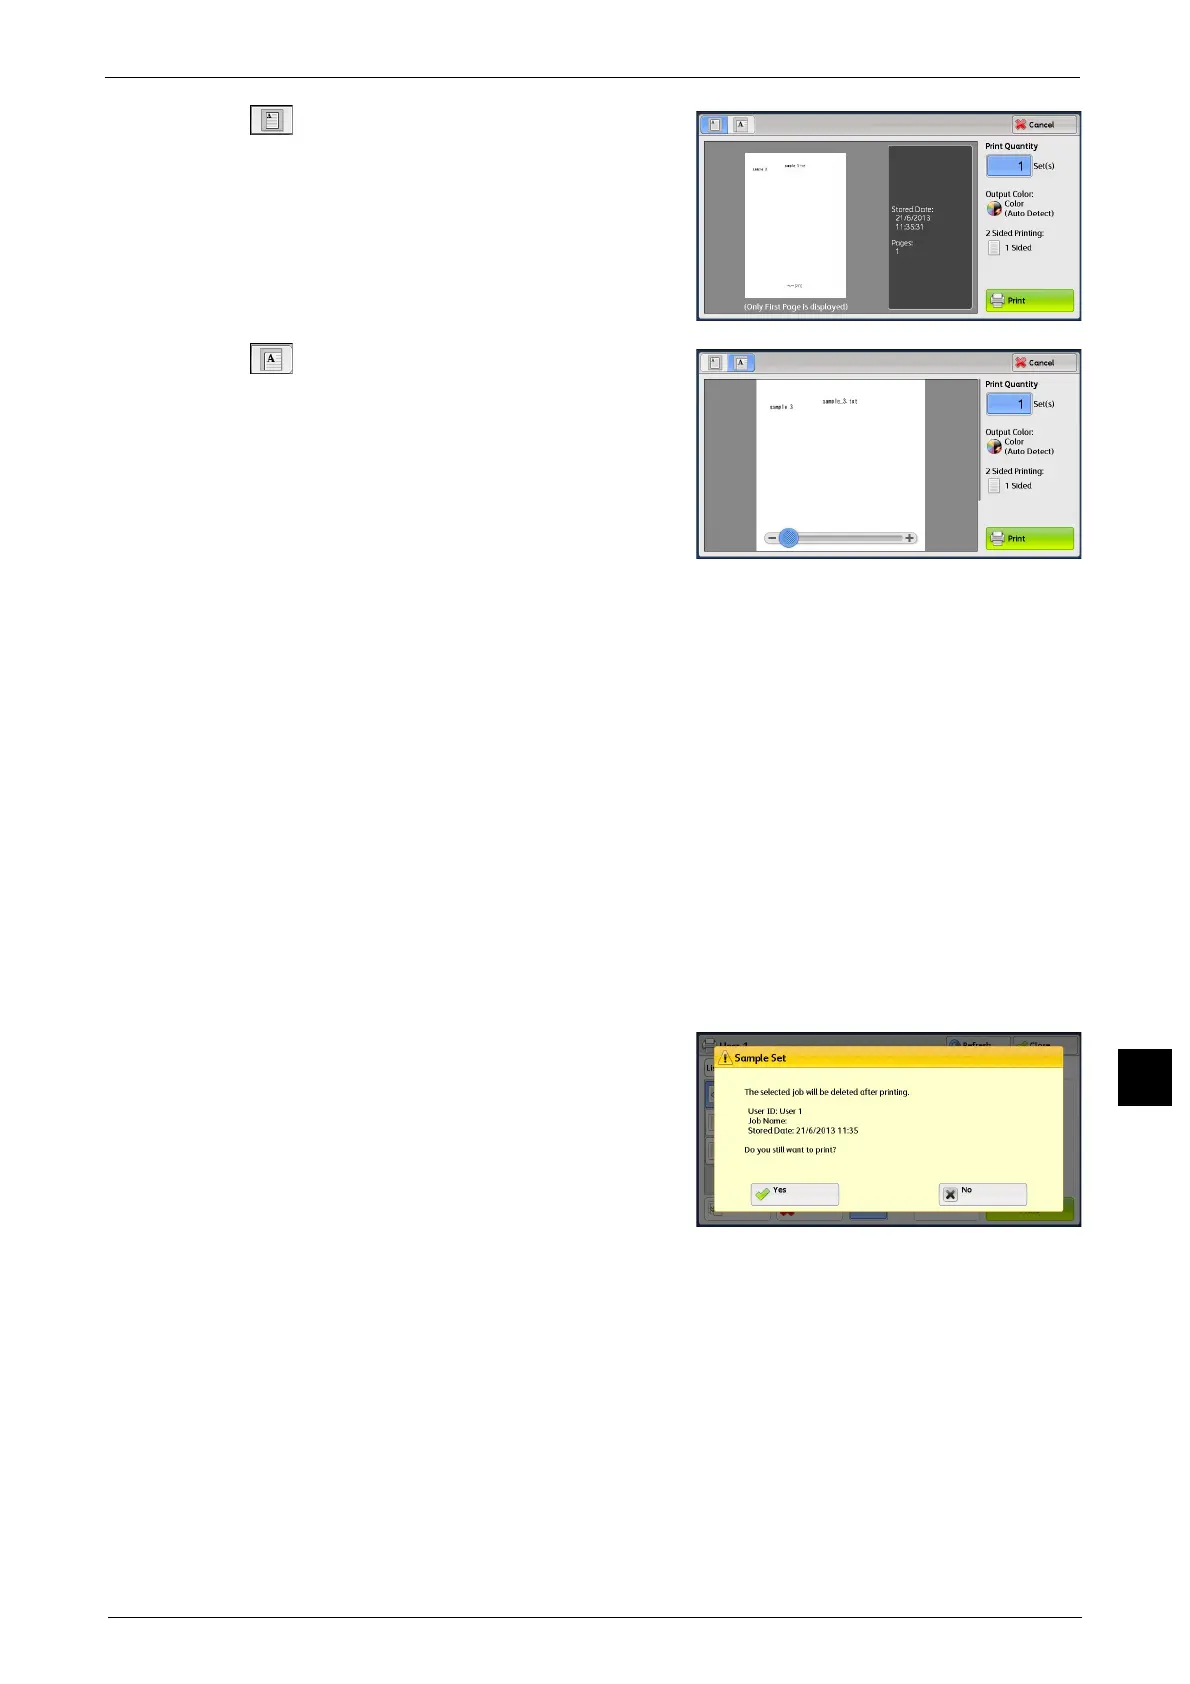
(Entire view)
An entire preview image is displayed.
Double-tap the touch screen to move to the
enlarged view.
(Enlarged view)
A previewed image is enlarged or reduced.
Drag or flick the enlarged image to move the
position to be displayed.
Print Quantity
Specify the number of print sets.
Output Color
Displays the output color of the document to be printed.
2 Sided Printing
Displays 1 Sided, Flip on Short Edge, and Flip on Long Edge.
Print
Prints the Sample Set job.
Refer to "When [Print] is Selected" (P.411).
When [Print] is Selected
1 Select [Yes].
Note • The screen as shown on the right does not
appear if [Print Job Confirmation Screen] is
set to [Disabled] in the System
Administration mode. If [Disabled] is
selected, the machine automatically deletes
the job after printing without displaying the
confirmation screen. For more information,
refer to "5 Tools" > "Stored File Settings" >
"Print Job Confirmation Screen" in the
Administrator Guide.
Yes
Starts printing the job. After printing, the job is deleted.
Note • After a sample set is output, the remaining sets will automatically be output if the machine is not
instructed for the period specified in [Auto Job Release]. To prevent the remaining sets from being
output automatically, set [Auto Job Release] to [Off]. For information on how to set [Auto Job
Release], refer to "5 Tools" > "Common Service Settings" > "Machine Clock/Timers" > "Auto Job
Release" in the Administrator Guide.
 Loading...