NOTES:
(1)
If no time values are flashing, the clock display will automatically reappear after 15 seconds if no buttons are pressed.
(2) A flashing time value indicates that the system is in time-setting mode. To return to the clock display you
must hold down the SET button for 3 seconds.
(3) You do not need to set values for both WEEKLY 1 and WEEKLY 2. If you wish, you can set values only for
WEEKLY 1 or only for WEEKLY 2.
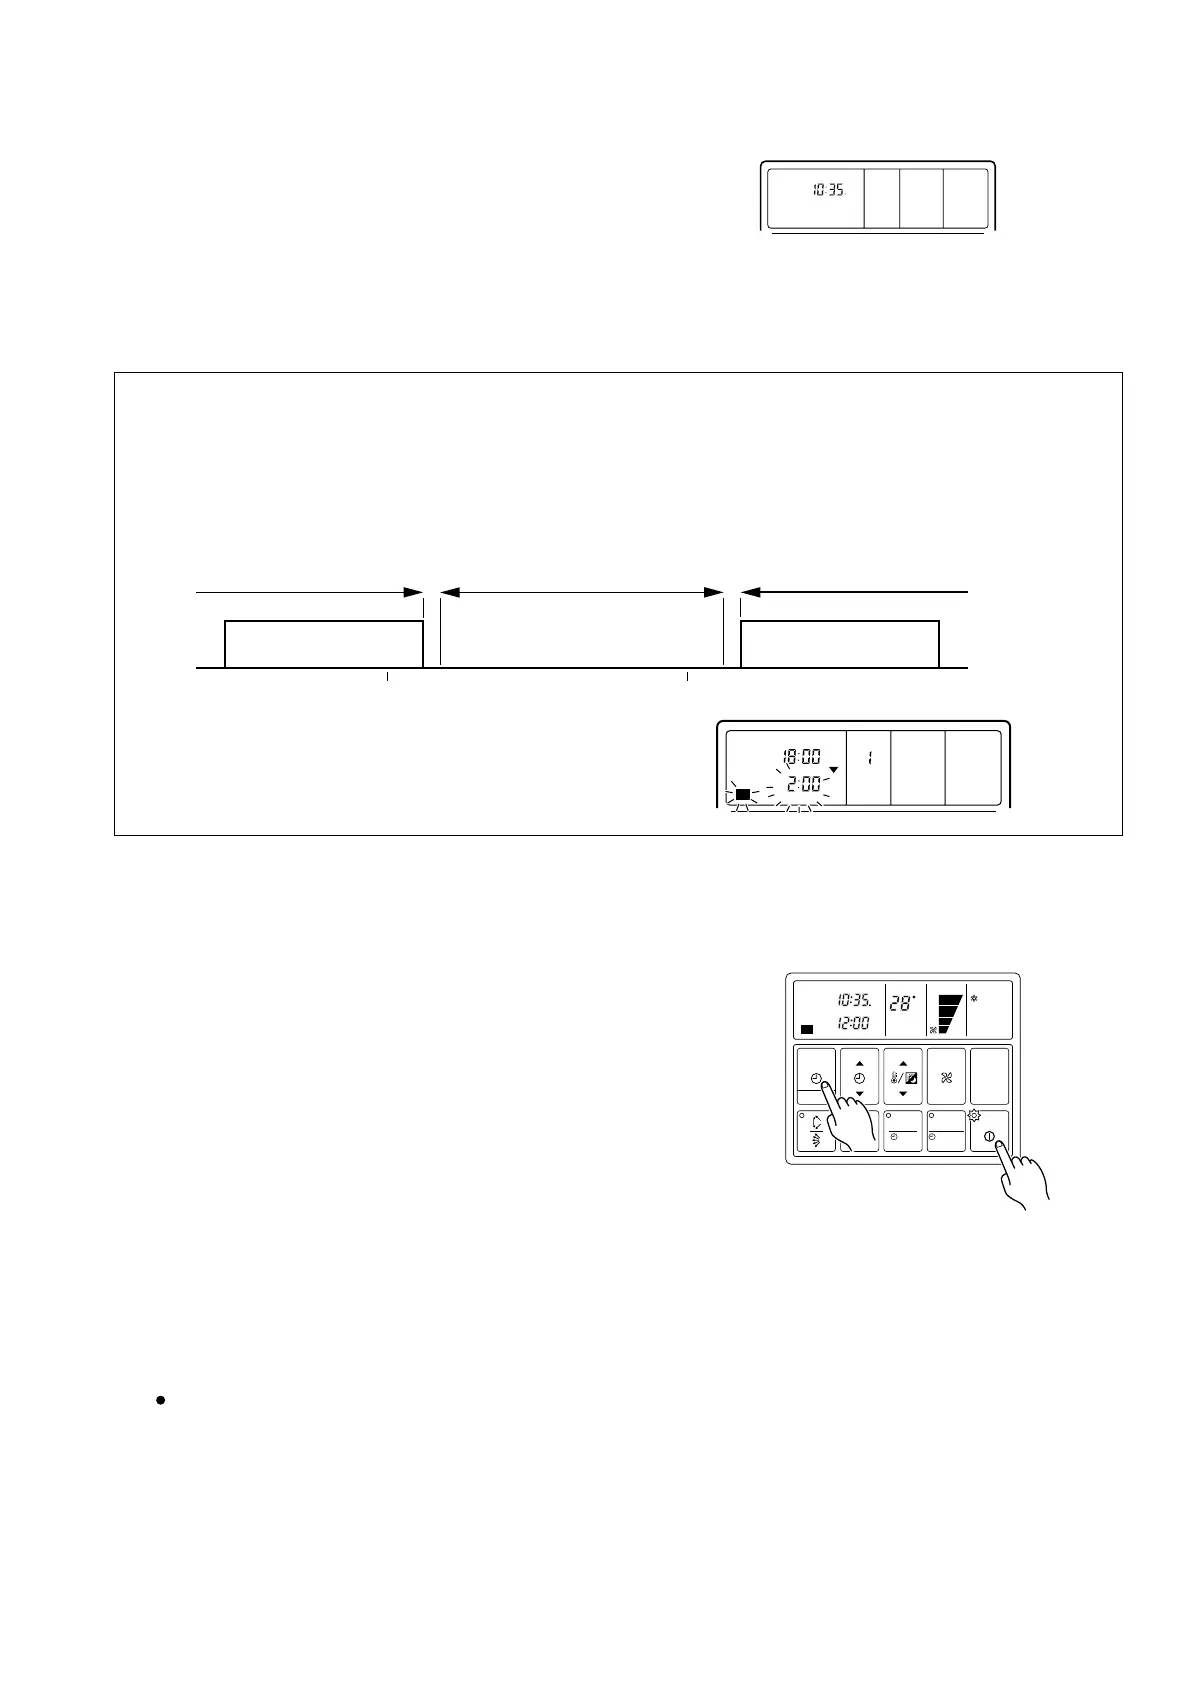
(4) The allowable range for the day as time settings is shown below.
(5)
If you set the OFF time to occur on the day following the ON
time, the NEXT DAY caption appears on the display.
Next day’ s WEEKLY
settings
Cannot set
5 min.
Available range Cannot set
5 min.
ON OFF ON OFF
Previous day’ s WEEKLY
settings
0:00 0:00
TIMER
NEXT DAY
DAY
WEEKLY
ON
OFF
21
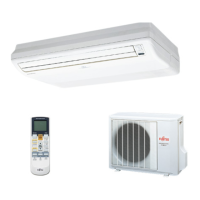
Starting Weekly Timer Operation
1. Press the TIMER MODE button so that "WEEKLY"
appears on the display.
2. Press the START/STOP button to start operation.
(This step is not necessary if the air conditioner is already
running.)
Weekly timer operation starts, and the operation lamp comes on.
(If the current time is between the first or second ON and OFF
time settings for the current day, the air conditioner will start.
Otherwise the air conditioner will remain off.)
The day display is replaced by the temperature display.
The upper time display now shows the current time, and the
lower time display shows the next scheduled ON or OFF time.
To Stop Weekly Timer Operation
To stop weekly timer while leaving the air conditioner
running:
Press the TIMER MODE button to select NONSTOP,
OFF TIMER, or ON TIMER.
To stop weekly timer operation and the air conditioner
also:
Press the START/STOP button.
Reviewing the Time Settings
Press the START/STOP button to stop the air condition-
er, and then proceed as follows.
1 Press the TIMER MODE button so that "WEEKLY"
appears on the display.
2 Press the SET TEMP./DAY button to select the day
that you want check.
3 Press the SET TIME button (▲ or ▼ ) to switch
between the "WEEKLY 1" or "WEEKLY 2" time dis-
plays.
9. Press the SET TEMP./DAY button to select another day
for setup. The repeat steps 4 to 8 above to set the ON and
OFF times for that day.
10.When you have finished setting all of the times, hold
down the SET button for 3 seconds.
The WEEKLY display flashes for 3 seconds while the new
WEEKLY TIMER settings are registered, and then the clock
display reappears.
CLOCK
MASTER
CONTROL
FAN
CONTROL
TIMER
MODE
TEMP./DAY
SET TIME
CLOCK ADJUST
START/STOP
SET
DAY OFF
ZONE
ENERGY SAVE
COOL
CLOCK
OFF
C
DAY
TIMER
WEEKLY
1
– 61 –
1
2