EasyManua.ls Logo

Fujitsu AR G07LL A Series - User Manual

Fujitsu AR G07LL A Series
77 pages
Print Icon
To Next Page IconTo Next Page
Loading...
SPLIT TYPE
ROOM AIR CONDITIONER
Models Indoor unit Outdoor unit
AO*G18LAC2
INVERTER MULTI
SERVICE
INSTRUCTION
R410A
Slim Duct / Compact Cassette
Compact Wall Mounted /
Floor type
AR*G07LL* A
AR*G09LL* A
AR*G12LL* *
AU*G07LVLA
AU*G09LVLA
AU*G12LVL*
AS*G07LJCA
AS*G09LJCA
AS*G12LJCA
AS*G07LUCA
AS*G09LUCA
AS*G12LUCA
AS*G14LUCA
AG*G09LVCA
AG*G12LVCA
AS*G07LMCA
AS*G09LMCA
AS*G12LMCA
AS*G14LMCA
Question and Answer IconNeed help?

Do you have a question about the Fujitsu AR G07LL A Series and is the answer not in the manual?

Overview

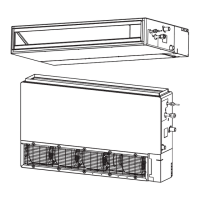
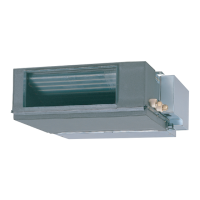
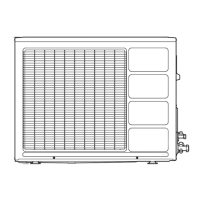
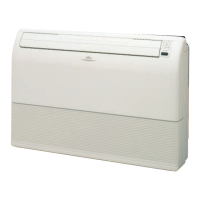
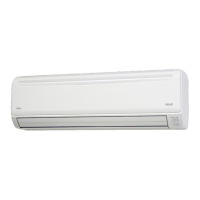
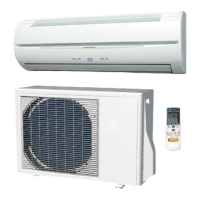
This document provides service instructions for Fujitsu General Limited's Split Type Room Air Conditioners, specifically for Slim Duct, Compact Cassette, Compact Wall Mounted, and Floor type INVERTER MULTI systems. The refrigerant used is R410A.

Function Description

The air conditioning systems covered by this manual offer a range of operational modes and controls designed for optimal comfort and energy efficiency. Key functions include:

  • Capacity Control: The compressor frequency, and thus the system's capacity, is dynamically adjusted based on the number of indoor units operating, set temperature, room temperature, and outdoor temperature. This ensures efficient cooling, heating, and dry operation.
  • Auto Changeover Operation: When set to "Auto" mode, the system automatically selects the most suitable operation mode (Heating, Cooling, Dry, or Monitoring) based on sensed room and outdoor temperatures. The set temperature range for this mode is 18°C to 30°C, adjustable in 1°C increments. The system also includes logic to prevent rapid mode switching by entering a "Monitoring mode" if the compressor has been stopped for 6 consecutive minutes due to temperature control.
  • Indoor Fan Control: The indoor fan speed can be set in 5 steps: Auto, Quiet, Lo, Me, Hi. In "Fan" mode, if set to "Auto," the fan operates at "Me" speed. During Cooling operation in "Auto" mode, the fan speed adjusts based on the difference between room temperature (TR) and set temperature (Ts). For example, if TR > Ts + 2°C, it's "Hi"; if Ts + 2°C ≥ TR ≥ Ts - 2°C, it's "Me"; and if TR < Ts - 2°C, it's "Lo." There's also an "Indoor unit fan control for energy saving" feature in Cooling mode, which adjusts airflow based on the set temperature and room temperature changes.
  • Dry Operation: In "Auto Dry" mode, the fan speed is automatically controlled and cannot be manually changed. It operates based on room temperature variations detected by the indoor unit's sensor.
  • Heating Operation: Similar to Cooling, in "Auto Heating" mode, the indoor fan motor speed adjusts according to room temperature. If set to "Hi" through "Quiet," the fan runs at a constant airflow corresponding to the selected mode.
  • Cool Air Prevention Control: During Heating and Min. Heat operation, this feature prevents the discharge of cold air by adjusting the indoor fan speed based on the indoor heat exchanger sensor temperature. For AR and AU type units, this feature needs to be explicitly enabled as "Cool air prevention: effective."
  • Louver Control: Vertical louver direction can be adjusted in multiple steps. In Cooling/Dry/Fan modes, the default is horizontal flow (position ①). In Heating mode, the default is downward flow (position ⑥ or ⑦ depending on the model). The system temporarily adjusts the airflow direction to prevent cold air from blowing directly onto occupants during heating startup or defrosting. It also prevents condensation by automatically returning louvers to a higher position if left in the heating range for extended periods during cooling/dry modes. Vertical airflow swing operation is also available, with the range depending on the mode. Right-left louvers can be manually adjusted on some models.
  • Timer Operation Control:
    • ON/OFF Timer: Allows setting a specific time for the air conditioner to turn on or off.
    • Program Timer: Combines ON and OFF timers for a single programmed sequence.
    • Sleep Timer: Monitors room temperature and automatically stops operation. In cooling, the setting temperature increases by 1°C initially, then another 1°C after an hour, before stopping at the set timer. In heating, the setting temperature decreases by 1°C initially, then another 1°C every 30 minutes (up to 4°C decrease), before stopping.
    • Weekly Timer (for AS*G07/09/12/14LUCA Type): Enables setting operation times for each day of the week, with the option to repeat settings for all days.
    • Temperature Set Back Timer (Wired Remote Controller): Allows changing the setting temperature for specific operation times each day, combinable with other timer settings.
  • Compressor Control: The compressor's operation frequency varies based on the mode (Cooling or Heating) and has defined minimum and maximum ranges. It also features a controlled start-up sequence, gradually increasing frequency.
  • Electronic Expansion Valve (EEV) Control: The EEV opening is precisely controlled based on operating conditions, compressor frequency, discharge temperature, and outdoor temperature to optimize refrigerant flow. It undergoes an initialization process when power is supplied to the outdoor unit.
  • Test Operation Control: Allows service personnel to run the system in a test mode for 60 minutes, bypassing normal room temperature sensor detection. This can be initiated via wireless remote controller (with TEST RUN button), by pressing the MANUAL AUTO button on the indoor unit for 10 seconds (for AS*G07/09/12/14LUCA Type), or via wired remote control by pressing MODE and FAN buttons simultaneously for 2 seconds.
  • Prevent to Restart for 3 Minutes (3 MINUTES ST): After the compressor stops, it will not restart for 3 minutes, even if an operation command is given.
  • 4-Way Valve Extension Select: When switching from Cooling to Heating, the 4-way valve switches 3 minutes after the compressor stops.
  • Auto Restart: In case of a power interruption, the system memorizes its operating state and automatically resumes operation with those settings once power is restored. This feature requires a specific DIP switch setting on the wired remote controller for memory backup.
  • Manual Auto Operation: If the remote control is lost or its battery is depleted, pressing the MANUAL AUTO button for 3 to 10 seconds initiates a default "Auto changeover" operation at 24°C, "Auto" fan mode, and "Normal" louver settings, with timers, swing, and economy functions off.
  • Compressor Preheating: If the outdoor heat exchanger temperature is low and heating operation has been stopped for 3 hours, power is applied to the compressor to preheat it. This ensures warm air is quickly discharged at startup. Preheating ends when the outdoor temperature reaches a specified release temperature.
  • Powerful Operation: Activates maximum power for both indoor and outdoor units, overriding normal settings for rapid cooling or heating. It automatically deactivates when the room temperature reaches a certain threshold relative to the set temperature or after a set operation time.
  • 10°C Heat Operation: Maintains a minimum room temperature of 10°C, useful for preventing freezing in unoccupied rooms. It operates in Heating mode with "Auto" fan and "Economy" LED display, with defrost operation as normal.
  • Economy Operation: Reduces maximum output to approximately 70% of normal operation for energy saving. In Cooling/Dry, the target temperature is 1°C higher than the set temperature; in Heating, it's 1°C lower.
  • Defrost Operation Control: Automatically initiates defrosting when the outdoor heat exchanger temperature drops below specific thresholds, based on compressor integrating operation time. It ends when the outdoor heat exchanger temperature rises above 16°C or after 15 minutes of compressor operation.
  • OFF Defrost Operation Control: If frost is detected on the outdoor unit heat exchanger when the system stops in Heating mode, a defrost operation proceeds automatically, indicated by a slow flashing of the indoor unit operation lamp.
  • Various Protections:
    • Discharge Gas Temperature Over Rise Prevention Control: Reduces compressor frequency or stops the compressor if discharge gas temperature exceeds safe limits.
    • Current Release Control: Adjusts compressor frequency to prevent the outdoor unit input current from exceeding its limit.
    • Anti-Freezing Control (Cooling mode): Decreases compressor frequency if indoor unit heat exchanger or 2-way valve temperature drops too low, preventing ice formation.
    • Cooling Pressure Over Rise Protection: Stops the compressor and displays an error if the outdoor unit heat exchange sensor temperature rises to 67.0°C or higher.
    • High Temperature Release Control (Heating Mode): Controls compressor frequency based on indoor heat exchanger temperature to prevent overheating.

Important Technical Specifications

  • Refrigerant: R410A
  • Compressor Operation Frequency Range (AO*G18LAC2):
    • Cooling: Min 15rps, Max 85rps
    • Heating: Min 21rps, Max 130rps
  • Electronic Expansion Valve Pulse Range (AO*G18LAC2):
    • Cooling/Dry mode: 50 ~ 480 pulses
    • Heating mode: 30 ~ 480 pulses
  • Outdoor Fan Speed (AO*G18LAC2): 900/820/700/410/320/250/200 rpm for both Cooling and Heating. Runs at 500rpm for 20 seconds at startup.
  • Thermistor Resistance Values: Detailed tables are provided for various thermistors (Room, Indoor Heat Exchanger, Discharge Pipe, Compressor, Outdoor, 2-way valve, 3-way valve, Heat Sink) showing resistance (kΩ) at different temperatures (°C). These are crucial for troubleshooting sensor errors.
  • Power Supply Voltage Check: For troubleshooting, it's specified to check for AC198V-264V at outdoor unit terminal L-N and indoor unit terminal 1-2. DC12V is expected for wired remote controller power supply.
  • Compressor Winding Resistance: For inverter compressors, the resistance value is approximately 0.668 Ω at 25°C.
  • EEV Coil Resistance: 46 Ω ± 4 Ω at 20°C.

Usage Features

  • Flexible Airflow Control: Users can select from various fan speeds and louver directions, with automatic adjustments for optimal comfort and efficiency in different modes.
  • Advanced Timer Functions: Comprehensive timer options, including ON/OFF, Program, Sleep, Weekly, and Temperature Set Back, allow users to schedule operation according to their lifestyle and energy-saving preferences.
  • Powerful Mode: Provides quick heating or cooling when rapid temperature change is desired.
  • Economy Mode: Offers an energy-efficient alternative for daily operation.
  • 10°C Heat Mode: A practical feature for maintaining a minimum temperature in unoccupied spaces, preventing pipes from freezing.
  • Auto Restart: Ensures seamless operation after power outages, restoring previous settings.
  • Manual Auto Operation: A convenient backup in case of remote control issues.

Maintenance Features

  • Error Display: The system provides error codes through the indoor unit's operation, timer, and economy lamps, as well as on wired remote controllers, facilitating quick identification of issues.
  • Self-Diagnosis Function: Wired remote controllers offer a self-diagnosis feature to display memorized error codes, aiding technicians in troubleshooting.
  • Detailed Troubleshooting Flowcharts: The manual includes extensive flowcharts for various error codes and "no error code" scenarios (e.g., no power, no cooling/heating, abnormal noise, water leaking). These charts guide technicians through logical steps to identify the root cause, including checking connections, sensor values, voltages, and component functionality.
  • Service Parts Information: Dedicated sections provide guidance on checking specific components like compressors (inverter and non-inverter), electronic expansion valves, indoor fan motors, and outdoor fan motors, including resistance checks and voltage measurements.
  • Component Replacement Guidance: The troubleshooting steps often conclude with recommendations to replace specific PCBs or components if previous checks do not resolve the issue.
  • Emphasis on Proper Installation: The manual frequently refers to the "Installation Manual" and "Data & Technical Manual" for correcting abnormal conditions related to wiring, pipe length, and capacity, highlighting the importance of correct installation for reliable operation.
  • Grounding and Noise Prevention: Troubleshooting steps emphasize checking proper grounding and identifying potential sources of harmonic noise near power cables, which can interfere with system operation.
  • Refrigerant Leak Check: For discharge temperature errors, checking for refrigerant leaks and recharging the specified amount after vacuuming is a recommended step.
  • Strainer Clogging Check: The manual illustrates how to check for clogged strainers by observing temperature differences between inlet and outlet pipes.

Fujitsu AR G07LL A Series Specifications

General IconGeneral
BrandFujitsu
ModelAR G07LL A Series
CategoryAir Conditioner
LanguageEnglish

Related product manuals