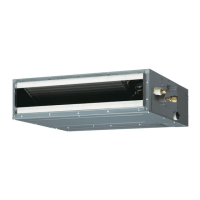
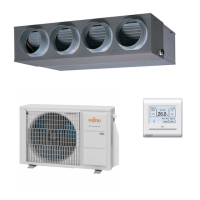
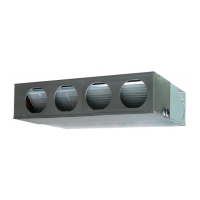
This document serves as an installation manual for Fujitsu Slim Duct / KLL series outdoor air conditioning units, specifically models AOYG 09 KBTB, AOYG 12 KBTB, AOYG 14 KBTB, and AOYG 18 KBTB. It is intended for use by professional service personnel and emphasizes safety precautions, product specifications, installation procedures, and maintenance guidelines.
Function Description:
The Fujitsu Slim Duct / KLL series outdoor units are components of a complete air conditioning system designed to provide cooling and heating. These units operate with R32 refrigerant, which has a higher working pressure compared to conventional R22 refrigerants. The manual details the necessary steps for proper installation, including pipe connection, electrical wiring, sealing tests, vacuum processes, and additional refrigerant charging, to ensure efficient and safe operation of the air conditioning system. It also highlights the importance of using dedicated tools and materials suitable for R32 refrigerant due to its specific properties.
Important Technical Specifications:
- Refrigerant Type: R32. The working pressure is 1.6 times higher than R22 models.
- Charging Port Thread Diameter: 1/2 inch (for R32 and R410A).
- Copper Pipes: Seamless copper pipes with residual oil less than 40 mg/10 m are recommended. Avoid collapsed, deformed, or discolored portions.
- Copper Pipe Thicknesses (Annealed):
- 6.35 mm (1/4 in.): 0.80 mm
- 9.52 mm (3/8 in.): 0.80 mm
- 12.70 mm (1/2 in.): 0.80 mm
- 15.88 mm (5/8 in.): 1.00 mm
- 19.05 mm (3/4 in.): 1.20 mm
- Pipe Diameters (Liquid/Gas):
- 09, 12/14 models: 6.35 mm (1/4 in.) / 9.52 mm (3/8 in.)
- 18, 22, 24 models: 6.35 mm (1/4 in.) / 12.7 mm (1/2 in.)
- Maximum Piping Length (L):
- 09 model: 20 m
- 12/14 models: 25 m
- 18, 22, 24 models: 30 m
- Maximum Height Difference (H) (Indoor unit to outdoor unit):
- 09 model: 15 m
- 12/14 models: 20 m
- 18, 22, 24 models: 25 m
- Electrical Requirements:
- Voltage Rating: 1 Φ 230 V (50 Hz)
- Operating Range: 198 to 264 V
- Power Supply Cable (Type 60245 IEC57, 2 wire + Ground, 1 Φ 230 V):
- 09~22 model: 1.5 mm²
- 24 model: 2.5 mm²
- Connection Cable (Type 60245 IEC57, 3 wire + Ground, 1 Φ 230 V): 1.5 mm²
- Breaker Capacity (A):
- 09 model: 10 A
- 12/14 model: 13 A
- 18/22 model: 16 A
- 24 model: 20 A
- Earth Leakage Breaker: 30 mA
- Additional Refrigerant Charge Rate: 20 g/m for piping exceeding factory standard lengths (15 m for 09/12/14 models, 20 m for 18/22/24 models).
- Gauge Manifold: Recommended with seals -0.1 to 5.3 MPa (-1 to 53 bar) for high pressure and -0.1 to 3.8 MPa (-1 to 38 bar) for low pressure.
- Charge Hose: Material and base size changed for R32/R410A to increase pressure resistance.
- Vacuum Pump: Conventional vacuum pump can be used with an adapter. Series motor vacuum pumps are prohibited.
- Gas Leakage Detector: Special gas leakage detector for HFC refrigerant R32/R410A.
- Flare Nut Tightening Torque:
- 6.35 mm (1/4 in.) dia.: 16 to 18 N·m (160 to 180 kgf·cm)
- 9.52 mm (3/8 in.) dia.: 32 to 42 N·m (320 to 420 kgf·cm)
- 12.70 mm (1/2 in.) dia.: 49 to 61 N·m (490 to 610 kgf·cm)
- 15.88 mm (5/8 in.) dia.: 63 to 75 N·m (630 to 750 kgf·cm)
- 19.05 mm (3/4 in.) dia.: 90 to 110 N·m (900 to 1100 kgf·cm)
- Blank Cap Tightening Torque:
- 6.35 mm (1/4 in.) & 9.52 mm (3/8 in.): 20 to 25 N·m (200 to 250 kgf·cm)
- 12.70 mm (1/2 in.): 28 to 32 N·m (280 to 320 kgf·cm)
- 15.88 mm (5/8 in.): 30 to 35 N·m (300 to 350 kgf·cm)
- 19.05 mm (3/4 in.): 35 to 40 N·m (350 to 400 kgf·cm)
- Charging Port Cap Tightening Torque: 12.5 to 16 N·m (125 to 160 kgf·cm)
- Terminal Screw Tightening Torques:
- M4 screw: 1.2 to 1.8 N·m (12 to 18 kgf·cm)
- M5 screw: 2.0 to 3.0 N·m (20 to 30 kgf·cm)
- Insulation Material Thickness (Minimum): Varies based on pipe diameter and relative humidity (70%, 75%, 80%, 85% or more). For example, at 70% relative humidity, a 6.35 mm (1/4 in.) pipe requires 8 mm thickness, while a 19.05 mm (3/4 in.) pipe requires 10 mm thickness.
Usage Features:
- Installation Location: The outdoor unit must be installed on a stable, level surface capable of withstanding its weight and vibrations, away from direct sunlight, heat sources, steam, flammable gases, and areas with high salt content or electromagnetic interference. Adequate ventilation and clearance (e.g., 100 mm or more at the rear, 250 mm or more at the front, 600 mm or more at the sides) are crucial for optimal performance and to prevent short-circuiting of airflow. For multiple outdoor unit installations, a minimum of 250 mm space between units is required.
- Pipe Bending: Pipes should be bent with a radius of curvature of 70 mm or more to prevent crushing or breaking. Avoid bending the same section more than three times.
- Flaring: Use special R32(R410A) flare tools or conventional tools with an allowance adjustment gauge. Ensure uniform flaring without cracks or scratches.
- Refrigerant Charging: Refrigerant must be added from the charging port at the completion of work, using electronic scales to measure by weight. Charge from the liquid phase side for stable composition. Do not overfill the system.
- Electrical Connections: All electrical work must be performed by qualified personnel according to specifications and local regulations. A dedicated power supply circuit with an earth leakage breaker is mandatory. Ensure secure connections, proper grounding, and correct cable sizing to prevent electric shock or fire.
- Test Run: A test run must be performed in accordance with the indoor unit's installation manual after all installation work is completed.
Maintenance Features:
- Safety Precautions: Always prioritize safety. Ventilate the area if refrigerant leaks. Do not mix R32 with other refrigerants. Wait at least 10 minutes after turning off power before touching electrical components.
- Tooling: Use dedicated tools for R32 refrigerant, including a clean gauge manifold and charging hose.
- Sealing Test: After pipe connections, perform a sealing test using nitrogen gas pressurized to 4.15 MPa on both liquid and gas pipes. Check all flare connections and welds for leaks. Release nitrogen gas slowly after the test.
- Vacuum Process: Evacuate the indoor unit and connecting pipes using a vacuum pump until the pressure gauge indicates -0.1 MPa (-76 cmHg) for at least 60 minutes. Do not purge air with refrigerants.
- Refrigerant Recovery: When removing refrigerant for servicing or decommissioning, all refrigerants must be recovered safely into appropriate, designated recovery cylinders. Ensure recovery equipment is in good working order and calibrated weighing scales are available. Do not mix refrigerants in recovery units or cylinders.
- Decommissioning: Technicians must be familiar with the equipment. Isolate the system electrically. Ensure mechanical handling equipment and personal protective equipment are available. Recover refrigerant and ensure cylinders conform to standards.
- Electrical Component Repair: Repairs to sealed electrical components require disconnecting all power supplies. If power is necessary, use a leak detection system. Ensure casings are not altered, and seals/sealing materials are effective. Replacement parts must meet manufacturer specifications.
- Leak Detection: Use electronic leak detectors suitable for flammable refrigerants. Calibrate the detector in a refrigerant-free area and set it to a percentage of the LFL (25% maximum). Avoid halide torches or other naked flame detectors. If a leak is suspected, remove all naked flames and recover/isolate refrigerant before brazing, purging with oxygen-free nitrogen (OFN).
- Pipe Protection: Protect pipes from moisture and dust during installation, especially when passing through holes or connecting to the outdoor unit. Pinch or tape pipes if exposed for more than one month.
- Labelling: Equipment must be labelled to indicate decommissioning, refrigerant emptying, and the presence of flammable refrigerant.