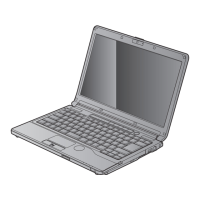
1. Open the Display Panel
• Ensure that your LifeBook is on a hard level surface and that
the air vents are not blocked.
• Press Display Panel Button and lift the display, being careful not
to touch the screen.
• Adjust the display until it is at a comfortable viewing angle.
2. Connect AC Power
• Plug the power cord into the AC adapter.
• Plug the AC adapter into your notebook.
• Connect the power cord to an electrical outlet.
3. Connect to Internet or Network
• Connect either a phone cord to the modem jack or an Ethernet
cable to the LAN jack on your notebook and to a wall jack
or to an Ethernet router.
Important:
• During the setup procedure, do not disconnect the power supply,
press any buttons, or use any peripheral devices such as a mouse,
keyboard, or remote control.
•
You should not attach any external devices and do not put a DVD/CD in
your drive until you have gone through the initial power on sequence.
4. Booting the System
•
Press the Power/Suspend/Resume button (above the keyboard) to turn
on the notebook. When you do this for the first time, it will display a
Fujitsu logo on the screen. If you do nothing the system will load
the operating system, and then the Windows Welcome will begin.
5. Register
• Accept the Microsoft
®
Windows
®
Licensing Agreement and the Fujitsu
End User License Agreement to proceed.
• Select your User ID and Password during the “Welcome Screen.”
• Keep a record of your User ID and password stored in a secure place.
• THE SCREEN WILL GO DARK FOR APPROXIMATELY TWO MINUTES.
• DO NOT ATTEMPT TO TURN POWER ON OR OFF DURING THIS STAGE.
6. Registering Your LifeBook notebook
• Register your notebook with Fujitsu Service and Support via our
website at us.fujitsu.com/computers.
• You will need to be set up with an Internet Service Provider (ISP)
to register online.
7. Installing Click Me!
• To verify a successful installation, the application icons will appear on
the desktop. This process can take up to 15-20 minutes.
• Check to be sure the WLAN switch is on or that your LifeBook is
otherwise connected to the Internet.
• After the first boot, a dialog box will automatically open that prompts
you to run Click Me!. If you choose not run Click Me! at this time, the
Click Me! icon will remain on your desktop.
• When you click the Click Me! icon, your system will automatically
build the icon tray in the bottom right of the screen. Other utilities
(e.g. Bluetooth) and drivers may be installed. Icons will be created
that provide links to application/utilities that you will frequently
access. Once Click Me! is completed the system will reboot.
8. Create backup media with MyRecovery
• Click on the [MyRecovery] icon to create backup recovery media and
application discs.
• Look in the “Saving and Recovering Your Factory and System Images”
guide for more detailed instructions.
9. Restoring Your System
• The original factory system is stored in a hidden partition on your
hard disk drive to keep it safe. For instructions on restoring the
factory system, please follow the instructions in the “Recovering
Your Factory and System Images” manual that is bundled
separately with your system.
Initial Start Up
The Lithium ion battery is not charged upon purchase.
Initially you will need to connect either the AC adapter
or the Auto/Airline adapter to use your notebook.
Display
Panel
Latch
Display
Panel
Button
Wireless LAN/Bluetooth
On/Off Switch
LAN Jack
Back
Connecting
a Modem
Power/Suspend/
Resume Button
Wall Jack
AC Adapter
DC Power
Jack
It is critical that you run ClickMe! to
install necessary applications, utilities
and drivers.
“Click Me!”
(For
Additional
Utilities)
3

 Loading...