Apply the setting.
(8) Touch the [OK] on the “Set
Temp. Auto Return” screen.
After the setting change
screen is displayed, the
display returns to the “Special
Setting” screen.
Enable /Disable [Enable]
Set Temp. Auto Return
Cancel OK
Cool/Dry
Heat
Return Time / Return Temp.
60min. / 28.0°c
60min. / 23.0°c
3-5-3 Set Temp. Range Setting (for administrator)
(1) Touch the [Set Temp. Range
Setting] on the “Special Set-
ting” screen. When the “Pass-
word Verication” screen is
displayed, enter the password
and touch the [OK].
Back
Special Setting
Set Temp.
Range Setting
Set Temp.
Auto Return
Anti Freeze
Economy
Next
Page
Page 1/ 2
“Set Temp. Range Setting” screen is displayed.
Enable the Set Temp. Range Setting
(2) Touch the [Enable/Disable] on the “Set Temp. Range
Setting” screen.
(3) “Enable/Disable” screen is displayed. Touch the [Enable]
on the “Enable/Disable” screen.
(2) (3)
–
–
–
18.0°c
10.0°c
18.0°c
30.0°c
30.0°c
30.0°c
–
Enable /Disable [Disable]
Set Temp. Range Setting
Cancel OK
Lower Limit Upper Limit
Auto
Heat
Cool/Dry
Enable/Disable
Cancel OK
Enable
Disable
When the [OK] is touched, the display returns to the “Set
Temp. Range Setting” screen.
Set the Lower Limit and Upper Limit
(4) Touch the [Lower Limit - Upper Limit] on the “Set Temp.
Range Setting” screen.
(5) “Setting” screen is displayed. Touch the [Auto], [Cool/
Dry] or [Heat] on the “Setting” screen.
(4) (5)
–
–
–
18.0°c
10.0°c
18.0°c
30.0°c
30.0°c
30.0°c
–
Enable /Disable [Enable]
Set Temp. Range Setting
Cancel OK
Lower Limit Upper Limit
Auto
Heat
Cool/Dry
[18.0°c – 30.0°c]
[18.0°c – 30.0°c]
[10.0°c – 30.0°c]
Auto
Cool/Dry
Heat
Setting
Back
(6) Each setting screen is dis-
played. Set the temperature
upper limit and lower limit by
touching [ ] or [ ].
Auto
Cancel OK
30.0
Lower Limit Upper Limit
°C
18.0
°C
When the [OK] is touched, the display returns to the
“Setting” screen. If the [Back] on the “Setting” screen is
touched, the display returns to the “Temp. Range Set-
ting” screen.
Note
The settable upper limit value and lower limit value may
be different depending on the indoor unit model and set-
ting at installation.
Apply the setting.
(7) Touch the [OK] on the “Set
Temp. Range Setting” screen.
After the setting change
screen is displayed, the
display returns to the “Special
Setting” screen.
–
–
–
18.0°c
18.0°c
26.0°c
30.0°c
24.0°c
30.0°c
–
Enable /Disable [Enable]
Set Temp. Range Setting
Cancel OK
Lower Limit Upper Limit
Auto
Heat
Cool/Dry
3-5-4 Anti Freeze (for administrator)
(1) Touch the [Anti Freeze] on
the “Special Setting” screen.
When the “Password Verica-
tion” screen is displayed, enter
the password and touch the
[OK].
Back
Special Setting
Set Temp.
Range Setting
Set Temp.
Auto Return
Anti Freeze
Economy
Next
Page
Page 1/ 2
On/Off of the Anti Freeze
(2) “Anti Freeze” screen is dis-
played. Select the [On] or [Off]
on the “Anti Freeze” screen.
Anti Freeze
Cancel OK
On
Off
When the [OK] is touched, data transmission is per-
formed and after the setting change screen is displayed,
the display returns to the “Special Setting” screen.
3-5-5 Human Sensor Setting (for administrator)
(1) Touch the [Human Sensor Setting] on the “Special Set-
ting” screen. When the “Password Verication” screen is
displayed, enter the password and touch the [OK].
(2) “Human Sensor Setting” screen is displayed. Touch the
[Auto Saving] or [Auto Off] on the “Human Sensor Set-
ting” screen.
(1) (2)
Back
Previous
Page
Page 2/ 2
Special Setting
Human Sensor
Setting
Fan Control for
Energy Saving
Auto Saving [Disable]
[Disable]Auto Off
Human Sensor Setting
Back
Each setting screen is displayed.
Setting of the Auto Saving
(3) Touch the [Auto Saving] on the “Human Sensor Setting”
screen. “Auto Saving” screen is displayed. Touch the
[Enable/Disable] on the “Auto Saving” screen.
(4) “Enable/Disable” screen is displayed. Touch the [Enable]
on the “Enable/Disable” screen.
(3) (4)
Auto Saving
Cancel OK
Enable/Disable [Disable]
Absence Detection Time [In 30 min.]
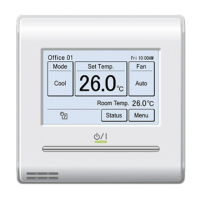
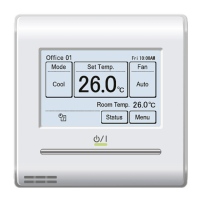
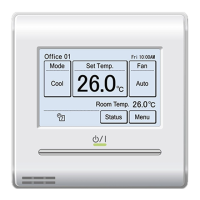
Fri 10:00AM
Enable/Disable
Cancel OK
Enable
Disable
When the [OK] is touched, the display returns to “Auto
Saving” screen.

 Loading...