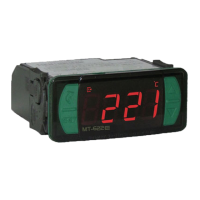
MT-622e
6.3 Basic operations
6.3.1Adjusting the desired temperature (setpoint) and time process
If it is configured not to use formulas (F03= [no,,]):
- Press and hold the / key for two seconds, until the message [Set,]appears;
- Then the message [Sp1,] will appear and it will be possible to adjust the stage 1 setpoint;
- Use the keys > or < to change the value, and press/ to confirm.
It will then be possible to adjust the setpoint of stage 2 [Sp2,] and the process time ([TMR,]).
Note 1: The adjustment of the stage 2 setpoint can only be configured if the unit is set to operate as a
thermostat or steam (F28 = 0 , 1 or 11).
Note 2: When F49=4, it is possible to set a time lapse for each timer, identified by the message [tMR1]
, [tMR2],[tMR3] and [tMR4].
Note 3: If the 2nd stage operating mode is configured with the cyclic timer (F28= 5, 6, 7, 8, or 9), it will be
possible to set the timer values [tOn,] and [tOff].
If it is set to use formulas (F03=[ ):
Each formula can be configured to use different values for the setpoint, hysteresis of stage 1 and the
time of the process. To select the formula:
- Press and hold the/ key for two seconds, until the message [SEt,]and [Sp1,]appears;
- You will then see the currently selected formula.
- Use the > or < keys to select which of the 5 formulas will be used:
[rc1,]- Formula 1;
[rc2,]- Formula 2;
[rc3,]- Formula 3;
[rc4,]- Formula 4;
[rc5,]- Formula 5.
To confirm the selection, press / .
Then setpoint of stage 2[SP2,]can be adjusted, if configured to operate as a thermostat
( F28 = 0 or 1 ).
Note 1: The values of the functions of each formula are configured in the parameter menu.
Note 2: The formulas are linked only to the first timer. In case of F49=4, only the value of
[tMR2],[tMR3] and [tMR4]can be configured manually.
yes,]
6.3.2 Process Timer
The process timer is a time counter. It is manually started after the end of the programmed time displays
the message [End,] on the controller’s display, if F49=0. If F49=1, 2, 3 or 4, the controller will be
operating 4 timers, each operated by a digital input. Thus, the message displayed at the end of the time
count for each timer will be [End1], [End2],[End3] and [End4].
Through function F48, the instrument can be configured to sound an alarm at the end of processing
time.
Please note that when the process time ends, this does not affect the output of the thermostats (unless
F54 is different from [no,,]).
6.3.3 Function block
The use of the function block brings greater security to the operation of the device. When active, the
setpoint and other parameters are visible to the user, but also protected against undue changes
(F51=2), or you can block the control function changes and leave the adjustment of the setpoint,
process times, and cyclic timer times enabled (F51=1). Using the key ; (quick touch), access the
function[LOC,]in the quick access menu, confirm by pressing/(quick touch), then the
message[no,,],will be displayed. After that hold down the key> for the time configured for the
function lock (F52), until [LOC,]. is displayed. Upon releasing the key, the message [On,,], will be
displayed indicating that the block function has been activated.
To unlock, turn the controller off and then turn it on again with the key > held down. Hold down the key
until[LOC,]is displayed. Keep the key held down for ten seconds and the message[OFF,]will be
shown on the display indicating the deactivation of the block function once the key is released.
6.3.4 Control Functions Shutdown
With the shutdown of the control functions the controller will operate only as a temperature indicator and
output relay stays off.
The way to operate the control functions shutdown depends on the parameter setting “[,F53]-
Control functions shutdown”:
[,,,0]Does not allow the shutdown of the control functions.
[,,,1]Allows to turn on and off the control functions only if the functions are unlocked.
[,,,2]Allows to turn on and off the control functions even when the functions are locked. With key
;(quick touch), select [Ctrl], then press /(quick touch) to confirm.
6.3.5 Changing display during process
With the process timer is in progress, press the/key (short press) to switch the information on the
screen between temperature and remaining time of each process.
[Temp]- Temperature
[Tmr1]- Remaining time of process 1
[Tmr2]- Remaining time of process 2
[Tmr3]- Remaining time of process 3
[Tmr4]- Remaining time of process 4
Note: In operating modes 1 and 4 of the F49, you can also observe the remaining time of process
through the push buttons.
6.3.6 Registers of minimum and maximum temperature
6.3.7 Steam Activation
If the operation mode of the 2nd stage is configured as steam (F28=11) and the key<is held down for 1
second, the controller will show the message [vap,]and the OUT2 output will be activated, remaining
so for the time configured in F55 or until the temperature reaches the minimum activation value.
The minimum temperature for the steam activation is configured in [Sp2,](see item 6.3.1). If this
temperature is not reached or the time between steam activations configured in F56 has not elapsed,
the message [nVAP]will be displayed during the attempt to activate the steam.
Pressing key < or also through the quick access menu (see chapter 6), the message [rEg,] will
appear, followed by the minimum and maximum recorded temperatures.
To turn the current minimum and maximum values off, press key ;(short press), until the message
[CrEg] is displayed. Press key /to confirm.
6.3.8 Unit Selection (ºC / ºF)
To determine the unit in which the instrument will operate, enter function “[,F01]” with access code
[,231] press key /now the user can select the unit by pressing keys <> where the messages
[,=C,]or[,=F,]will alternate. Press key /to confirm the desired unit. Then, the indication that
corresponds to the unit {or} will come on.
Every time the unit is changed, the parameters must be reconfigured, since they are assumed
the"standard" values.
6.5 Parameter table
CELSIUS
FAHRENHEIT
Min
Max
Standard
Unit
-
-40
no
0
0
0
0
0
1
1
1
1
1
1
-
40
yes
600
600
600
600
600
40
40
40
40
40
999
-
-
-
°C
°C
°C
°C
°C
°C
°C
°C
°C
°C
sec./min.
-
0
no
20
20
20
20
20
2
2
2
2
2
5
DescriptionFun
[,F01]
[,F02]
[,F03]
[,F04]
[,F05]
[,F06]
[,F07]
[,F08]
[,F09]
[,F10]
[,F11]
[,F12]
[,F13]
[,F14]
Access Code (123)
Indicator Offset (offset)
Using formulas in the 1st stage
Operation Setpoint of the 1st stage (rc1)
Operation Setpoint of the 1st stage (rc2)
Operation Setpoint of the 1st stage (rc3)
Operation Setpoint of the 1st stage(rc4)
Operation Setpoint of the 1st stage (rc5)
Differential control of the 1st stage (rc1) (*)
Differential control of the 1st stage (rc2)
Differential control of the 1st stage (rc3)
Differential control of the 1st stage (rc4)
Differential control of the 1st stage (rc5)
Process time (rc1)
Min
Max
Standard
Unit
-
-72
no
32
32
32
32
32
1
1
1
1
1
1
-
72
yes
1112
1112
1112
1112
1112
72
72
72
72
72
999
-
-
-
°F
°F
°F
°F
°F
°F
°F
°F
°F
°F
sec./min.
-
0
no
68
68
68
68
68
3
3
3
3
3
5
Process time (rc2)
Process time (rc3)
Process time
Process time
(rc4)
(rc5)
Operational Mode of the 1st stage
Minimum setpoint allowed to the end user (1st stage)
Maximum setpoint allowed to the end user (1st stage)
Minimum delay to re-connect the output of the 1st stage
Temperature to terminate preheating
Time base used to preheat
Time that preheating is connected
Time that preheating is disconnected
1
1
1
1
0
0
0
0
1
0
1
1
999
999
999
999
2
600
600
999
600
3
999
999
5
5
5
5
1
0
600
0
60
0
1
1
sec./min.
sec./min.
sec./min.
sec./min.
-
°C
°C
sec.
°C
-
sec./min.
sec./min.
1
1
1
1
0
32
32
0
33
0
1
1
999
999
999
999
2
1112
1112
999
1112
3
999
999
5
5
5
5
1
32
1112
0
140
0
1
1
sec./min.
sec./min.
sec./min.
sec./min.
-
°F
°F
sec.
°F
-
sec./min.
sec./min.
[,F15]
[,F16]
[,F17]
[,F18]
[,F19]
[,F20]
[,F21]
[,F22]
[,F23]
[,F24]
[,F25]
[,F26]
6.4 Advanced operations
To exit the menu and return to normal operation (temperature indication)
press and hold/until[----].
6.4.1 Changing the parameters of the controller
Access function [,F01]by pressing keys <and>simultaneously or through the quick access
menu. After that, [,F01]will appear, then, press the/ key (short press). Use keys <or>to enter
with access code [,123]and, when ready, press /. Use keys <or> to access the desired
function.
After selecting the function, press the key/ (short press), to visualize the set value for that function.
Use keys <or> to change the value, and when ready, press / pto memorize the set value and
return to the functions menu.
OBS: If the lock function is active, by pressing the<or>to change the value of the function, the
controller will displays the message [LOC,] and will not allow to set the of parameter.
 Loading...