10
Cleaning the Dust Cup
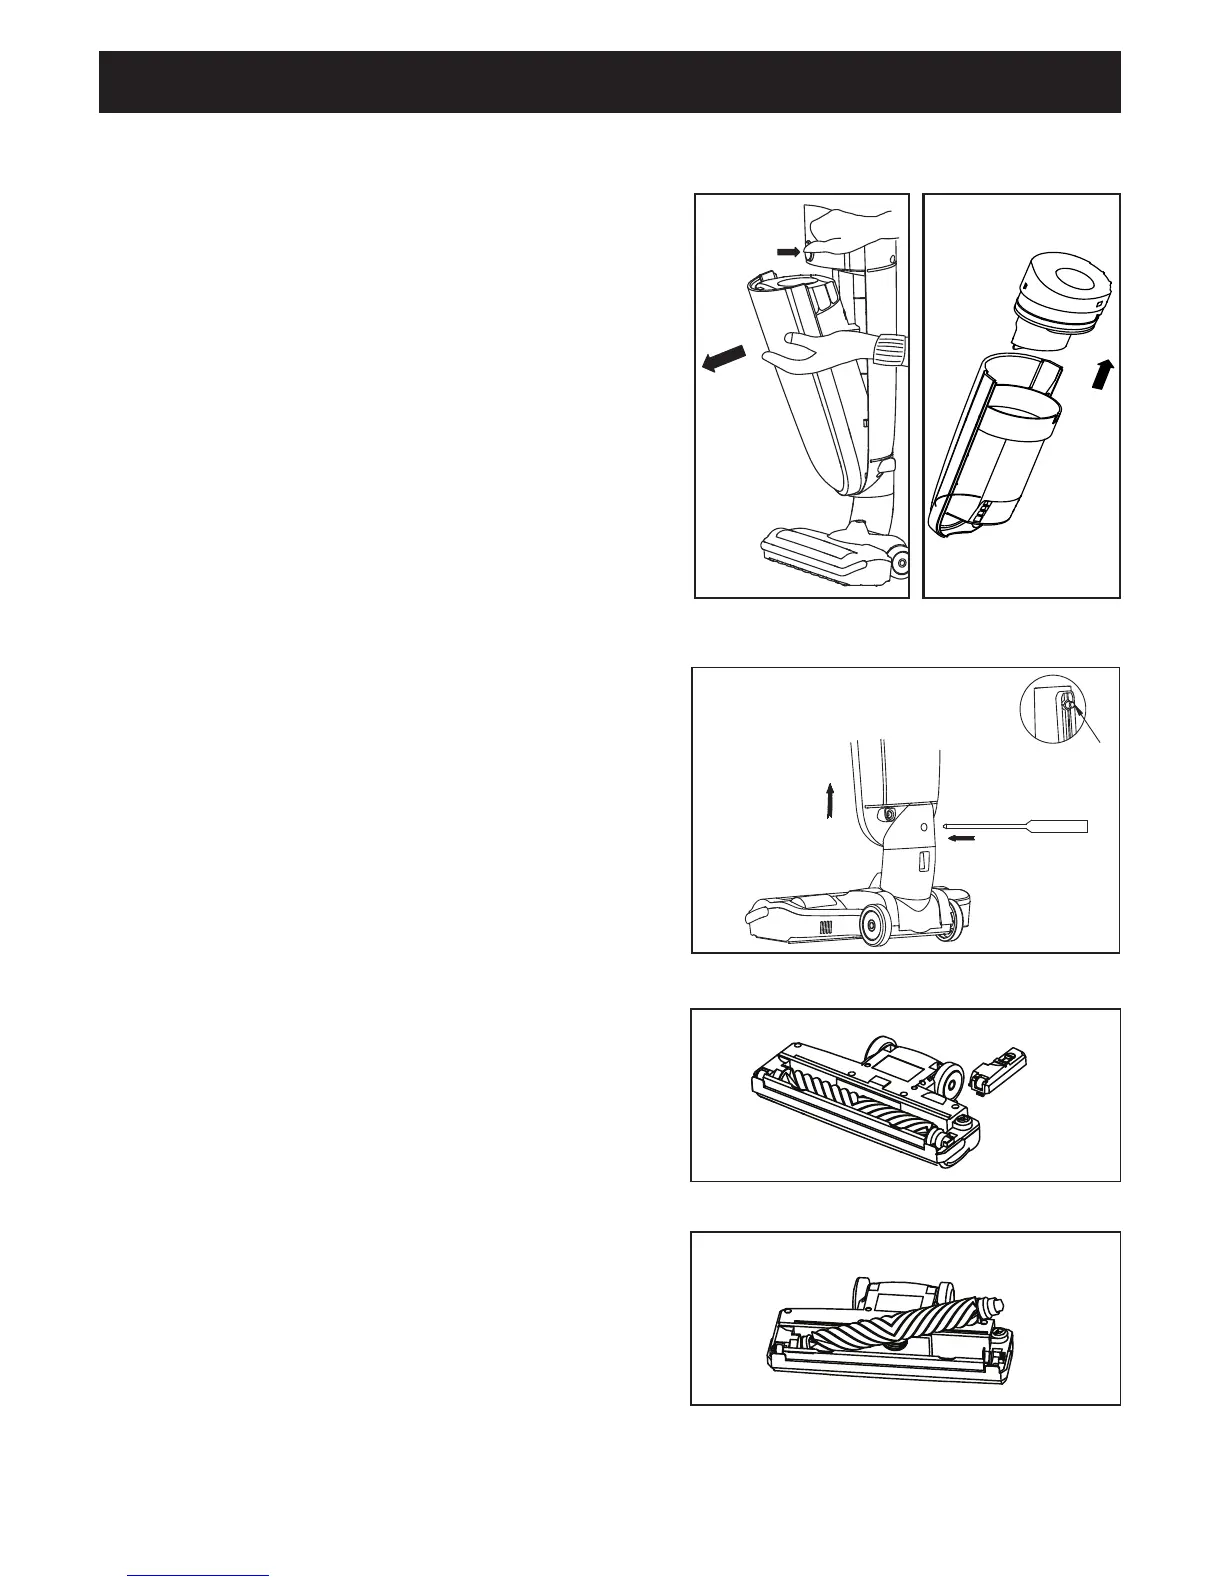
• Remove the dust cup from the vacuum by
pressing the dust cup release button on top
of the dust cup (Fig. 1).
• Remove the filter assembly by pulling it up
and out of the dust cup (Fig. 2).
• Rinse the dust cup in warm water. Allow it
to dry thoroughly before reattaching it to the
vacuum.
• Replace the filter assembly and turn it to the
“Lock” position.
• Replace the dust cup onto the vacuum body
and resume vacuuming.
Removing the Brushroll
• Remove the floor nozzle by pressing the
metal button at the base of the vacuum
(Fig. 3).
• Turn the floor nozzle over. Use a screwdriver
or a coin to turn the screw once to the left.
Then lift off the brushroll cover (Fig. 4).
• Remove the brushroll from the floor nozzle to
clean or replace (Fig. 5).
• Replace the brushroll, then replace the
brushroll cover. Tighten the screw by turning
once to the right.
• Reattach the floor nozzle (page 6).
Fig. 3
Fig. 2Fig. 1
Installation and removal of dust cup component
When dust cup is installed, please firstly check whether internal parts
of dust cup component are installed completely or not. Missed
installation should be avoided. Please firstly align to clamp at the
bottom of dust cup during installation. After the bottom of dust cup is
correctly aligned, dust cup component can be directly pulled into main
body, and reliable assembly can be ensured after locking sound is
heard.
If dust cup is should be removed, dust cup release button should be
pressed, and t
he dust cup should be removed according to direction in
the drawing.


 To Next Page