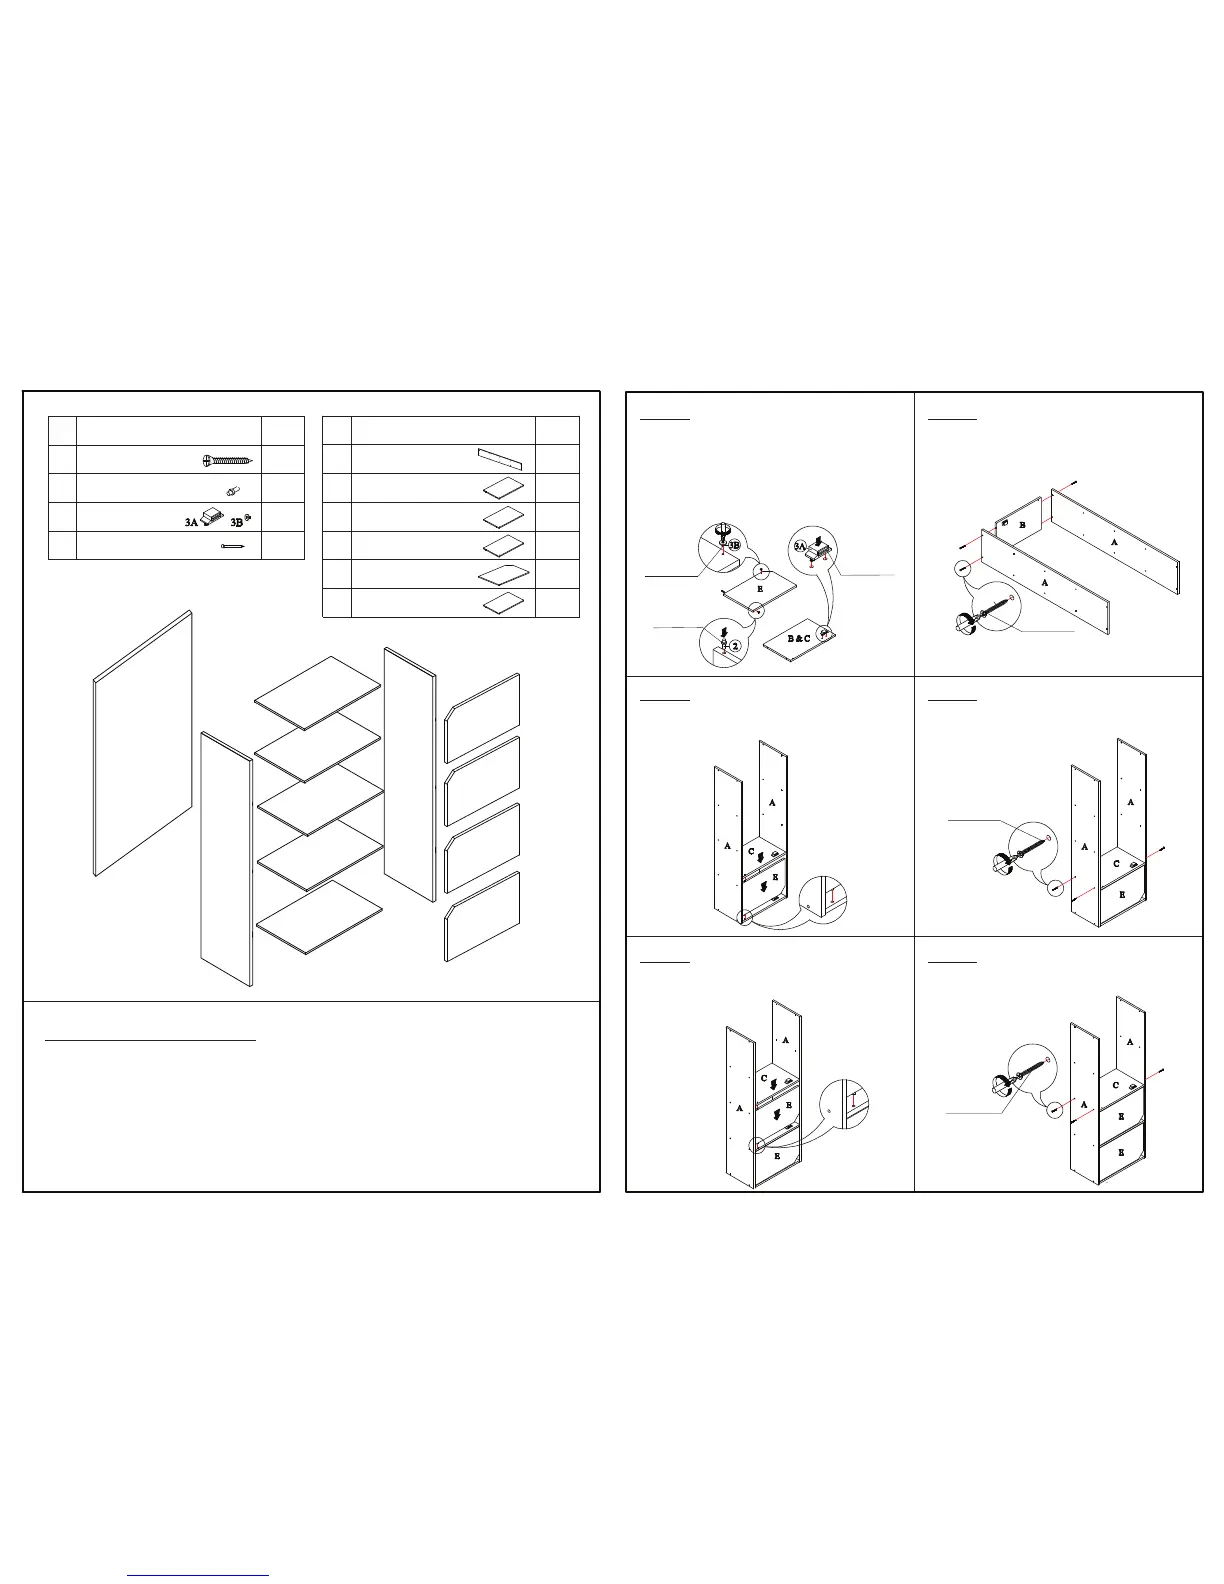
STEP 5
Attach Door Panel(E)and Shelf Panel(C)to
completed unit in Step 4,as shown.
Attach Shelf Panel(C)to L/R Side Panel(A)
using Chipboard Screw(1).
STEP 6
STEP 3
Attach Door Panel(E)and Shelf Panel(C)to
completed unit in Step 2,as shown.
Attach Shelf Panel(C)to L/R Side Panel(A)
using Chipboard Screw(1).
STEP 4
STEP 1
Attach Top Panel(B)to L/R Side Panel(A)
using Chipboard Screw(1).
STEP 2
USEFUL HINTS BEFORE YOU START:
1. Read each step carefully before starting.
2. It is important that each step is performed in correct order to avoid difficulties.
3. Identify, sort and count the parts before assembly.
4. Assemble your furniture on packaging cardboard to prevent scratch or damage.
5. Clean the product with mild cleanser using soft damped cloth. Do not use harsh or abrasive cleanser.
6. Using uncompatible hardware might cause damage to product.
1
2
3
20pcs
8pcs
4pcs
A 2pcs
L/R Side Panel
Magnet/Screw
No Hardware List Qty No QtyParts List
Chipboard Screw
Door Support
4 22pcs
Power Pin
B
C
1pcs
3pcs
Shelf Panel
Top Panel
D
E
F
1pcs
4pcs
1pcs
Back Panel
Bottom Panel
Door Panel
F
E
E
E
E
B
C
C
C
A
A
B
(1)x 4pcs
(3A)x4pcs
(2)x8pcs
(3B)x4pcs
(1)x 4pcs
(1)x 4pcs
1.1 Insert Screw(3B)and Door Support(2)
into Door Panel(E).
1.2 Insert Magnet(3A)into Top Panel(B)
and Shelf Panel(C).
Note: Metal Plate on Magnet(3A)should be
pointing outward.