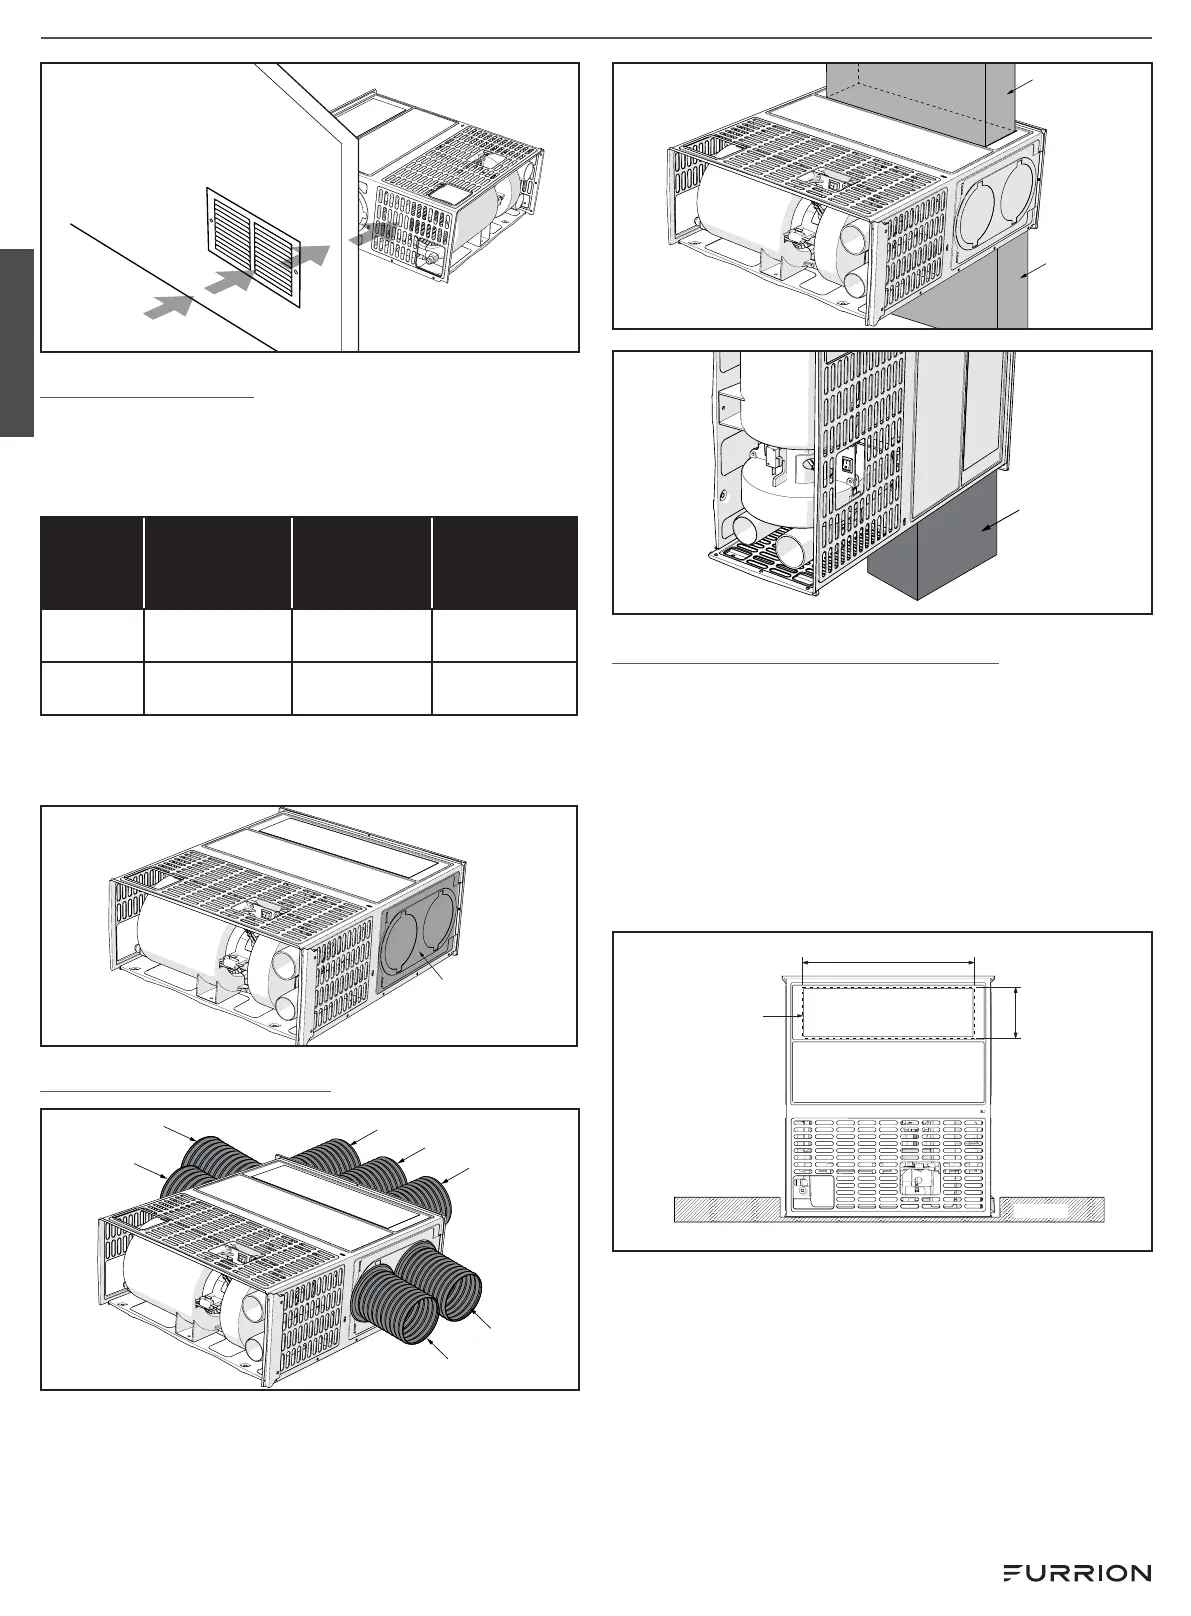
To ensure the proper operation of the furnace, the duct
requirements listed below must be followed completely,
and the minimum open duct areas must be maintained
throughout the entire duct system, including the registers.
Model
4” Round Ducts
(ducts 1 - 7)
Rectangular
Duct - 14” x 4”
(Top & Bottom -
ducts 8 - 9)
Rectangular
(duct 10)
FFG30AF
FFG30AR
36 in
(3 ducts min.)
56 in 52 in
FFG35AF
FFG35AR
48 in
(4 ducts min.)
56 in 52 in
NOTE: Remove the duct adapter plate before using the 9”
with the 2 round duct knockouts left closed when not used.
Duct adapter plate
Duct 1
Duct 2
Duct 3
Duct 4
Duct 5
Duct 7
Duct 6
Duct 8
Duct 9
Duct 10
Your furnace can be installed as a bottom-discharge system
in either a horizontal or a vertical position as appropriate.
1. Cut an opening for the floor discharge system through
the RV floor.
2. Remove the bottom side discharge plate.
3. Seal the furnace to a hard ducting system using a UL-
approved foil tape, or choose a gasket (not provided) that
is rated for 300°F temperature minimum.
4. Position the furnace into the floor opening and seal
around for airtight.
RV Wall
Horizontal Floor Ducting - Top View
Floor Ducting Area
14"
(356 mm)
4"
(102 mm)
English