EasyManua.ls Logo

Furuno TZT16F User Manual

Furuno TZT16F
16 pages
To Next Page IconTo Next Page
Page #1 background imageLoading...
Page #1 background image
Icon (home/displays), power switch operations
Operational Overview
How to select a display
MULTI FUNCTION DISPLAY
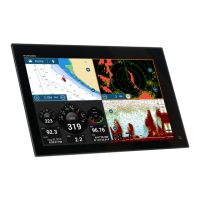
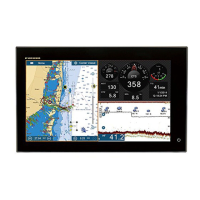
TZT12F/TZT16F/TZT19F
Operators Guide
Model
This guide provides the basic operating procedures for this equipment. For detailed information, see the Operator’s
Manual on the WEB site. You can get the latest version of the manual by accessing the quick response code at the
back of this guide. Connection of sensors required.
iPhone, iPod and iPad are trademarks of Apple Inc. Android is a trademark of Google Inc. All brand and product
names are trademarks, registered trademarks or service marks of their respctive holders.
The screenshots used in this guide were mainly taken from the TZT19F.
Power switch
Power switch
- Turns on power
- Shows [Quick Access] window.
Power offPower offPower off
Power offPower off
Device: Powers off
this unit.
Network: Powers off
all NavNet TZtouch3
units in network.
Day
Swipe downward from top of display
Quick pageQuick pageQuick page
Quick pageQuick page
Home screenHome screenHome screen
Home screenHome screen
Displays the
home screen.
Home icon
Home icon
Display icons
(max. 16 on home screen)
Home screenHome screenHome screen
Home screenHome screen
Long tap a display icon to edit, delete, resize, or
change its location.
Display icon long tapped
Edit
Delete
Size
(large or
small)
Tap
“eGuide” provides
an abbreviated
operator’s guide.
How to edit a display icon
Tap a display icon on the home screen
OR
OR
Tap a display icon on the quick page
www.furuno.com
Tap
Brilliance, Hue
Brilliance, HueBrilliance, Hue
Hue:
Brilliance:
Tap
TZT12F
Right side of the Panel
TZT12F
Right side of the Panel
Tap
TZT16F/TZT19FTZT16F/TZT19F

Other manuals for Furuno TZT16F

Question and Answer IconNeed help?

Do you have a question about the Furuno TZT16F and is the answer not in the manual?

Furuno TZT16F Specifications

General IconGeneral
BrandFuruno
ModelTZT16F
CategoryMonitor
LanguageEnglish

Summary

Operational Overview

Icon and Power Switch Operations

Explains how to use icons, displays, and power switch operations.

Editing Display Icons

Details on editing, deleting, resizing, and relocating display icons.

Selecting Displays

Instructions on selecting displays from the home screen or quick page.

Touchscreen and Menu Operations

Basic Touchscreen Gestures

Covers tap, drag, swipe, pinch, and two-finger gestures for interaction.

Menu Navigation

Guides on using pop-up, layer, slide-out, and settings menus.

Plotter Display

Data Area Overview

Components of the plotter's data area, like heading line and alarm.

Switching 2D and 3D Views

Changing between 2D and 3D visualization modes on the plotter.

Orientation Modes

Switching between North Up (NU) and Heading Up (HU) orientation.

Centering Own Ship Position

Recentering the vessel's position on the plotter screen.

Data Area (Data Box) Management

Data Box Settings

How to add, delete, or change displayed data in data boxes.

Points and Boundaries

Entering and Setting Points

Steps for entering points and setting them as destinations.

Managing Points List

Accessing and managing the list of saved points.

Setting Boundaries

Instructions for setting boundaries like area or line.

Route Navigation

Creating New Routes

Step-by-step guide to creating a new route with waypoints.

Following Routes

Instructions on how to navigate a route on the plotter display.

Managing Routes List

Accessing and managing the list of saved routes.

Radar Operations

Radar Standby and TX Modes

Changing the radar mode between standby and transmit (TX).

Adjusting Radar Controls

Adjusting radar gain, sea clutter, and rain clutter settings.

Radar Measurements and Guard Zones

Measure Range and Bearing to Target

Measuring distance and direction to radar targets from own ship.

Setting Radar Guard Zones

Setting up radar guard zones for target alerts.

ARPA Target Tracking

Managing ARPA Symbols

Managing the visibility of ARPA target symbols on the display.

Acquiring ARPA Targets

Manually and automatically acquiring radar targets for ARPA tracking.

Displaying ARPA Target Data

Viewing detailed data for acquired ARPA targets.

Collision Avoidance Features

CPA/TCPA Alarm Setup

Configuring CPA/TCPA alarm settings for collision alerts.

CPA Line Display

Enabling and showing the CPA Line for visual closest point of approach indication.

AIS Target Information

Managing AIS Symbols

Managing the display of AIS target symbols.

AIS Target Symbols Explained

Understanding different AIS target symbol types and colors.

Proximity AIS Alarm

Setting up proximity alarms for nearby AIS targets.

Showing AIS Target Data

Displaying detailed information for AIS targets.

Fish Finder Display

Selecting Fish Finder Frequencies

Choosing between low, high, and dual frequencies for fish finding.

Viewing Past Echoes (History)

Viewing historical echo data on the fish finder display.

Fish Finder Operation Modes

Automatic vs. Manual Operation

Overview of automatic and manual modes for gain, clutter, and TVG.

Manual Mode Adjustments

Changing the Range

Adjusting the range on the fish finder display.

Adjusting the Gain

Optimizing fish finder performance by adjusting gain.

Reducing Clutter

Minimizing unwanted noise or interference on the fish finder.

Fish Finder Zoom and Advanced Features

Bottom Lock and Zoom

Using Bottom Lock and Bottom Zoom for seabed analysis.

Bottom Discrimination, RezBoost™, ACCU-FISH™

Utilizing Bottom Discrimination, RezBoost™, and ACCU-FISH™ for detailed analysis.

Instrument Display Customization

Enabling and Switching Displays

Adding and switching between different instrument display configurations.

Editing Display Indications

Modifying, removing, or adding data indications on the instrument display.

Wireless LAN Connectivity

Connecting to an Existing LAN

Steps to connect to an existing wireless LAN network for internet access.

Creating a Local Wireless Network

Local Network Setup

Steps to create a local wireless network for device connectivity.

Related product manuals