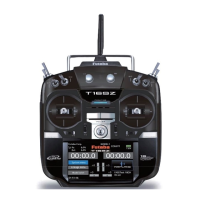
59
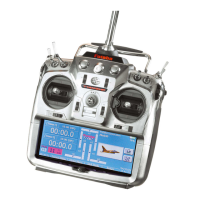
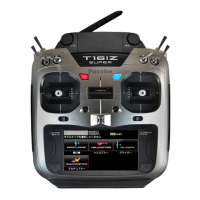
<Functions of Linkage Menu>
PUSH
[Cursor Lever]
Ɣ0RYHPHQWRQWKH
VFUHHQGLUHFWLRQV
Ɣ3XVKWKHOHYHUWRFDOO
QH[WSDJH
[Data Input Dial]
[Enter Button]
[Return Key]
Ɣ7RKRPH
VFUHHQ
Ɣ7RSUHFHGLQJ
VFUHHQ
FAIL SAFE
6HWVWKHVHUYRVRSHUDWLQJSRVLWLRQZKHQWUDQVPLWWHUVLJQDOVFDQQR
ORQJHUEHUHFHLYHGRUZKHQWKHUHFHLYHUEDWWHU\YROWDJHGURSV
(The display screen is an example. The screen
depends on the model type.)
The Failsafe function may be used to set up positions
that the servos move to in the case of radio interference.
This function only works with G3 or PCM receivers
(FM receivers do not have failsafe capability).
When the receiver battery voltage drops, the servo
can be moved to a preset position. (Battery fail safe
function) A battery fail safe function reset switch can be
set. (Initial setting: Throttle stick maximum slow side)
You may set either of two positions for each
channel: Hold, where the servo maintains its last
commanded position, or Failsafe, where each servo
moves to a predetermined position. You may choose
either mode for each channel.
The T12Z system also provides you with an
advanced battery monitoring function that warns
you when the receiver battery has only a little
power remaining. In this case, each servo is
PRYHGWRWKHGH¿QHGIDLOVDIHSRVLWLRQ7KHEDWWHU\
IDLOVDIHPD\EHUHOHDVHGE\RSHUDWLQJDSUHGH¿QHG
Fail safe setting procedure
8VHWKHFXUVRUOHYHUDQGPRYHWKHFXUVRUWR
WKH)6LWHPRIWKHFKDQQHO\RXZDQWWRVHW
'LVSOD\>)6@E\WXUQLQJWKHGDWDLQSXWGLDOWR
WKHOHIW
*The display blinks.
3XVKWKHHQWHUEXWWRQ2SHUDWHDQRWKHUNH\
WRVWRSVHWWLQJ
*The channel switches to the F/S mode.
0RYHWKHFXUVRUWRWKH)6326LWHPE\
PRYLQJWKHFXUVRUOHYHUWRWKHULJKW
+ROGWKHFRUUHVSRQGLQJVWLFNNQREVOLGHU
HWFLQWKHSRVLWLRQ\RXZDQWWKHVHUYR
WRPRYHWRZKHQWKHIDLOVDIHIXQFWLRQLV
DFWLYDWHGDQGSXVKWKHHQWHUEXWWRQ
*The set position is displayed in percentage.
*When you want to return that channel to the hold mode, use
the cursor lever to move the cursor to the "F/S" item and
display [HOLD] by turning the data input dial to the right
and then change the mode by pushing the enter button.
control on the transmitter (default is throttle),
do not continue to fly, land as soon as possible.
Remember, if the predefined control suddenly
moves to a position you did not command, land at
once and check your receiver battery.
'H¿QHVVHUYRSRVLWLRQZKHQVLJQDOVDUHORVWDQG
when receiver battery voltage becomes low.
WARNING
For safety, always set the fail safe functions.
Ɣ(VSHFLDOO\VHWWKHWKURWWOHFKDQQHOIDLOVDIHIXQFWLRQVRWKDW
the servo moves to the maximum slow side for airplanes and
to the slow side from the hovering position for helicopters.
Crashing of the model at full high when normal radio waves
cannot be received due to interference, etc., is very dangerous.
Ɣ,IIDLOVDIHLVUHVHWE\WKURWWOHVWLFNLWPD\EHPLVWDNHQIRUDQ
engine malfunction and will be reset at throttle slow and the model
ZLOOFRQWLQXHWRÀ\,I\RXKDYHDQ\GRXEWVLPPHGLDWHO\ODQG
Battery fail safe setting procedure
%DWWHU\IDLOVDIHFDQEHVHWIRUHDFKFKDQQHO
E\WKHVDPHPHWKRGDVWKHIDLOVDIHVHWWLQJ
SURFHGXUH6HOHFWDQGVHWWKH%$7)6LWHP
>%)6@%DWWHU\IDLOVDIHIXQFWLRQ21
>2))@%DWWHU\IDLOVDIHIXQFWLRQ2))
Battery fail safe release switch setting
7KLVIXQFWLRQWHPSRUDULO\UHOHDVHVWKHEDWWHU\
IDLOVDIHIXQFWLRQIRUWKHIXVHODJHWRUHFRYHU
DIWHUWKHEDWWHU\IDLOVDIHIXQFWLRQZDV
DFWLYDWHGE\DGURSLQWKHUHFHLYHUEDWWHU\
YROWDJH7KLVVHWWLQJVHOHFWVWKHVZLWFKZKLFK
UHOHDVHVWKHEDWWHU\IDLOVDIHIXQFWLRQ
8VHWKHFXUVRUOHYHUWRPRYHWKHFXUVRUWRWKH
>5(/($6(%$77(5<)6@LWHP
3XVKWKHHQWHUEXWWRQ
*The switch selection screen is called.
*For a detailed description of the switch selection and ON/
OFF direction setting method, see [Switch Setting Method]
at the back of this manual.
ŏ6HOHFW>)$,/6$)(@DWWKHOLQNDJHPHQXDQGFDOOWKH
VHWXSVFUHHQVKRZQEHORZE\SXVKLQJWKHHQWHU
EXWWRQ
ﷂﶼﵺﶮ
ﷄ
ﴶﴸﴸﳜ
ﶪﶸﶬﷂﶶﶸ
D6<L 6HH
D6<L 6HH
ﵼﶮ ﶬﵾﵼﶮﵺﵼﶮﶀﶴﶶﶮ
ﶼﶨﶬﶶﶰ
ﶰﶪﶰ
ﶬﷄﶰﶶﶬﶬﶼ
ﷂﶼﶰﶶﶸ
Hﻜ. PﻞHﻜ.
D6<L 6HH
ﻤV\ﻪ
@b
ﴂﴜﴎﴜﴤﴀﴜ
ﴢﴤﳾﳾﴜﴂﳴ
ﴚﳎﴀ
ﶺﶶﶼ
ﶶﶸﷂﶬ
ﴶﴸﳰﴶﴸﳰﴸﴸ

 Loading...