OTHER 6EXA FUNCTIONS
Trainer switch
To utilize the trainer function, the appropriate trainer cord (available separately) and a second Futaba transmitter (usually provided
by your flight instructor or R/C club) will be required. When two radios are connected with the trainer cord, they are both capable of
operating the model, but its usually best for the instructor to hold the radio that has been setup for the plane to be flown (as it is
already programmed to fly the model). When the instructor holds the trainer switch on his radio, the student will have control. When
the instructor wishes to regain control he simply releases the switch. Then he will have immediate, full control.
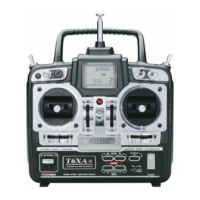
If connecting the 6EXA to another 6EXA with the small, square “micro” trainer jack, use the “Micro to Micro” (MM-TC) trainer
cord (FUTM4415). If connecting the 6EXA to Futaba radios with the larger, round, “DIN” connector, use “Micro to DIN” (MD-TC)
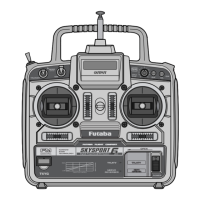
trainer cord (FUTM4420). The T6EXA transmitter may be connected to another T6EXA, or any 4VF, 6VA Skysport, FF6 - 9, or
9Z series transmitter.
To use the trainer cord:
1. It is best for the instructor to use the transmitter that is already set up for the model to be flown.
2. If the student’s radio has PCM/PPM capability, set it to PPM.
3. If the student’s radio has a plug-in RF module, remove the module.
4. Collapse the students antenna and fully extend the instructor s antenna.
5. With the transmitters off, connect the trainer cord to both radios. (On the 6EXA the trainer
jack is in the center of the rear of the case.) Do not force the plug into the transmitter and note
that the plug is “keyed” so it can go in only one way.
6. Turn on the instructors transmitter. DO NOT turn on the student s transmitter it will automatically “power up,” but will
not transmit a signal. Set the servo reversing and trims of the student s radio to match that of the instructors.
7. Turn on the receiver switch in the model. Depress the trainer switch on the instructors radio. Use the student’s radio to
operate the controls (ailerons, elevator, rudder, etc.) and observe how they respond. Make any adjustments necessary to the
student’s transmitter to get the controls to respond correctly.
8. Check to see that the trims are in “sync” by toggling the trainer switch back and forth a few times. The controls on the
model should remain stationary. If the controls do not remain stationary, this indicates that the trim settings on the student’s
radio do not match those on the instructor’s radio. Adjust the student’s trims as necessary.
Note: When the instructor initially depresses the trainer switch on his transmitter, there will be a one-second delay before
the student takes control. In most situations this momentary delay will go unnoticed.
Throttle-cut function
The throttle-cut function is intended to be used for shutting off the engine. The engine can be conveniently shut off by rapidly
pressing, then releasing the trainer/throttle-cut switch twice in succession. The throttle-cut feature prevents inadvertently
shutting off of the engine when lowering the throttle stick all the way (such as when coming in for a landing or taxiing).
Throttle-cut works only when the throttle stick is down. To set up throttle-cut, turn on the transmitter and receiver. Actuate
the throttle-cut function by rapidly depressing, then releasing the switch twice. Observe the momentary position of the
carburetor barrel on the engine. It should be fully closed (thus shutting off the engine). If necessary, use the throttle E.P.A.
(channel 3) to fully close the carburetor barrel when the throttle-cut is activated. Now use the throttle trim to open the
carburetor barrel so the engine will idle at the desired R.P.M. when the throttle stick is all the way down.
Optional Flap control lever (supplied)
When the flaperon mixing function is activated, the optional flap control lever can be used to set maximum flap deflection
by mechanically limiting the dial. This will prevent inadvertently retracting the flaps beyond their full, “up” position. To use the
flap control lever, turn the flap dial until the flaps are retracted (up). Place the flap control lever over the dial so that the arm
is contacting the transmitter case. This will limit rotation of the dial so the flaps cannot go up any farther.
17