233
ڀ ŪŲŃƗƒŃŷŤťůŨŃŲũŃŦŲűŷŨűŷŶ
ŶƈƗƗƌƑƊŃƅƜŃƆƘƕƙƈŃƗƜƓƈ
When the curve type is selected as described above, adjustment items corresponding to the curve type
appear on the screen. Adjust each curve as described below.
1. Tap to the [Offset] setting item.
2. Move the curve in the vertical direction
XVLQJWKHʈʈʈʆʆʆEXWWRQV
,QLWLDOYDOXH
(When the value is tapped, the rate is reset to the initial
value.)
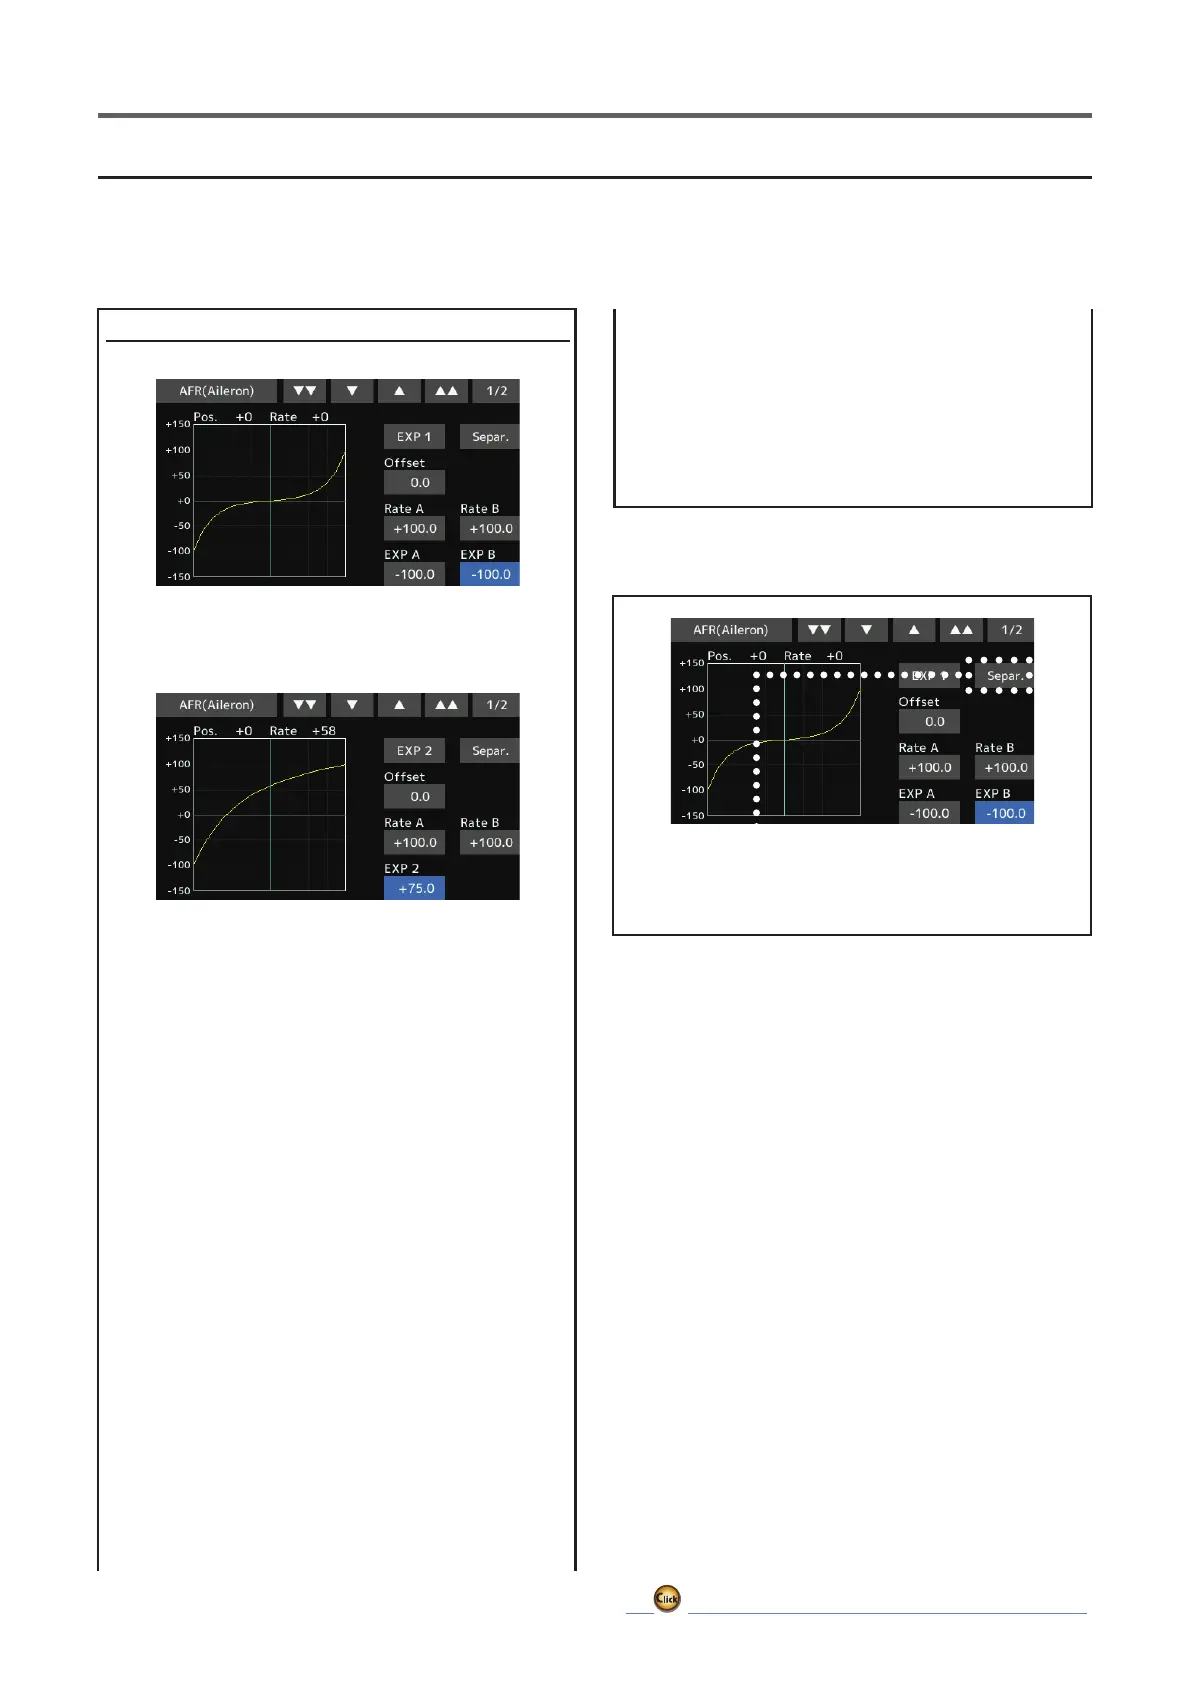
(;3(;3FXUYHDGMXVWPHQW
(EXP1 curve)
Using the EXP1 curve is effective in smoothing
starting of the ailerons, elevator, rudder, etc.
(EXP2 curve)
8VLQJWKH(;3FXUYHLVH൵HFWLYHLQHQJLQHULVH
and other engine control.
The curve left and right rates ([Rate A], [Rate B])
and EXP curve rate ([EXP A], [EXP B]) can be
adjusted individually. ([EXP] for EXP2)
7KHFXUYHFDQDOVREHR൵VHWKRUL]RQWDOO\>2൵VHW@
in the vertical direction.
[Rate setting]
1. Tap to the [Rate A], [Rate B], [EXP A], or
[EXP B] setting item.
6HWWKHUDWHXVLQJWKHʈʈʈʆʆʆ
buttons
,QLWLDOYDOXHUDWH(;3UDWH
,QLWLDOYDOXHGL൵HUVGHSHQGLQJRQIXQFWLRQ
$GMXVWPHQWUDQJHaUDWH
a(;3UDWH
(When the value is tapped, the rate is reset to the initial
value.)
[Offsetting the curve horizontally in the
vertical direction]
*[Separ.] mode: Normal setting
*[Comb.] mode: Creates a left and right
symmetrical curve.
 Loading...